How to Setup Team Channel for Projects
.png)
Contents


Learn how to make a Workspace for your projects using channels in Microsoft Teams. Video tutorial included!
How many routine projects does your team cycle through each year? A few or a few dozen?
Inspired by groups that mainly do project work, this workspace concept leverages Microsoft Team Channels to organize each project into it’s own space for conversations, meetings, task management and more.
Even if you don’t fit that description, you can use and adapt different ideas from this workspace for your own team.
Everything shown below uses out-of-the-box Microsoft 365 tools that are available to users from “Business Basic” through E5.
You can leverage this setup for your existing team, or create a new team that is 100% for projects. It’s up to you.
For sake of simplicity, this workspace does NOT factor for guests users or private channels. Both Private and Shared channels add some complexity to the setup, and should be tested before rolled-out to your team.
The Team and the General Channel
'Part 1: Setting Up the Team and General Channel'. Enable YouTube captions to follow along
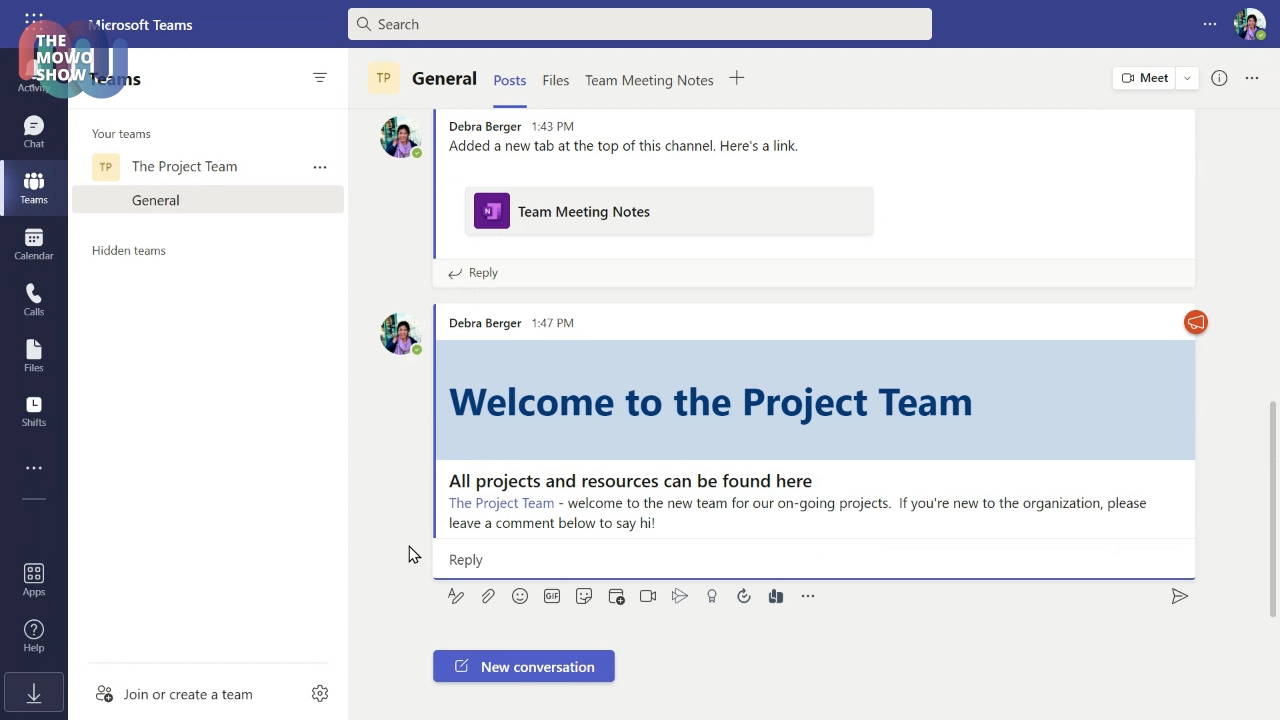
My philosophy with any new team is that the “General” channel needs a purpose, otherwise it may be best to be locked down by the team owner.
If the General channel doesn’t have a clear function, it will become a dumping ground for random stuff.
Publishing news and updates in the general channel (rather than email) allows staff and management to benefit from each others feedback and questions.
Additionally, you can use this to share new information and resources. Any files uploaded to a channel conversation are stored in your Team SharePoint site, and can be accessed from the “Files’ tab.
If your team needs to meet online, then you can setup a recurring teams meeting in the channel. All of the recordings will be saved directly to your Team SharePoint site, so you can access them from the Files tab.
Note that channel meeting are saved in the channel as a conversation thread, so it can only be accessed by Team members.
Next, let’s look at the actual project channel setup.
Setting Up Project Channels
Finally, the meat of this article.
As mentioned at the start, this workspace assumes you are using “Standard” team channels that can be accessed by all members of your team.
You’re welcome to use Private Channels or Shared Channels (which are not yet generally available as of writing this article) for your own team, but do your homework first.
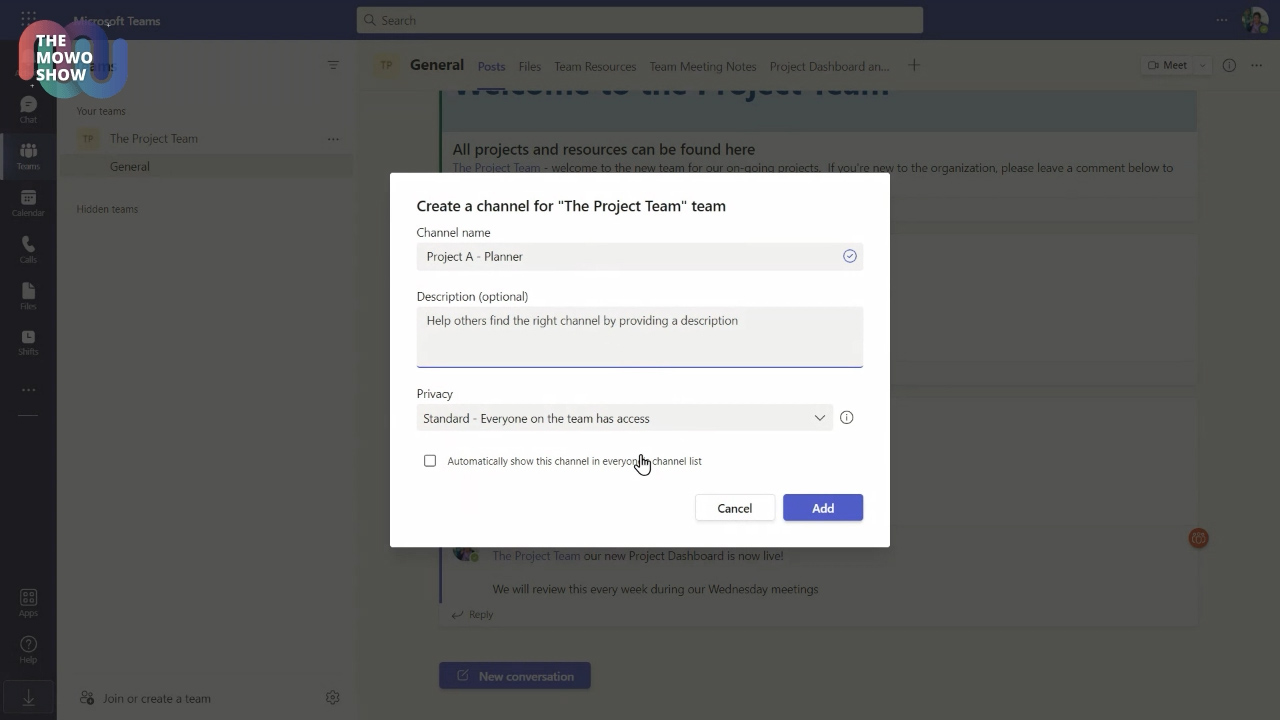
In this workspace setup, I recommend using any (or all) of these tools within your channel:
- Announcements, updates and meetings for the project team
- All project-specific files; documents, resources, etc.
- A OneNote notebook section for meeting notes (and whatever else you want)
- A Project Tracker using either (A) Microsoft Lists or (B) Microsoft Planner
- A SharePoint Page that contains all key project resources and information
The “Conversations” tab of your channel can be used for all project-specific meetings, questions and general discussions. Generally speaking, use this channel to reduce the load on your email inbox and chat threads.
All project files should uploaded to the Files tab (aka, the channel folder in SharePoint). Keep your file organization system as simple as possible, and remember that everyone in your team has access to these files.
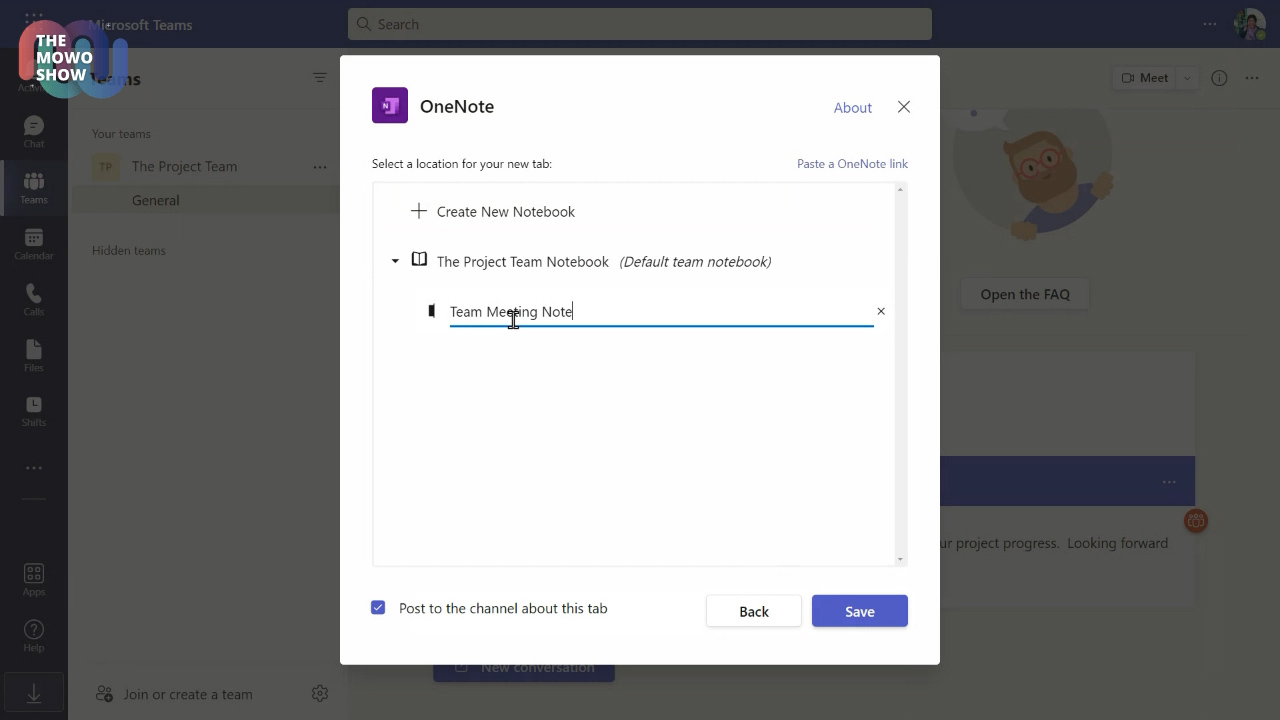
As mentioned earlier, Team channel meetings has it’s benefits, but what about your meeting notes?
My recommendation is to use the OneNote notebook that comes with your SharePoint Team site (and will share the same name as your Team).
You can add this notebook section as a channel tab in Teams so it’s easy to access in the early days of the project.
For each project, create a new section in the notebook to house all of your meeting notes and anything else worth keeping (saved emails, reference materials, etc.).
Now let’s talk about task management for your project.
Sticking with out-of-the-box Microsoft 365 tools, your options are Microsoft Lists or Microsoft Planner.
I cannot tell you which is "better" than the other as that's purely subjective. Plus, you know your workflows better than me.
Instead, consider the “right” tool to the the one that can keep your team on track and several steps ahead of potential pitfalls.
'Part 2: Setup a Project Channel using Microsoft Planner'. Enable YouTube captions to follow along
My (Subjective) List of Pros and Cons for Microsoft Planner:
|
Pros |
Cons |
|---|---|
|
|
Overall, I think Planner is a good choice when:
- Board is mainly needed to track task dates, staff assignments, and high-level progress
- The tasks in each project are established, routine processes. If the board wasn’t there tomorrow, staff would still know what to do.
- There is no requirement for customization or advanced metrics
'Part 3: Setup a Project Channel using Microsoft Lists'. Enable YouTube captions to follow along
My (Subjective) List of Pros and Cons for Microsoft Planner:
|
Pros |
Cons |
|---|---|
|
|
Overall, I find Microsoft Lists to be a good choice when:
- Project tracking requires more configuration options than Planner
- When project task data needs to be secured (limit who can/cannot edit)
- When you need to assign tasks to people outside of your team
- When you have a PowerBI Pro license to create custom dashboards
Either way, I recommend that you do your homework and test these tools with your team before making a decision that you'll be stuck with for months or years.
Lastly, let’s look at how a SharePoint page can be used for organizing your key project resources.
SharePoint Pages for Project Resources
With information and resources in different places, it can be hard to keep track of where to find it all. Especially if you’re brand new to the team.
Using a SharePoint page, you can quickly bring all your key files and resources together and add the page as a Channel tab for easy access.
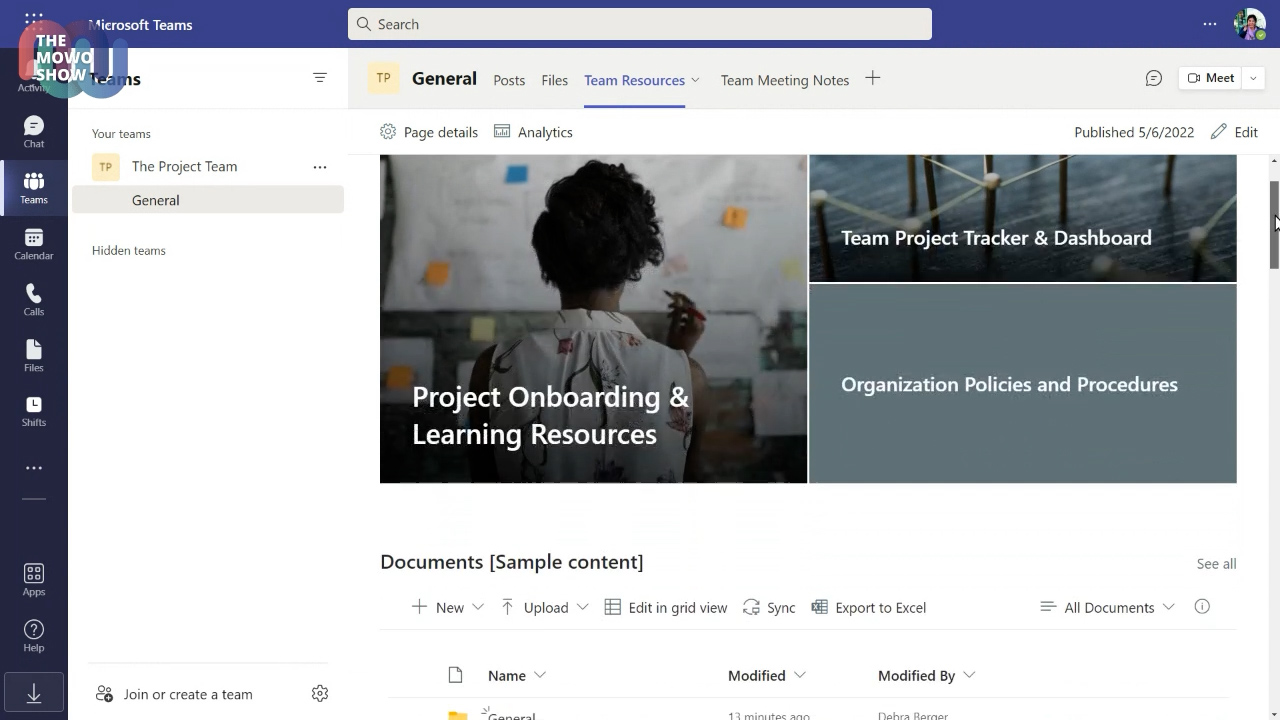
Remember, this doesn’t have to be a complicated setup. The goal is to ensure your team can quickly find the information they need in a pinch.
After the Project
All good things must come to an end. When a project has fully wrapped up, you’ll want to close the channel up.
'Part 4: How to Archive Your Channel and Contents'. Enable YouTube captions to follow along
Your first option is to delete the channel, which will delete all conversations after about 30 days from the date-of-deletion. However, your files, meeting notes, lists, planner boards will continue to live in SharePoint.
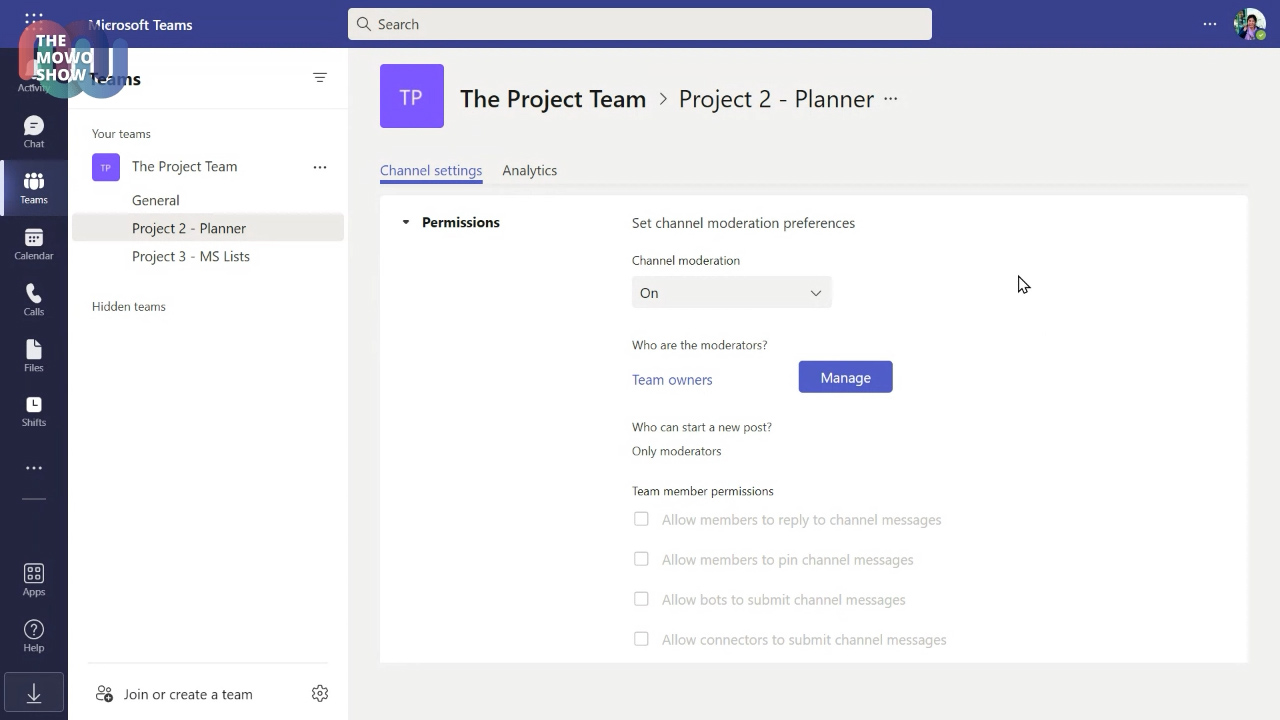
If you don’t want to delete the channel, you can lock it down using channel moderation. This will prevent users from making new posts, and you can go farther by preventing users and/or bots from replying to existing threads.
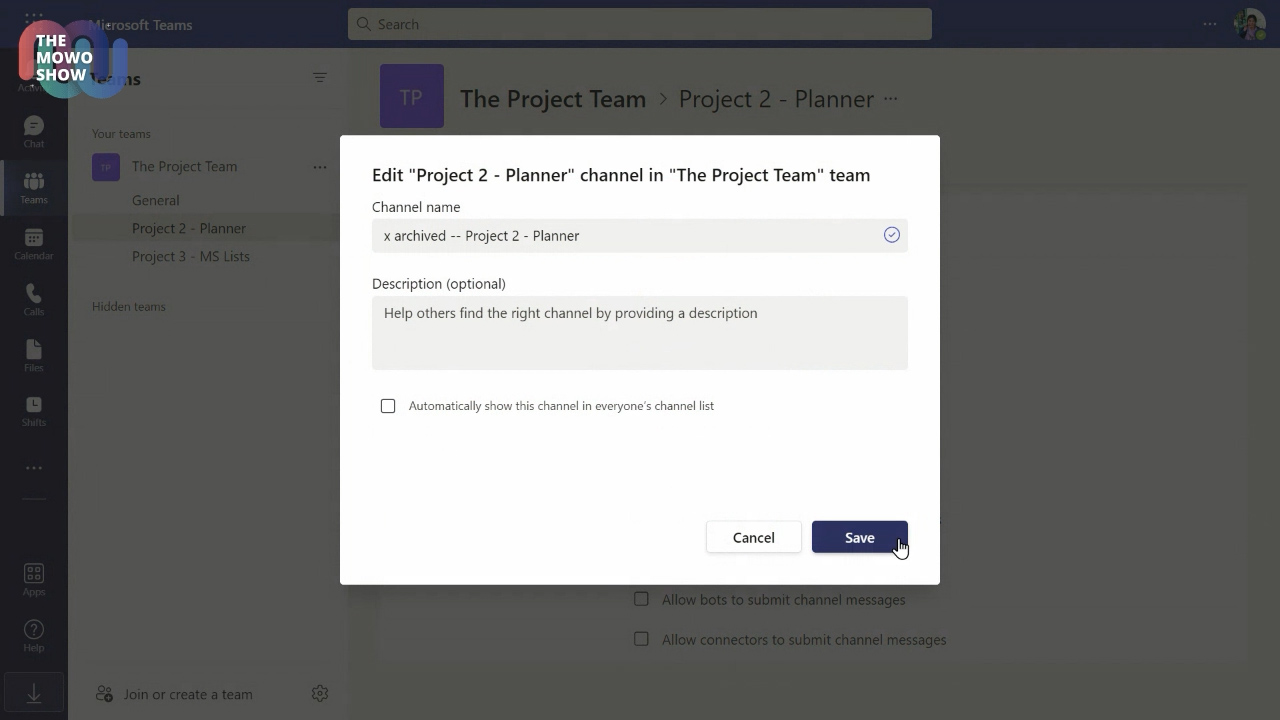
Next, I typically rename the channel by adding the “x archived—” prefix to the front of the name. As channels are sorted alphabetically, this will move the channel name to near bottom of the list.
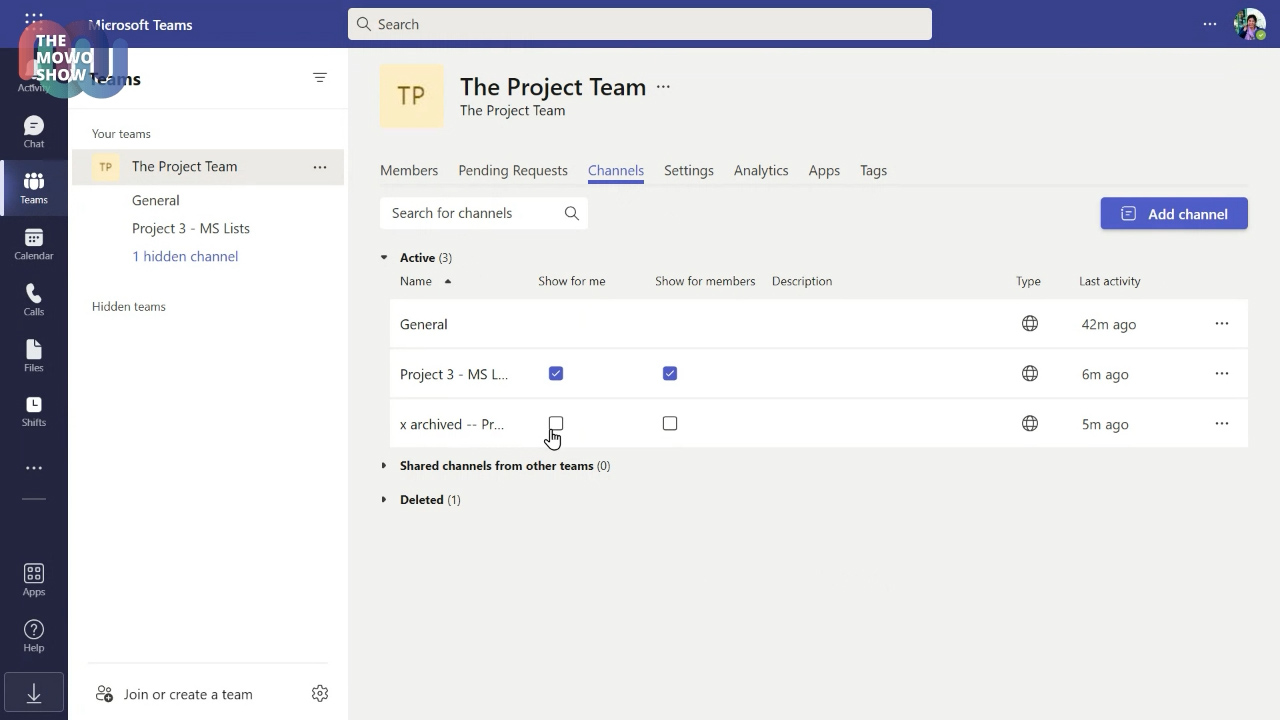
Last, as a Team owner you can hide the channel for all users. Staff can still access the contents if they search for it, but it’ll be out-of-sight and out-of-mind for most people.
Now that your project channel is locked up. What about the rest of the data?
If you want to have a back-up of your tasks, you can export Lists and Boards to an Excel file for future reference.
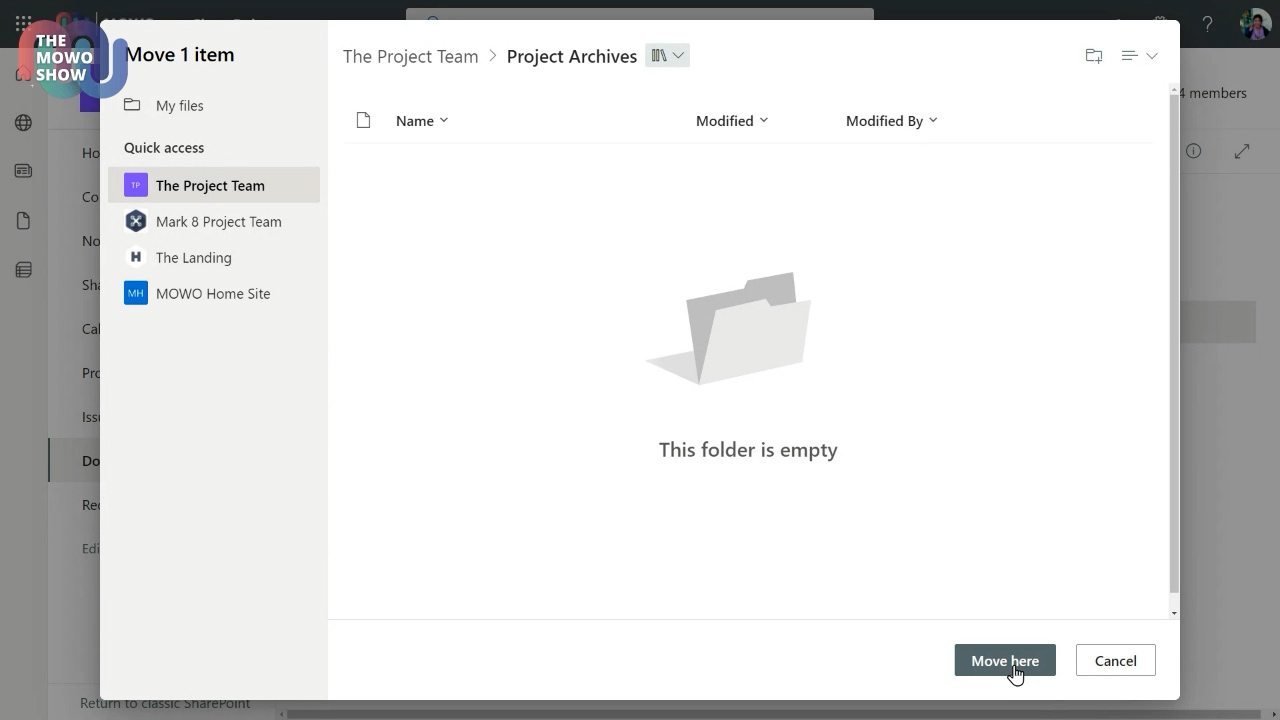
If you want to lock down your project files, you can move them to different document library with stricter permissions. This alternative document library can be on your current Team site or another SharePoint site all together if required.
Remember that there's no silver bullet app that will magically make projects fluid for everyone. There's only the right tool for you and your team.
I hope you found this workspace concept helpful for your own adoption journey into Microsoft 365.
Ready to setup your own Team and SharePoint site? Give us a call. We would love to talk!