

Create a Channel for Projects with Microsoft Lists

Contents


New to Microsoft Teams and need to organize a project? Learn how to setup and assign project tasks using Microsoft Lists, all from a team channel.
Perhaps Excel is no longer cutting it for managing your projects and assignments. Learn how to setup a Team channel with Microsoft Lists using the following visual aids or our guided YouTube video. Enjoy!
Visual Aids and Step by Step Process:
Step One: Create and Setup a New Channel
To get started, add a new “standard” channel to your existing Team.
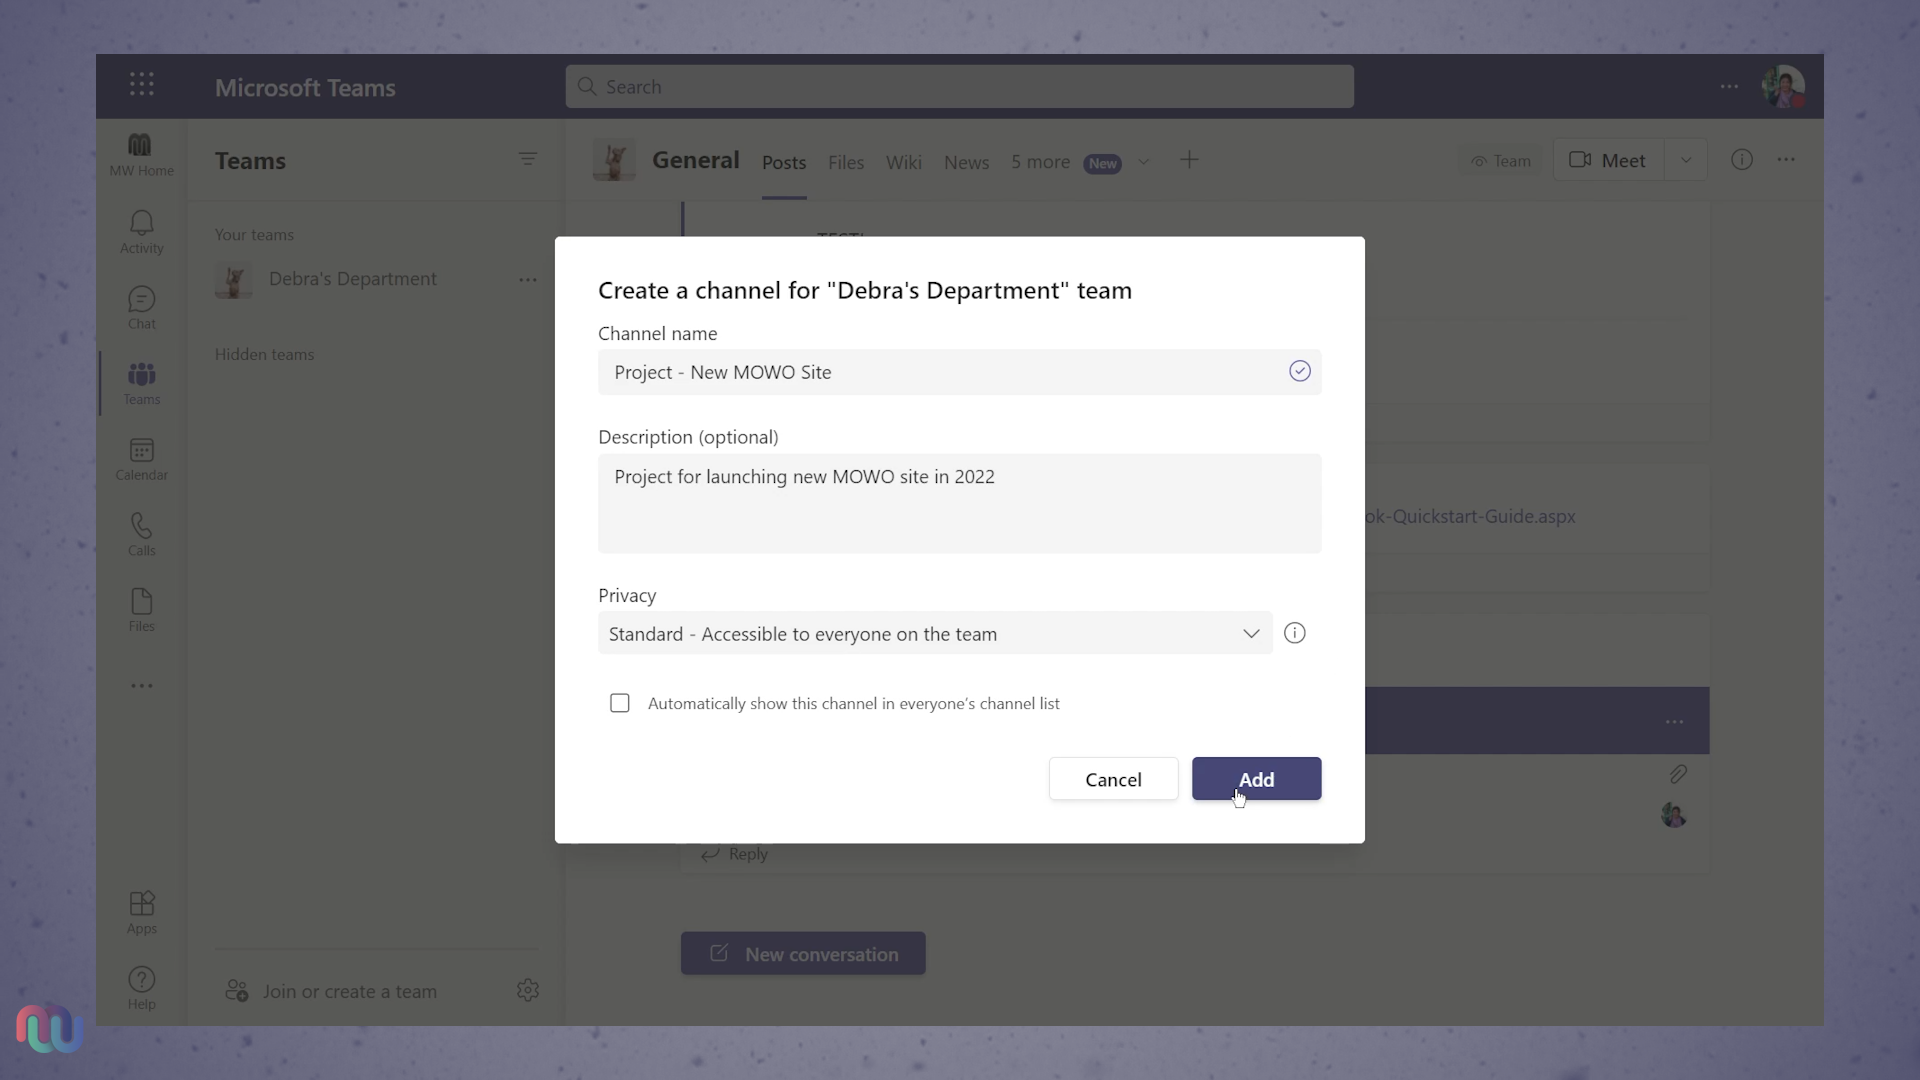
Private channels will work here too if you need to keep this project confidential from some of your team members. If you’ve never used a private channel before, click here to learn more.
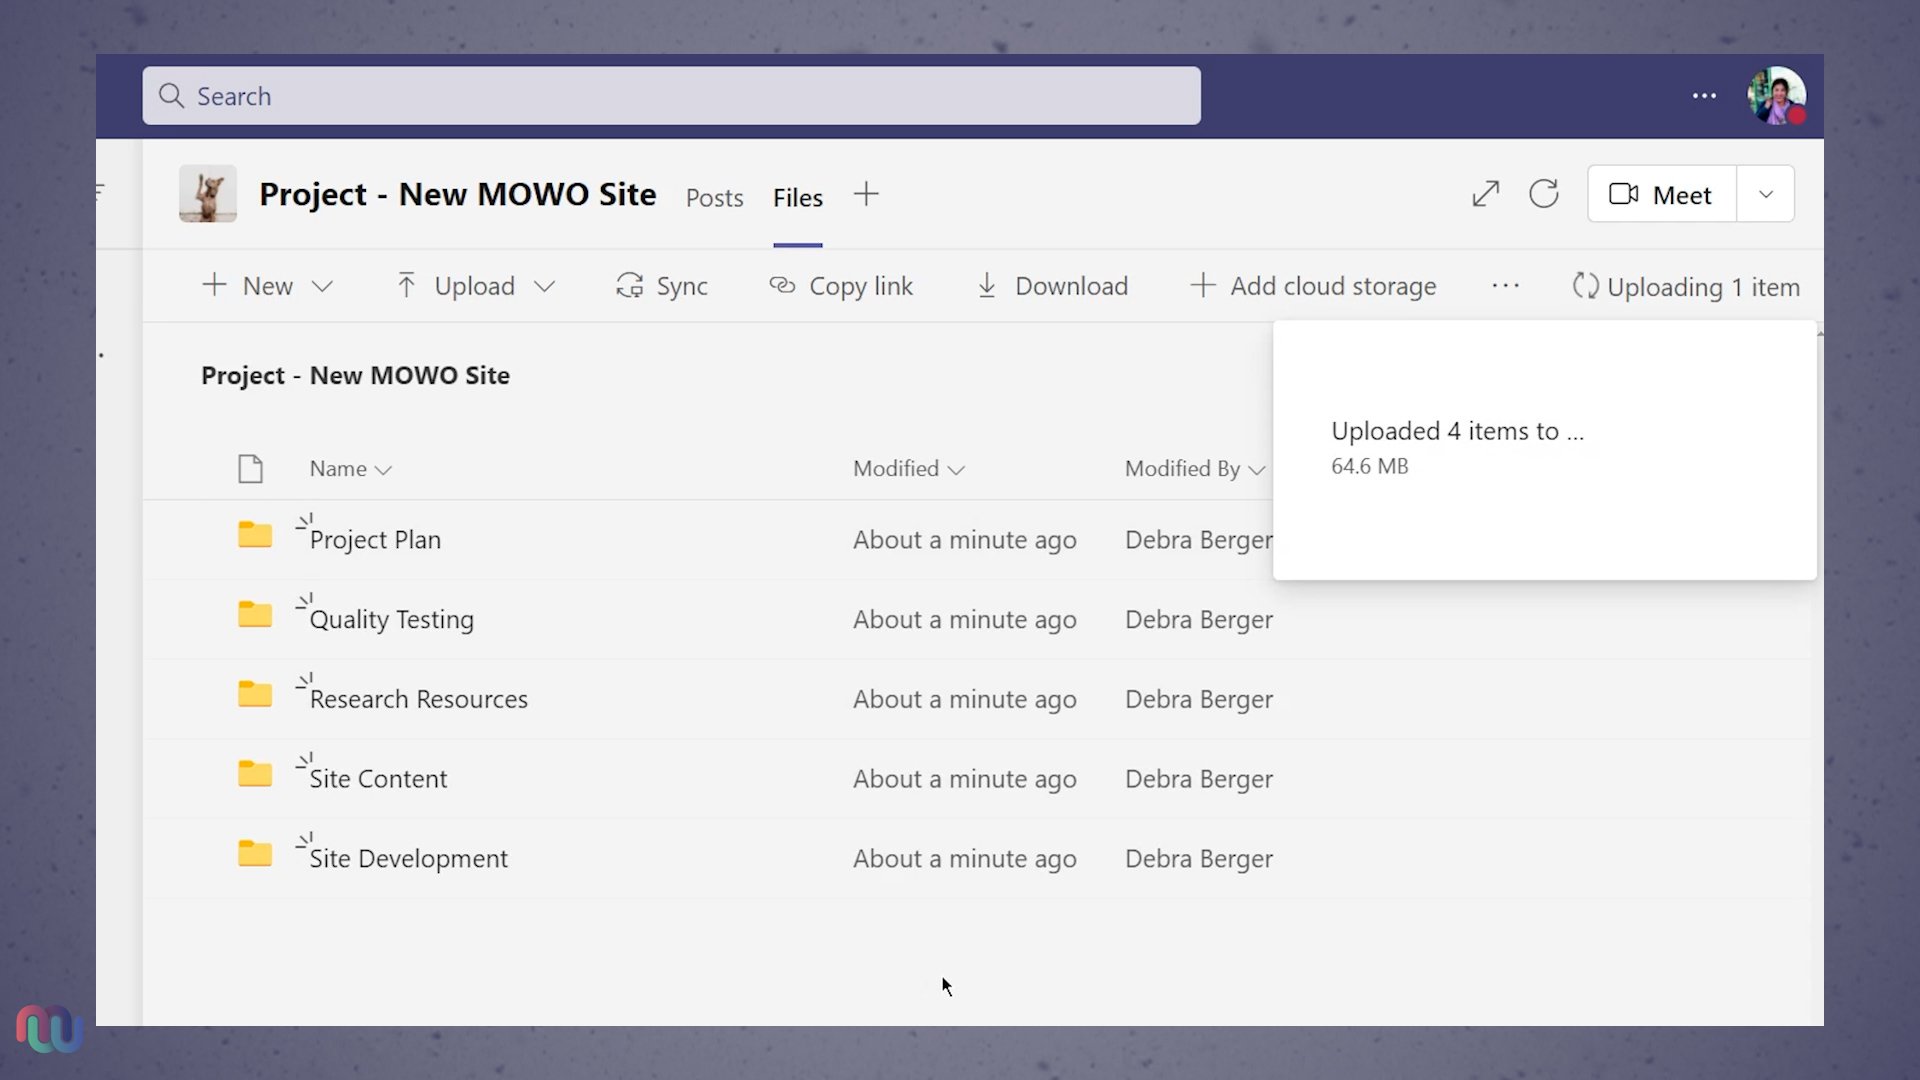
Finish setting up your channel by adding all related project files and resources to the “Files” tab. Remember that all of these files are stored in your Team SharePoint site and can be accessed by anyone in your group. Click here to learn more about uploading to the Files tab.
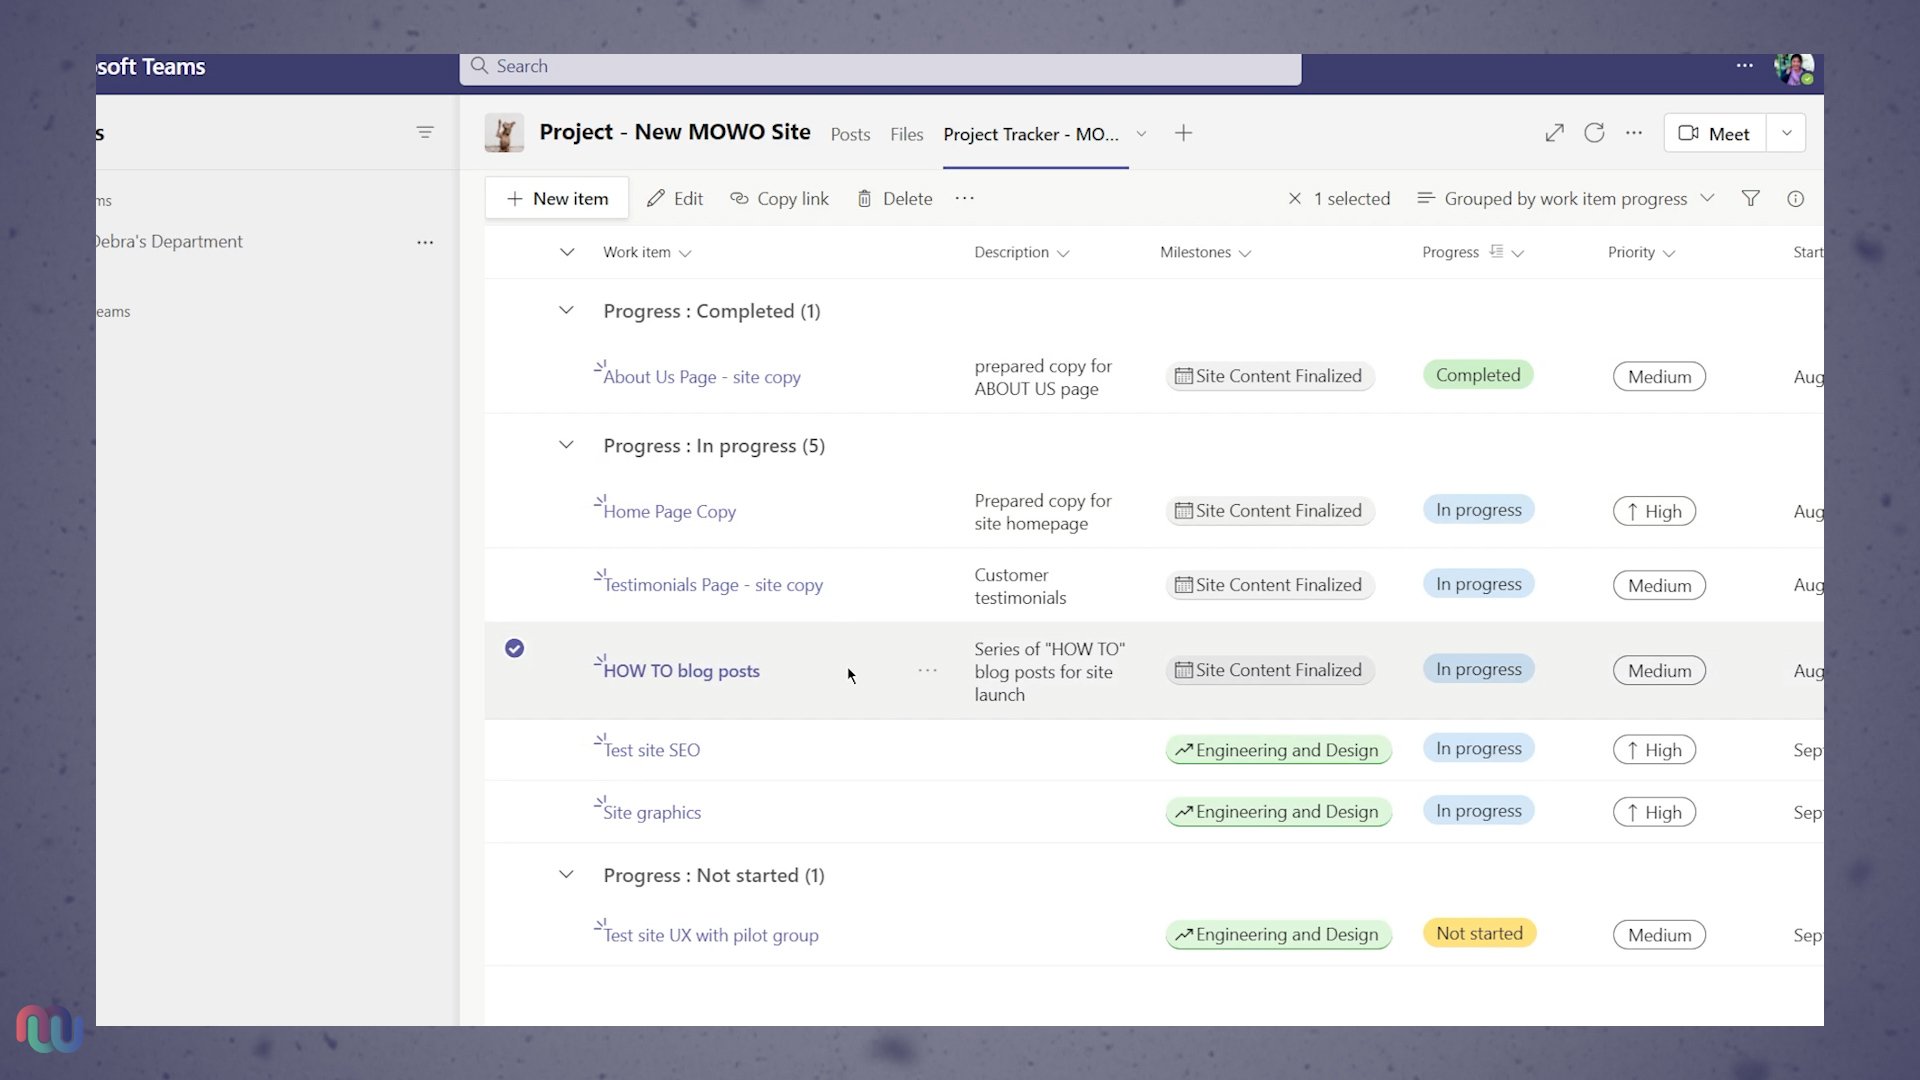
Step Two: Create and Setup a “Work Progress Tracker” List
In this step, we’ll add the “Work Progress Tracker” list template as a tab in your channel. The “Work Progress Tracker” is a template that we can customize later, but comes with the majority of the fields we need to get started.
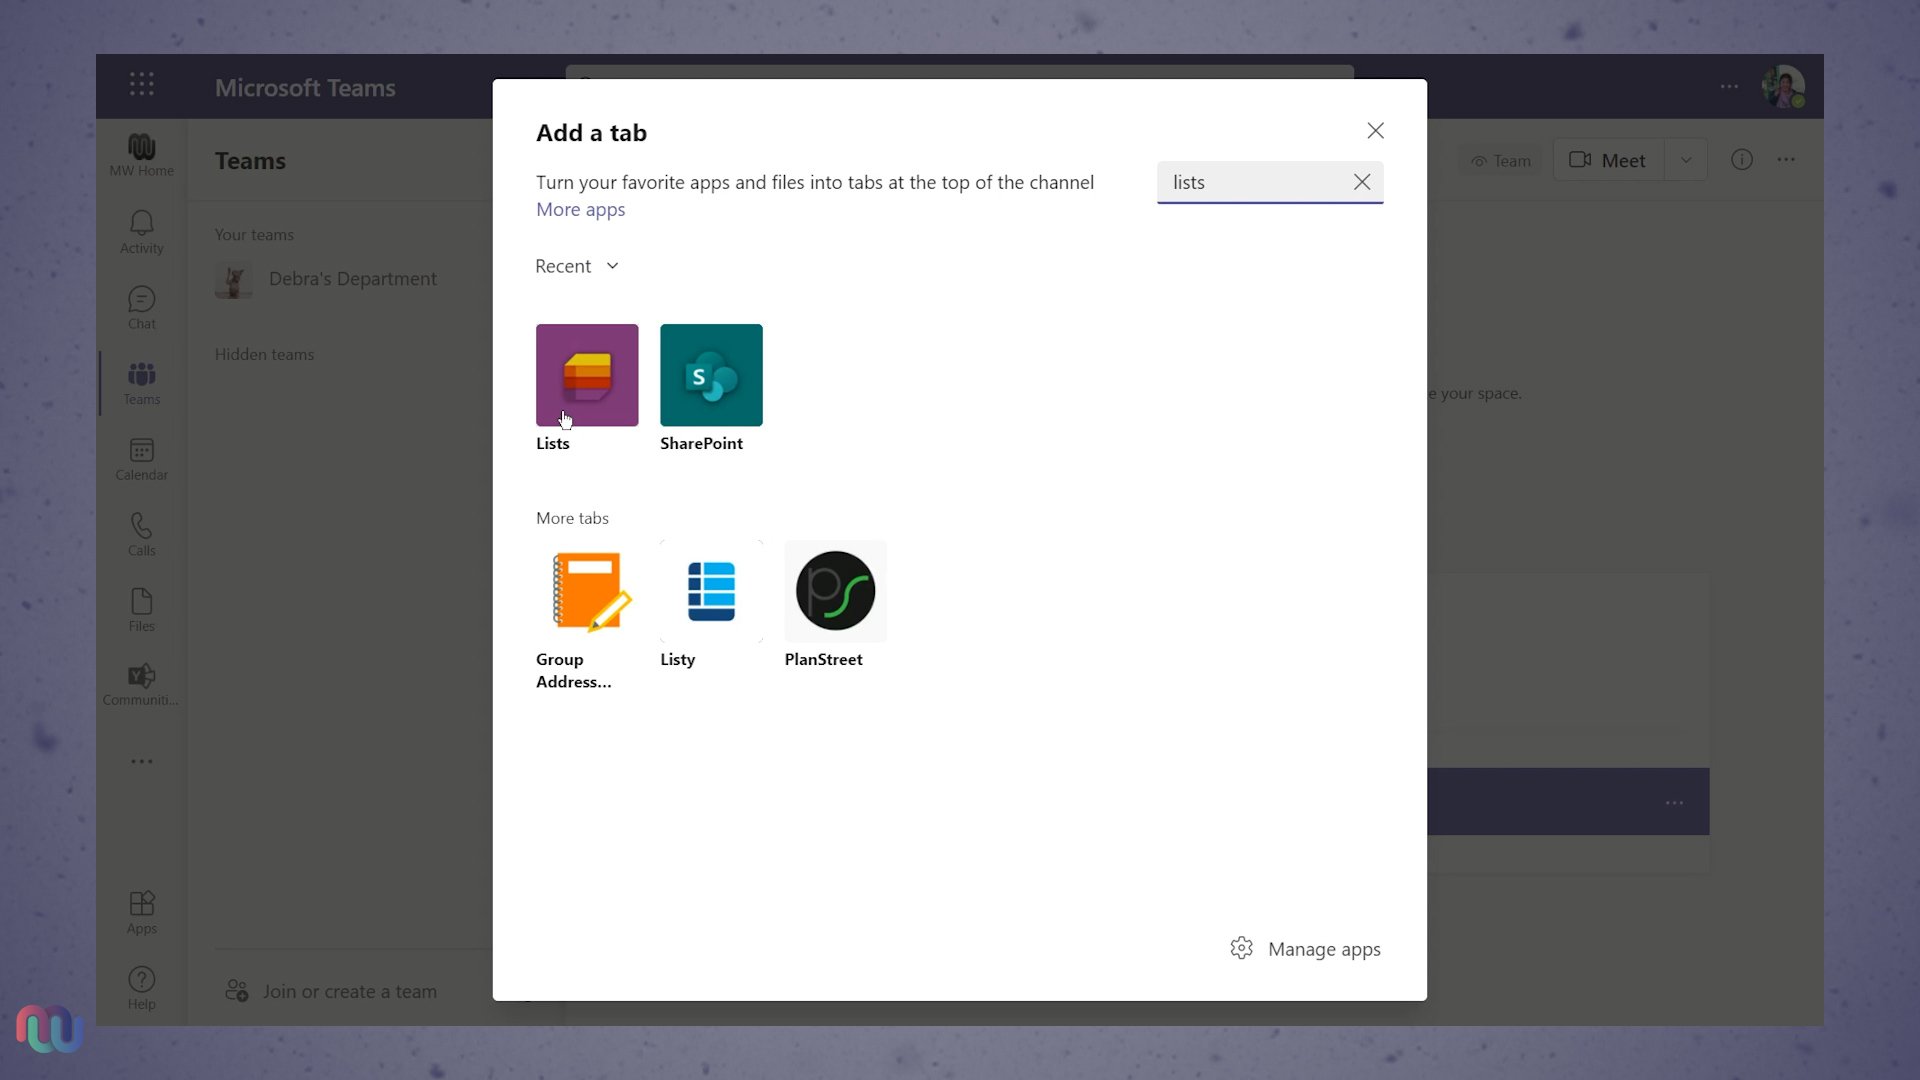
First add Microsoft Lists to your channel as a new tab and create a new list with the “Work Progress Tracker” template. Click here to learn about adding apps to Microsoft Teams. 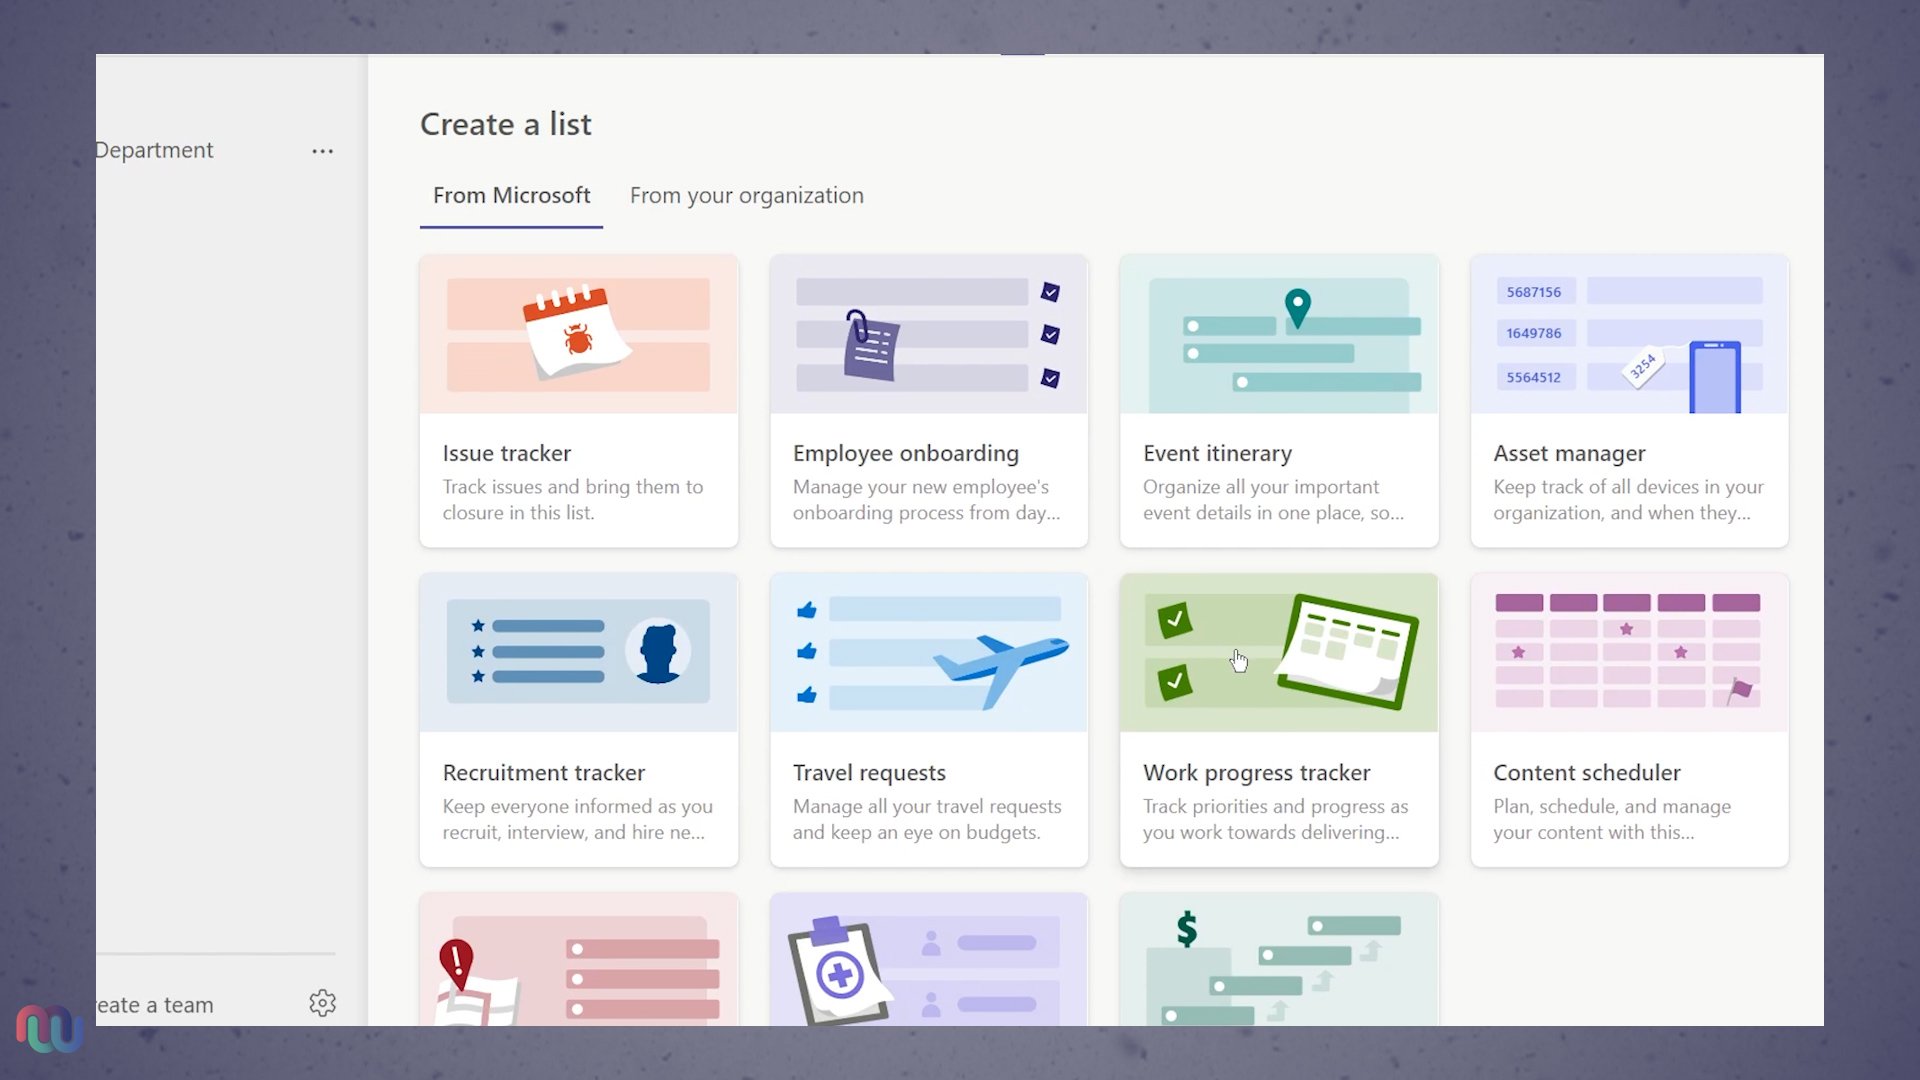
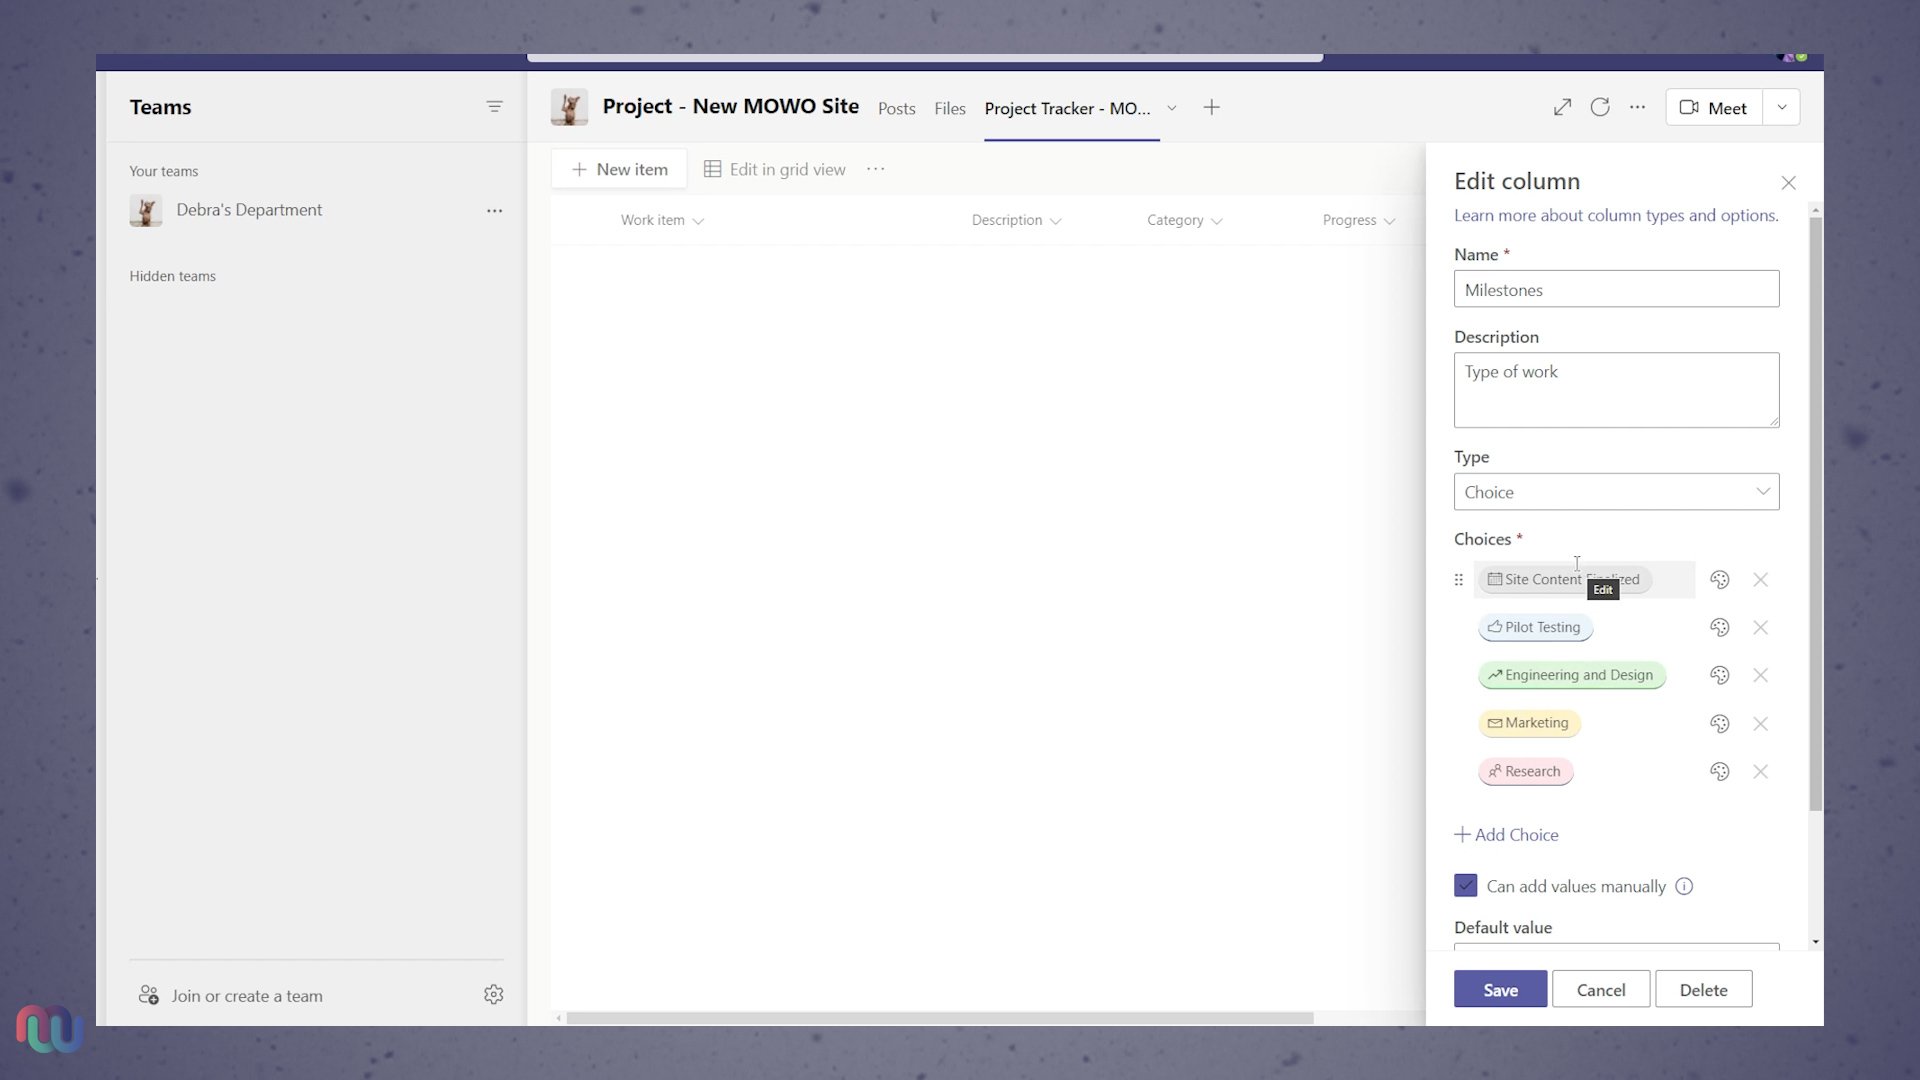
Step Three: Setup Your New “Work Progress Tracker” List
After your new list is ready, review the default columns and column configurations to ensure everything is setup to your liking. Click here to learn how to configure and customize columns in Microsoft Lists.
Once your list is setup, you can start adding your project tasks to your new list. You can add multiple items at once by clicking “EDIT IN GRID VIEW”. 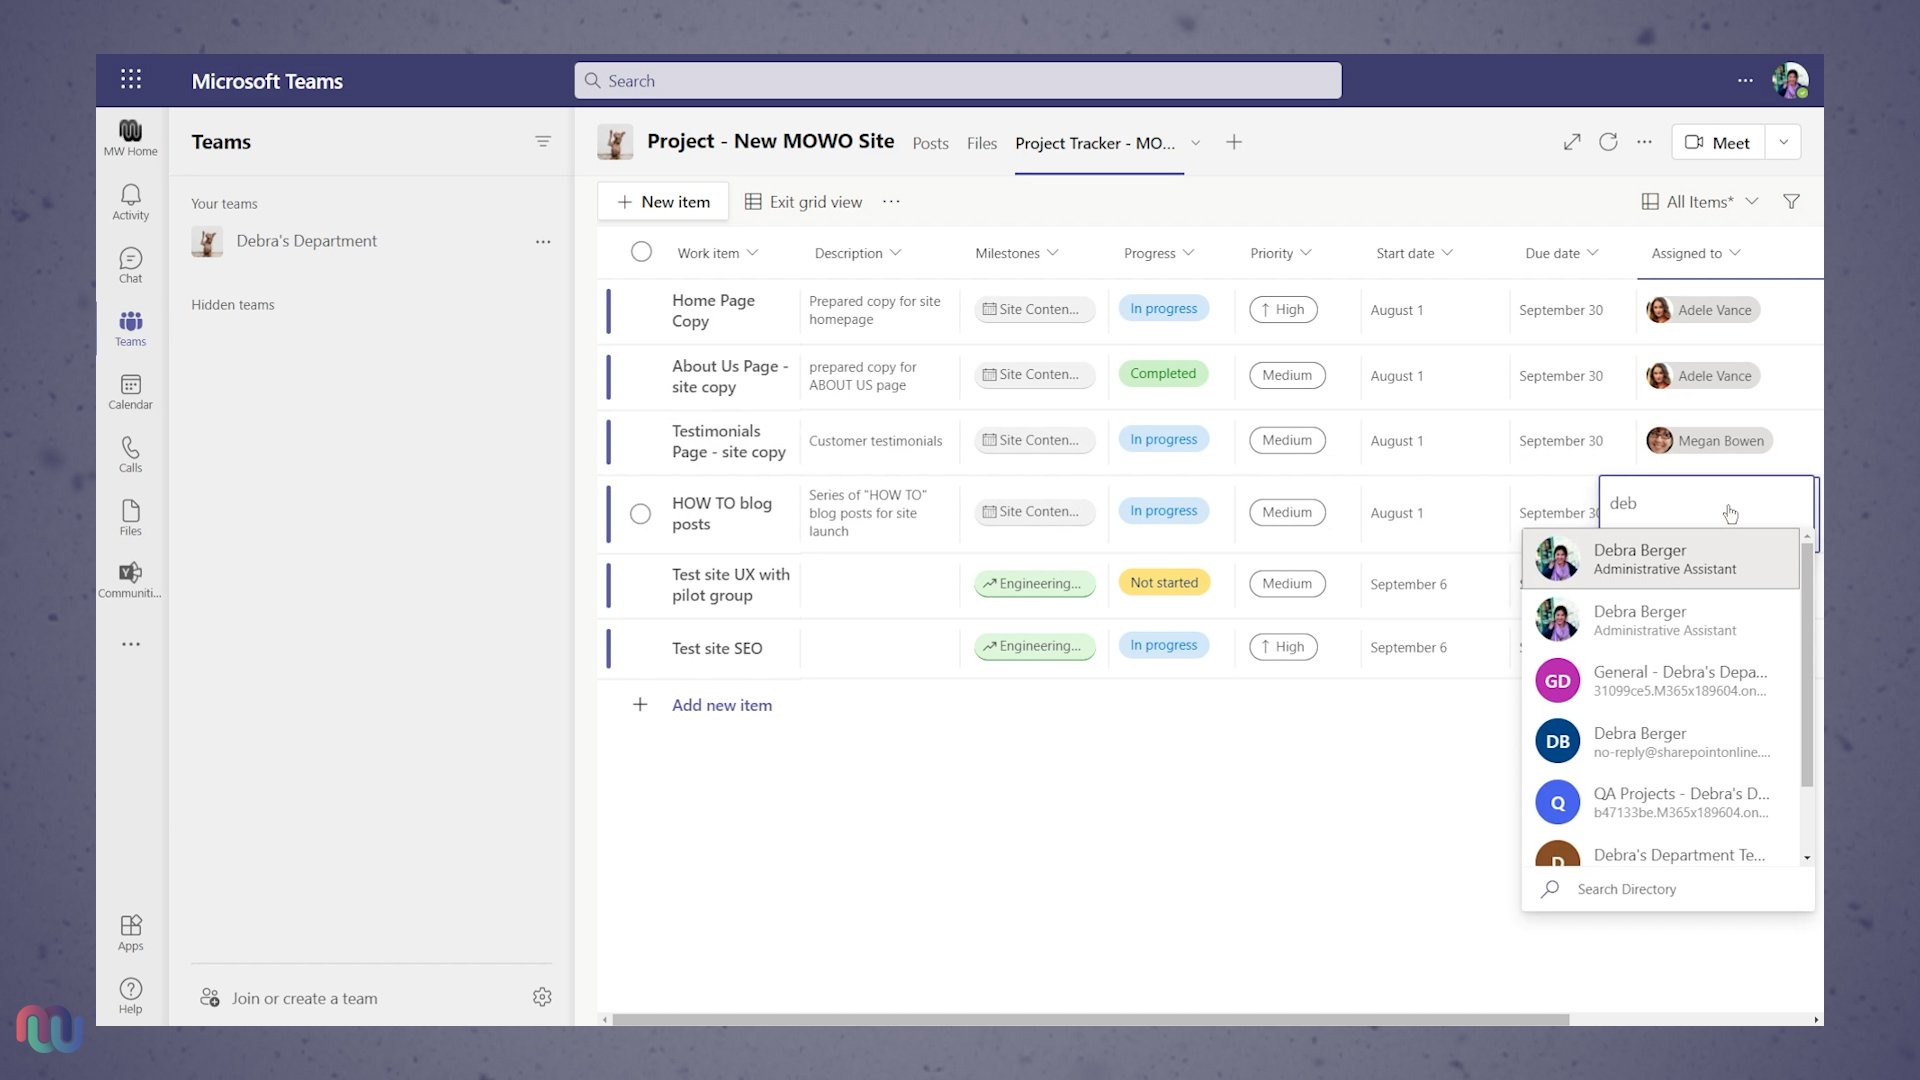
Similar to Excel, staff will NOT be notified automatically when they’re assigned to an item. You can manually notify users by starting a conversation at the item-level. 
Alternatively, you can use rules to automatically notify users of changes to your lists. Click here to learn how to create Rules in Microsoft Lists to send notifications.
Step Four: Notify your Team
Whether it’s a formal kick-off for your project or a simple FYI, don’t forget to let your team members know that your new channel is ready to go. 
----
That’s it! You now have a dedicated workspace for your project tasks, communication, files and much more.
Keep up the good work and stay tuned for updates.
Stay tuned to our Insights Blog for more information, or Contact Us if you wish to inquire about registration information.