

How to Use Breakout Rooms in Microsoft Teams

Contents


Looking to achieve more consequential connections out of large group meetings? Now you can break down your meetings into smaller groups to accomplish more with the use of Breakout Rooms in Microsoft Teams!
Today is all about breakout rooms in Microsoft Teams! No doubt it is one of the most anticipated releases for Microsoft to implement in 2020.
Let’s dive right into it.
What are Breakout Rooms?
 Source: Microsoft
Breakout Rooms for Microsoft Teams meetings are an easy way to separate persons who participate in group meetings into smaller groups. You can use them to breakout your business meetings, group retreats, and classes into smaller groups.
If you are planning on conducting a virtual workshop in which you have different topics for discussion, and many individuals with different interests, this is a great feature. You can also use it to group your class activities.
How to Create Breakout Rooms
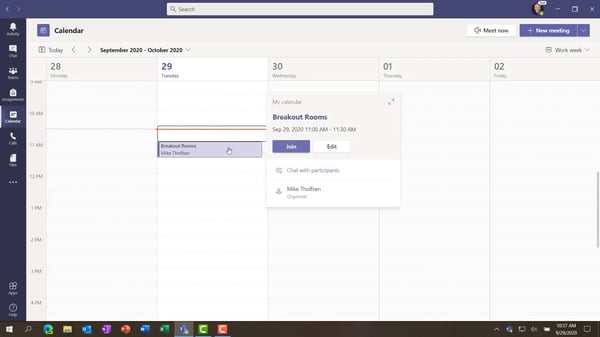
Step 1: Schedule Your Teams Meeting.
 Source: Microsoft
First things first, create your meeting and send the invites to your attendees. No special steps are required here!
Frist time setting up a Teams meeting? Click here to learn how.
What is important to remember is that only meeting organizers can create and manage Breakout rooms during the meeting. Keep that in mind if you schedule meetings on behalf of others.
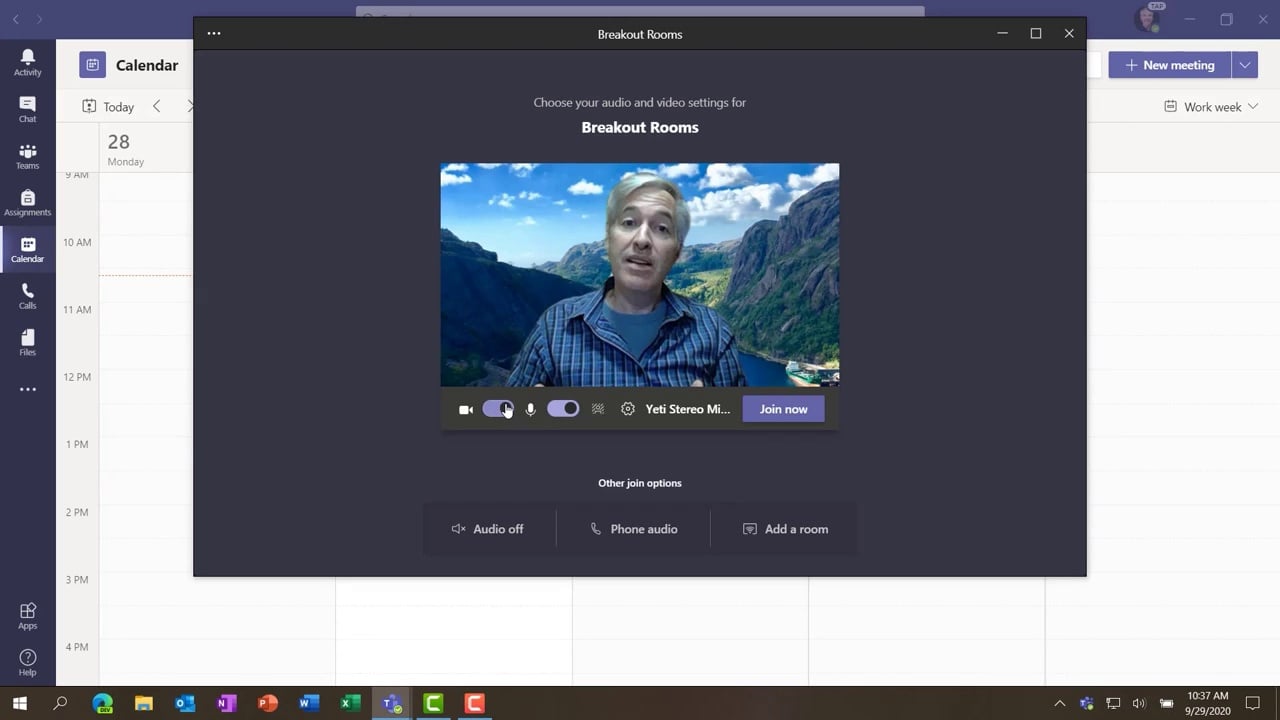
Step 2: Launch Your Meeting in the Microsoft Teams Desktop App.
Source: Microsoft
Breakout rooms can only be created and managed in the Teams desktop app. This only applies to meeting organizers.
Need the Microsoft Teams desktop app? Click here to download.
Your attendees can participate in breakout rooms using the Microsoft Teams web and mobile apps. Also, while dial-in attendees cannot join breakout rooms, but they can still participate in the main meeting room
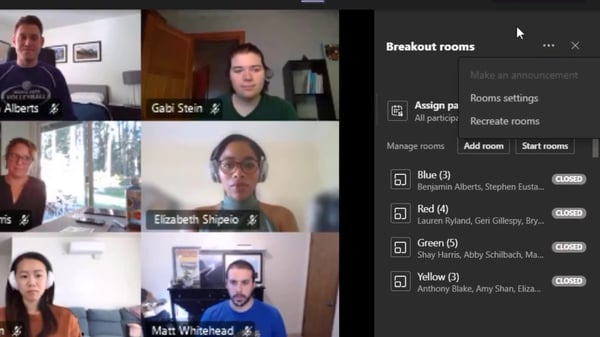
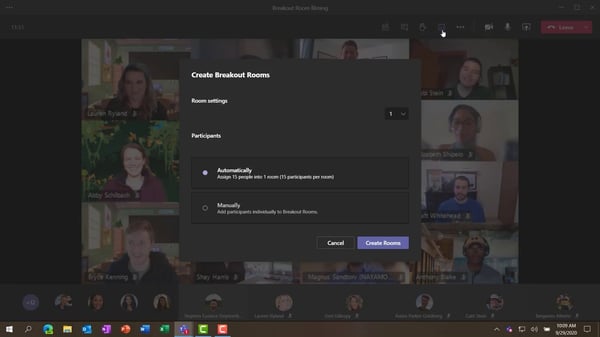
Step 3: Create the Breakout Rooms.
Source: Microsoft
You can choose how many rooms you would like to start, all the way up to 50 rooms!
You can then decide whether you’d like to have attendees automatically distributed among the breakout rooms, or manually if you want to control where people are assigned.
Note that you can only assign attendees manually after they’ve joined the meeting.
 Source: Microsoft
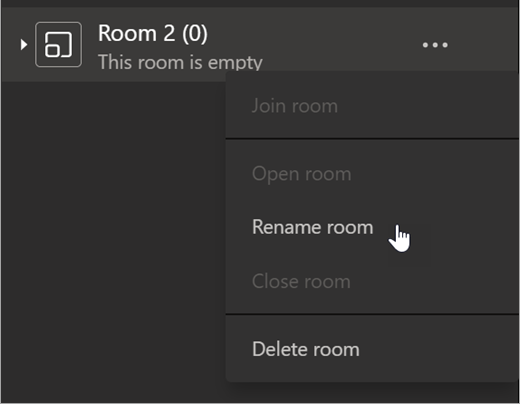
You will see that rooms are initially named “room 1”, “room 2”, (etc.). Feel free to rename them by selecting the ellipse icon that is located in the bottom right corner of the room.
Source: Microsoft
As a fun tip, you can add your favorite emoji in your room names.
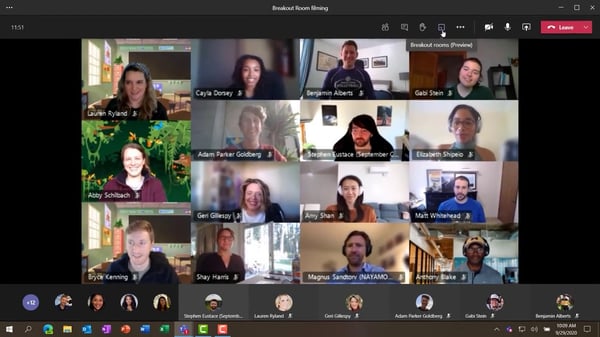
Step 4: Open Your Breakout Rooms
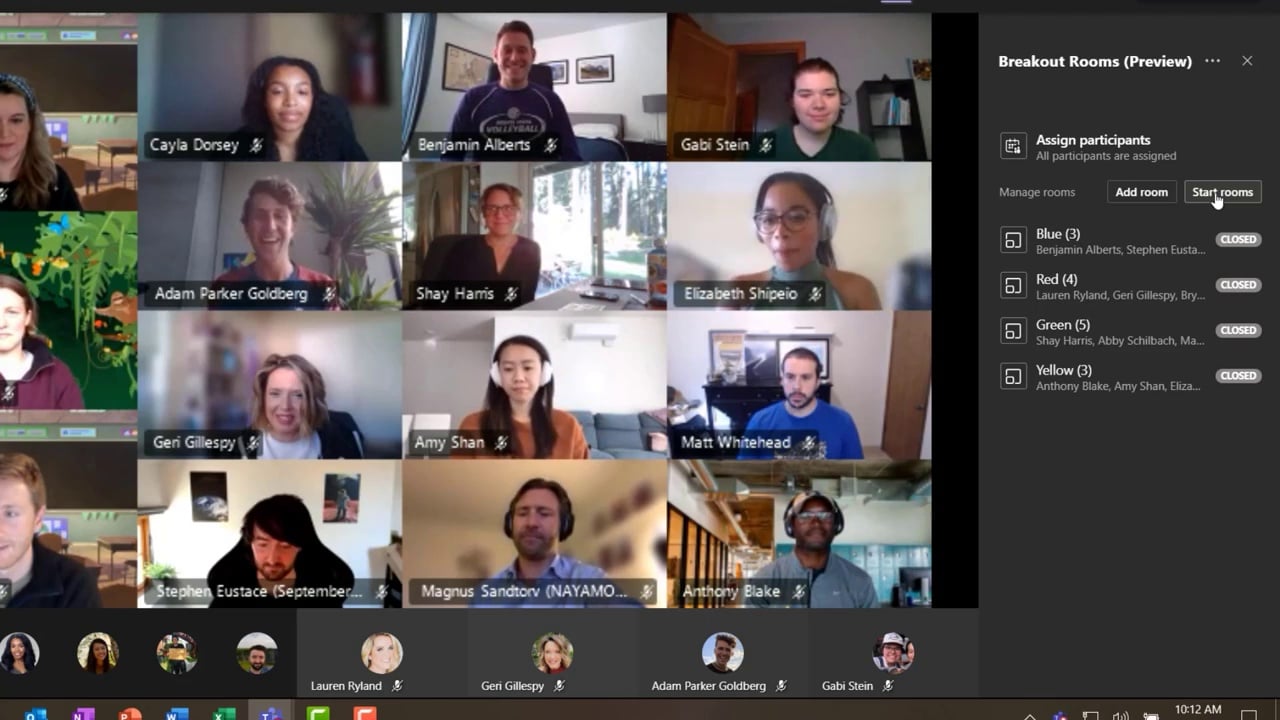
Source: Microsoft
When the time comes, click the "Start rooms" button to send your attendees into their respectful breakout rooms. You can start them all at the same time or one at a time.
In breakout rooms, your attendees can:
- Chat
- Share Files
- Record
- Screen share
Step 5: Manage your Breakout Rooms

Source: Microsoft
As the organizer of the meeting, you can:
- Jump between rooms as you please: You can switch between rooms by clicking the room’s ellipses and then select join room.
- Send out announcement to all rooms: If you are the meeting organizer, you can send messages to your attendees during meeting sessions whether it be updates or a warning message to indicate that you are close to closing time.
In the breakout box pane, select the option that says make an announcement.
- Move attendees between rooms: If you need to switch participants between rooms, enlarge the room name in the breakout room pane, then select the checkbox that is next to the room name and click the Assign
- Close the rooms all at once: The breakout room organizer is the one in control when it comes to closing breakout rooms. Participants will all end up in the main meeting by selecting the Close Room It’s that simple.
You can add and delete breakout rooms if you desire. This can be done using the Add Room button and the Delete Room buttons, respectively.
Step 7: Close the BO rooms to bring everyone back into the main room:

Source: Microsoft
Select the Close Room button to bring everyone back into the main room. Don't worry, attendees will be able to access their shared materials after the meeting has ended.
Don’t Forget to Test!
As with any few feature, we advise that you give this a test run with a colleague or two before going live. This way you can prevent avoidable bumps during an actual meeting.
Learn more on breakout rooms from microsoft.com
We look forward to hearing about your experiences with this new feature! Teams and hopefully it makes your future virtual meetings a little more fun and engaging!
Thanks for reading!