

Creating a Private Planner Board with Microsoft Lists

Contents


Do you need a Planner board that you have total control over? Learn how to set up your own private board in Microsoft Lists.
Microsoft announced "Board View" in November 2021 and it's finally started rolling out. In this article, I'll show you how to use it by replicating a Planner board.
How to Create a Planner Board in Microsoft Lists
Step #1: Create a New List from Scratch
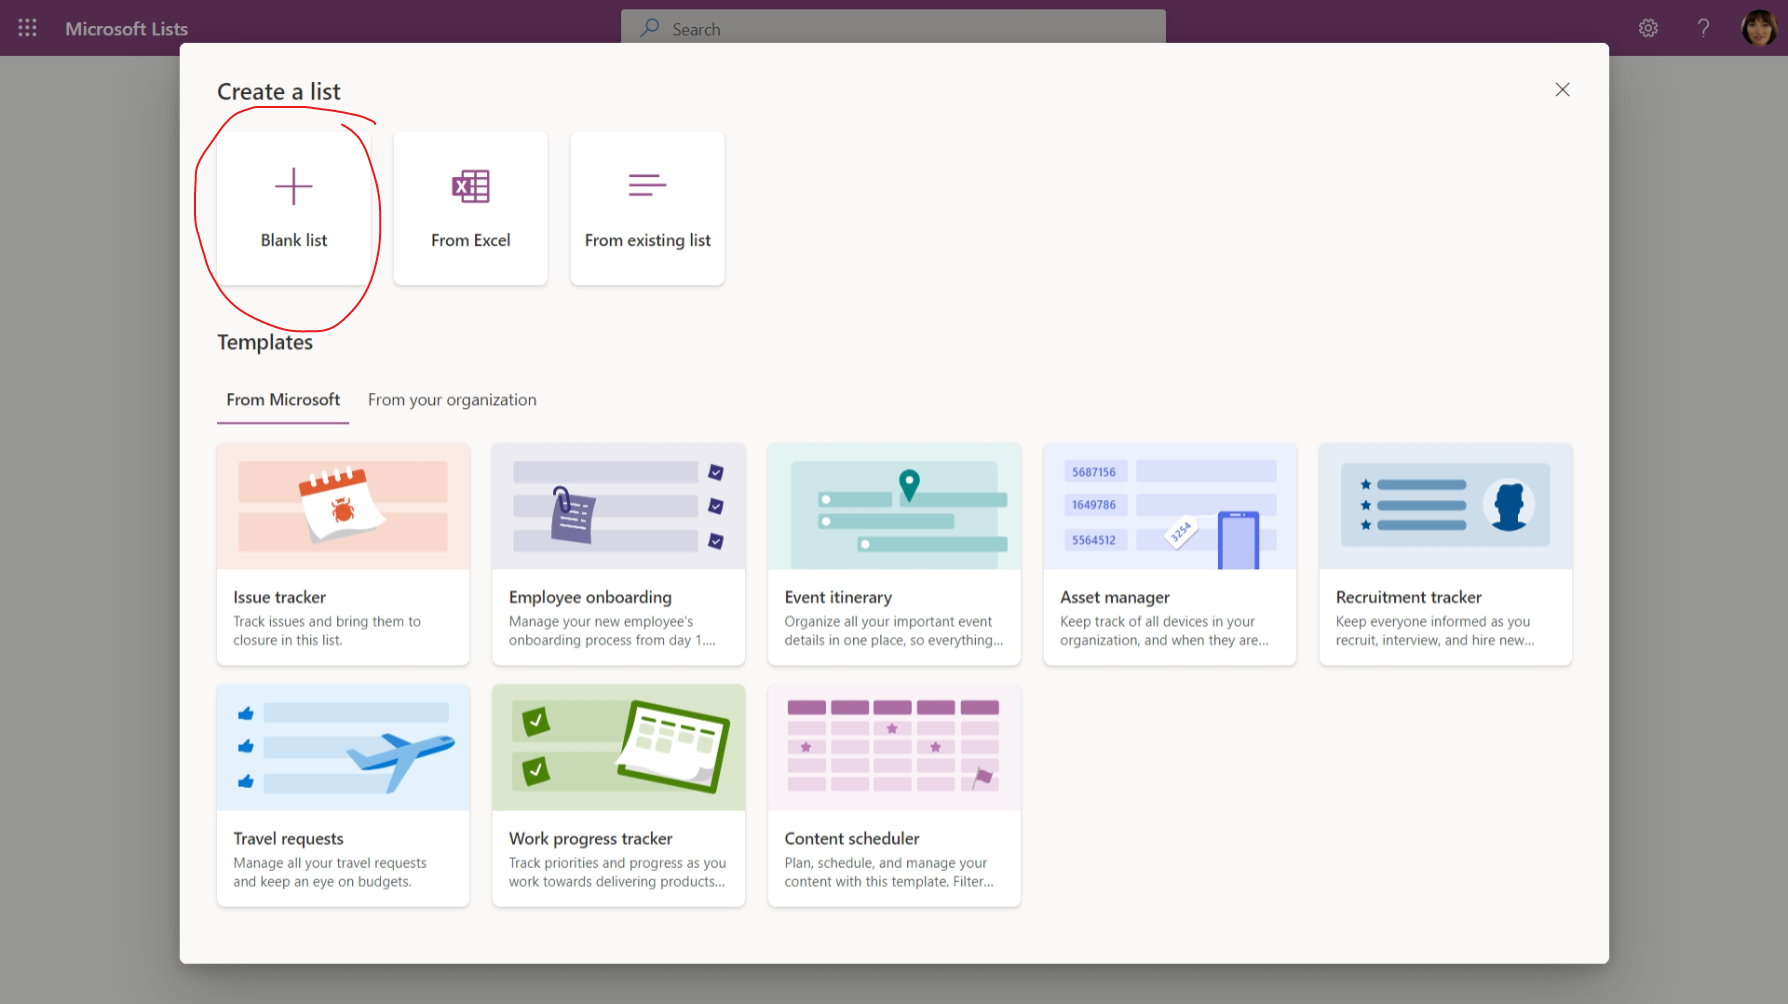
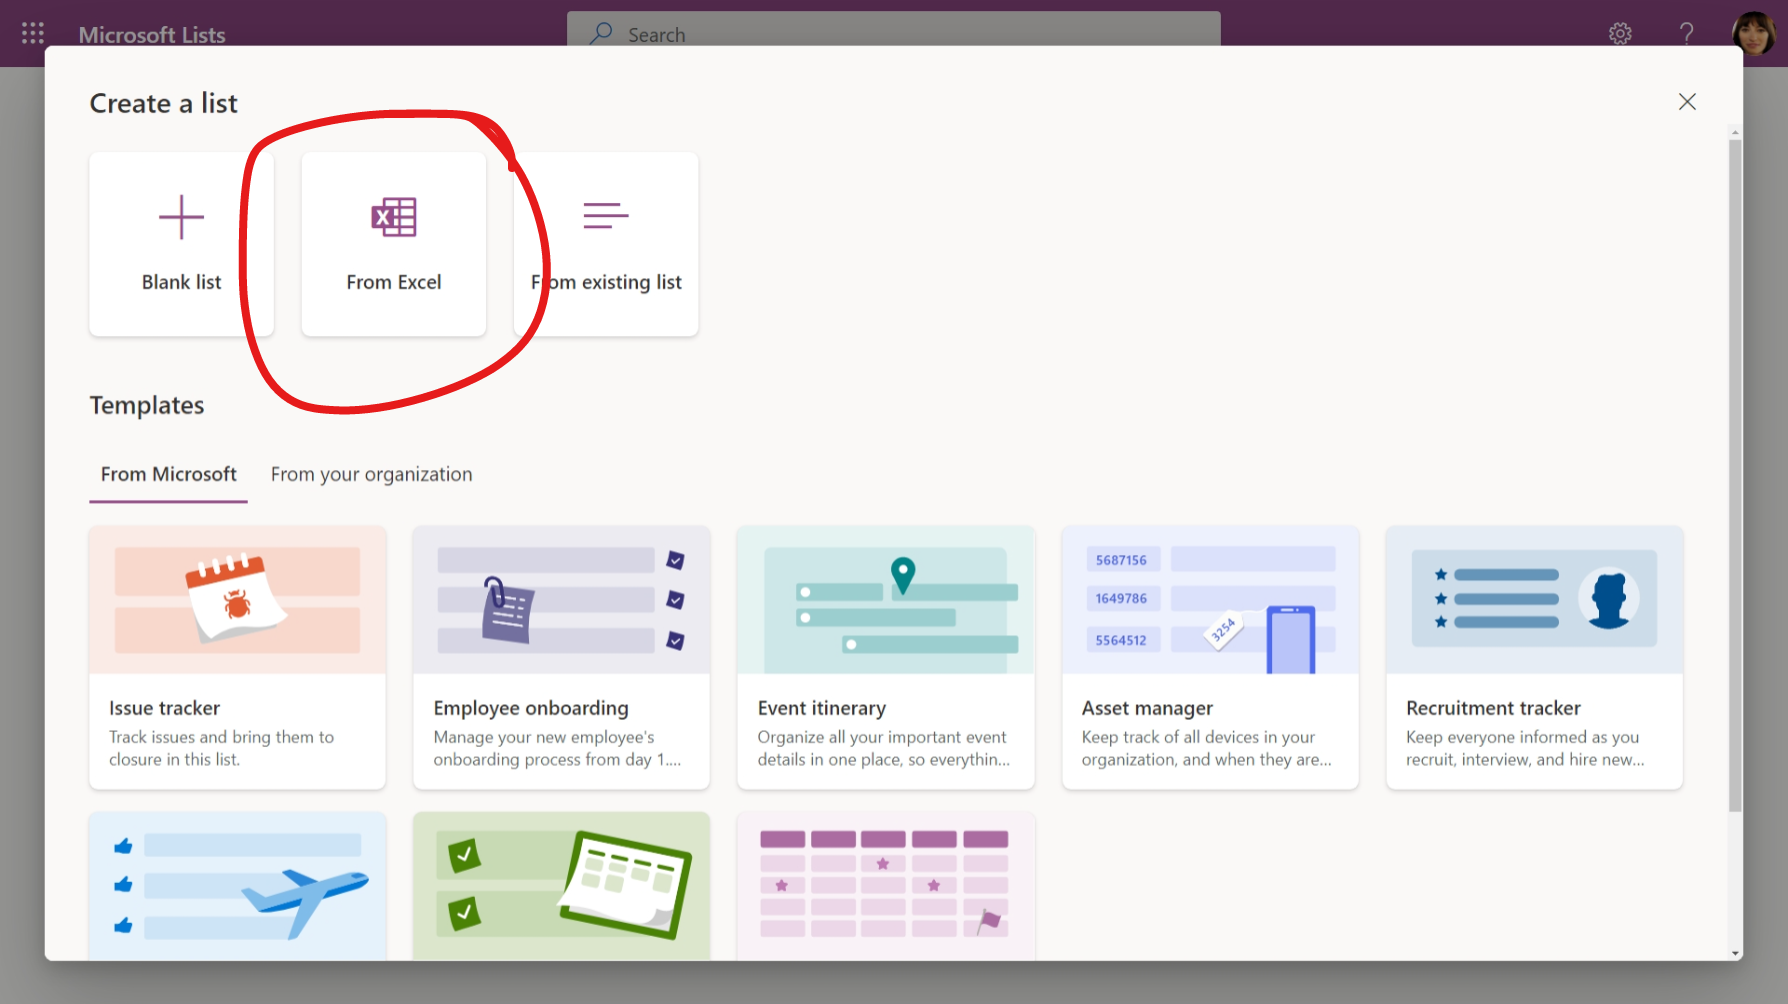
From the Microsoft Lists app, create a new list by choosing the “Blank list” option.
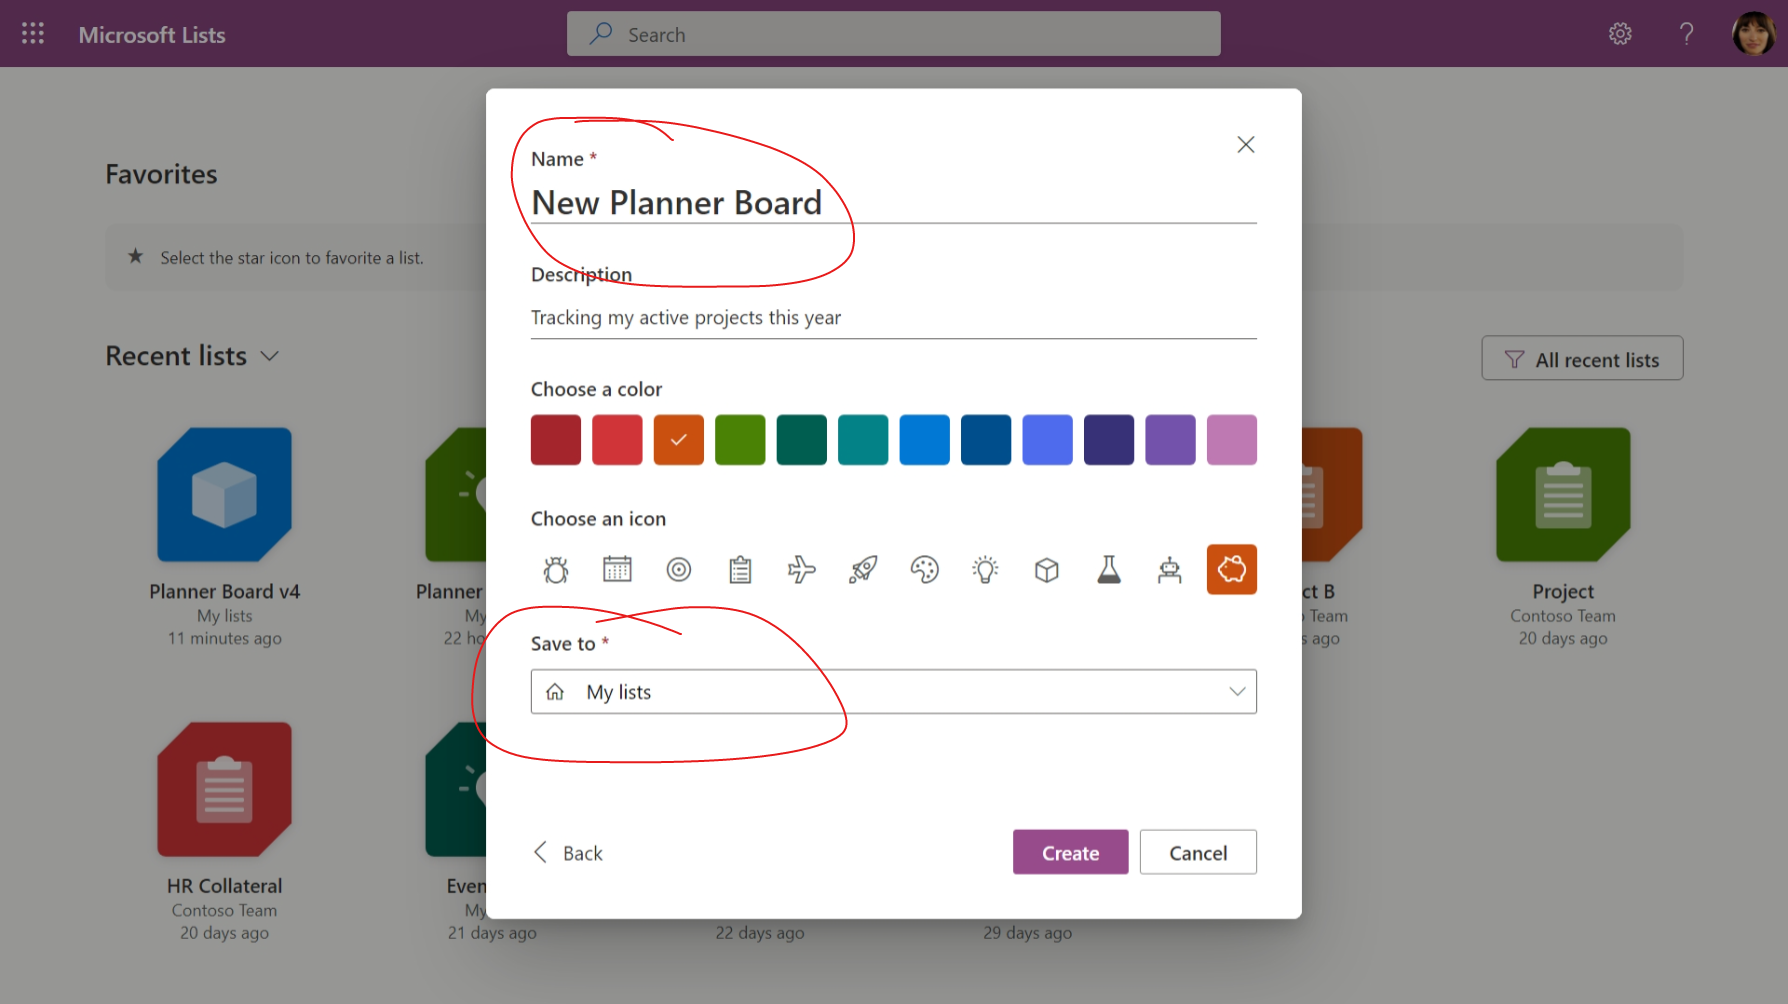
Give your list a name, a description and then save it to "My Lists". This will help ensure your list is private to you (and anyone you may choose to share it with later).
Step #2: Add your Planner Fields
Next, add the columns/fields shown in the table below. Remember that everything but the “Title” field is optional, so feel free to add only what you need:
|
Planner Fields |
Field Types in Microsoft Lists |
|---|---|
|
Title |
N/A - Use existing "Title" field |
|
Assigned To |
Person |
|
Labels |
Choice (with multi-select enabled) |
|
Bucket |
Choice |
|
Progress |
Choice |
|
Priority |
Choice |
|
Start Date |
Date/Time |
|
Due Date |
Date/Time |
|
Notes |
Multi-line Field (with Rich text enabled) |
|
Checklist |
Multi-line Field (with Rich text enabled) |
|
Comments |
N/A - use built-in comments |
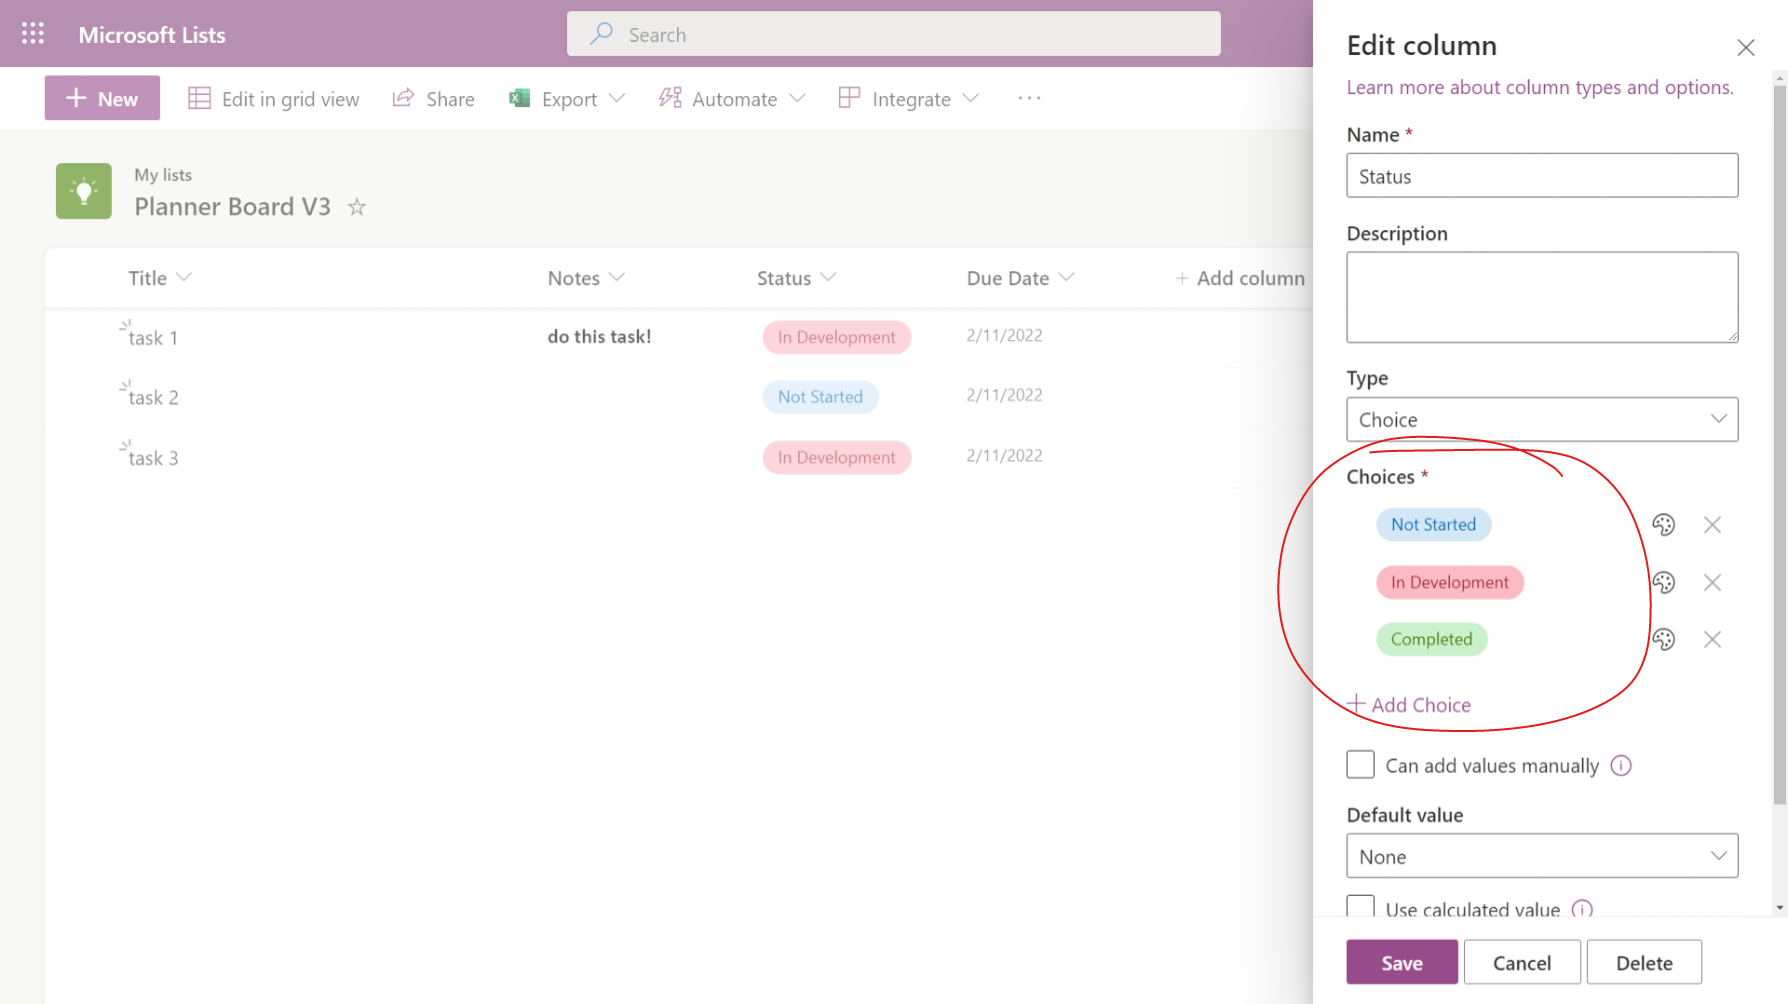
When adding values to your CHOICE fields, remember you don't have to stick with Planner terminology. You can copy the values used in Planner (e.g.: "Not Started", "In Progress", "Completed") or makeup your own.
After your columns are ready to go, you can start populating your new list!
Step #3 - Add your Tasks
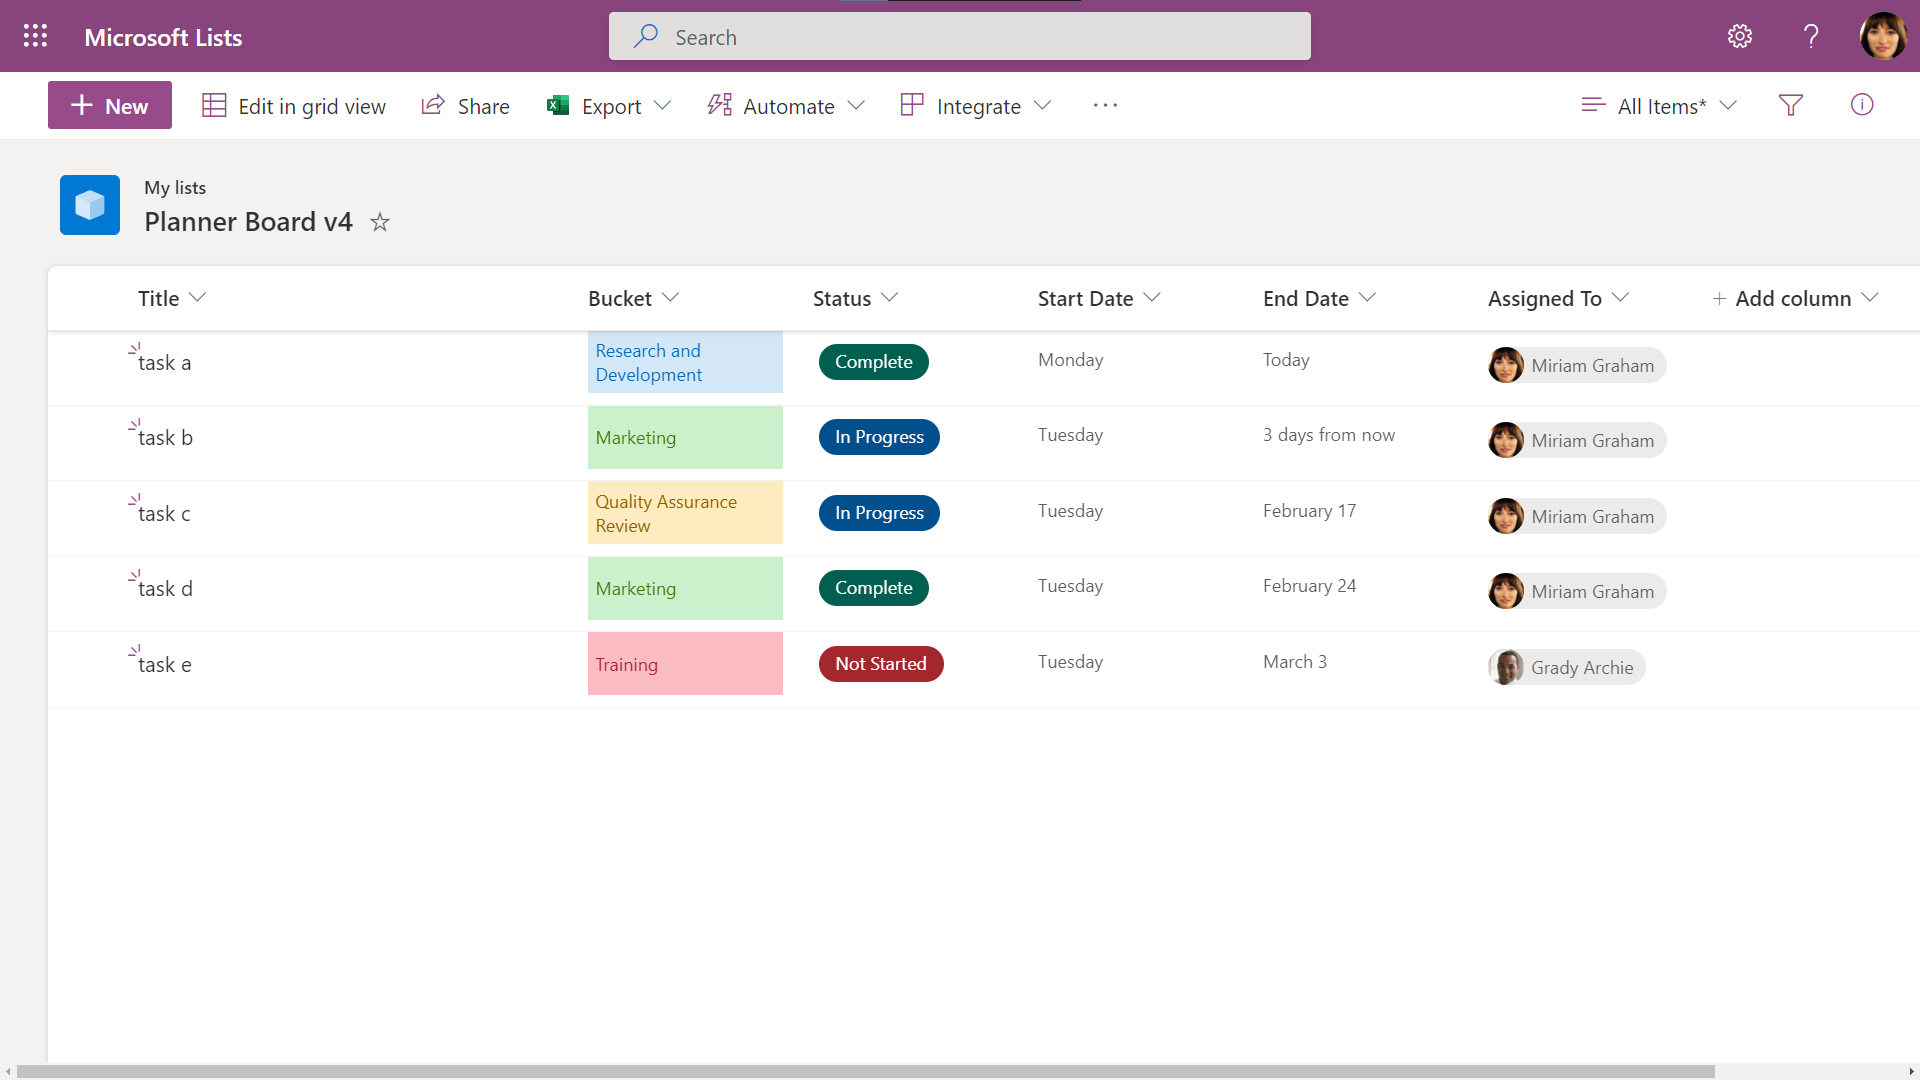
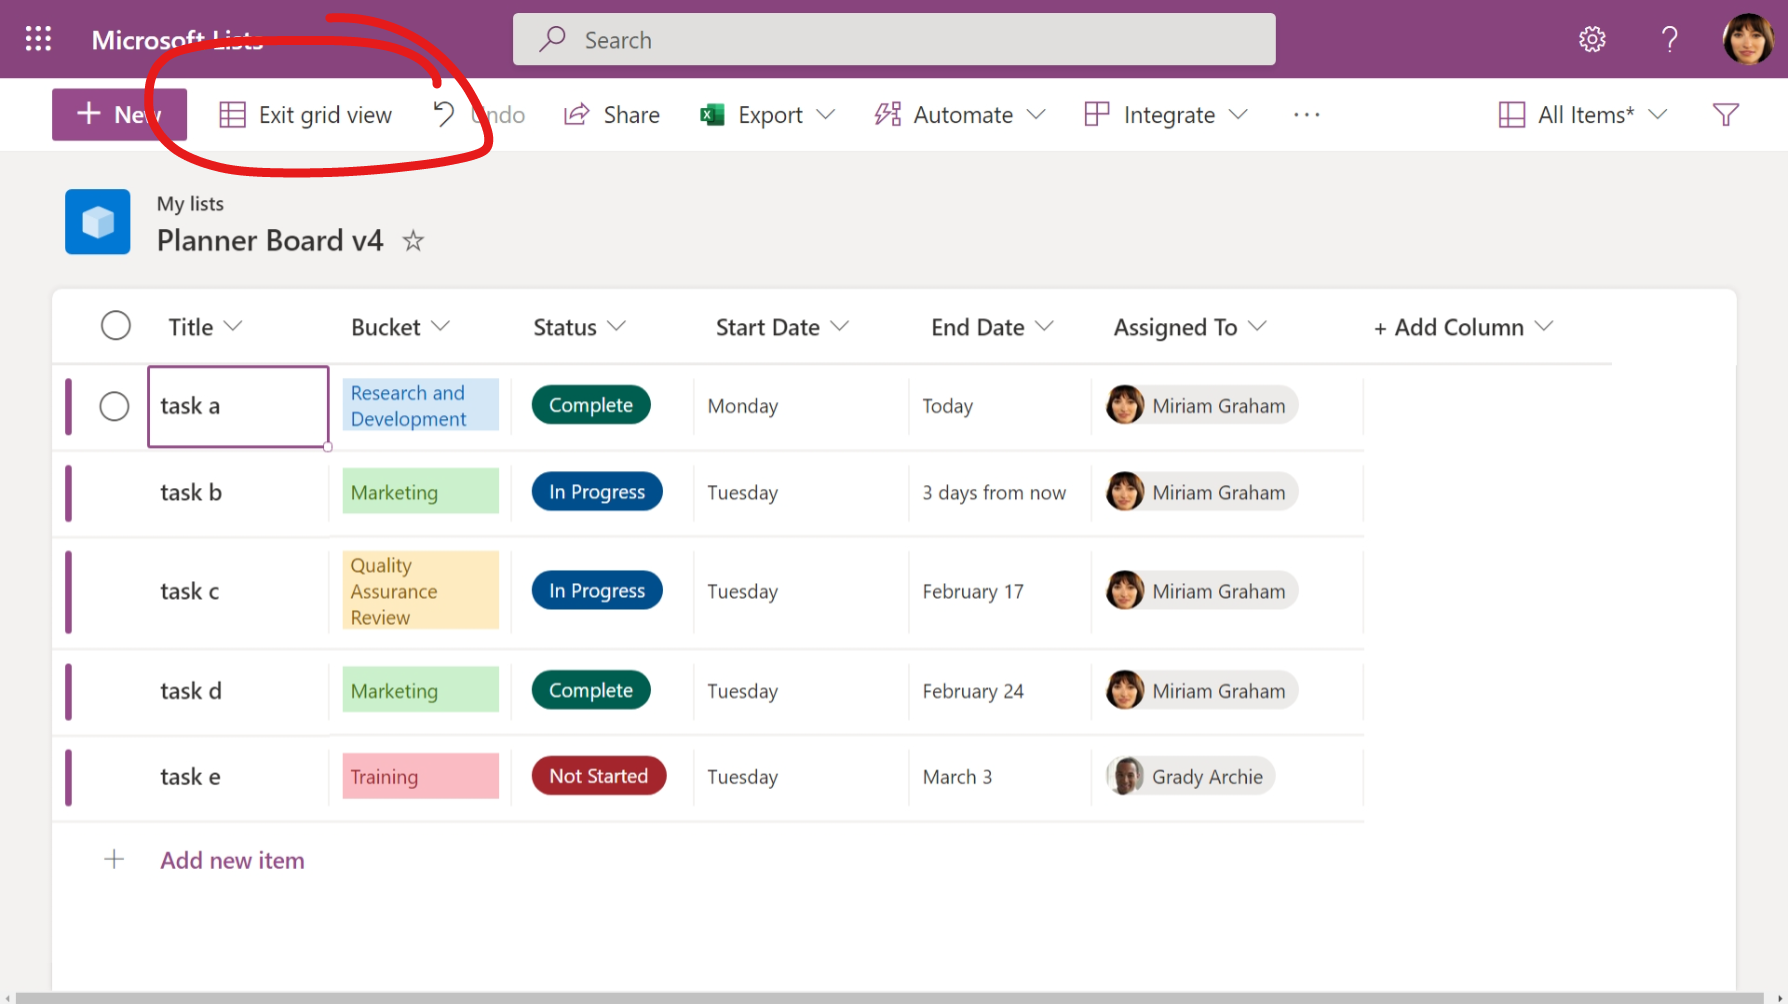
This may be the most time-consuming part of the process if you have a LOT of tasks to add at once. Thankfully, we can add multiple tasks at once.
Ensure your view is still set to “All Items” and then click “Edit in Grid Mode” from the toolbar. This is the most efficient way to add multiple tasks at once in Microsoft Lists. You can even “fill-down” cells like in Excel.
Once you’ve got your tasks added, we can create our new Board Views at last!
Step #4 - Create a “Progress” Board View
To create a new view in Microsoft Lists, click the Views dropdown menu and select “Create a New View”.
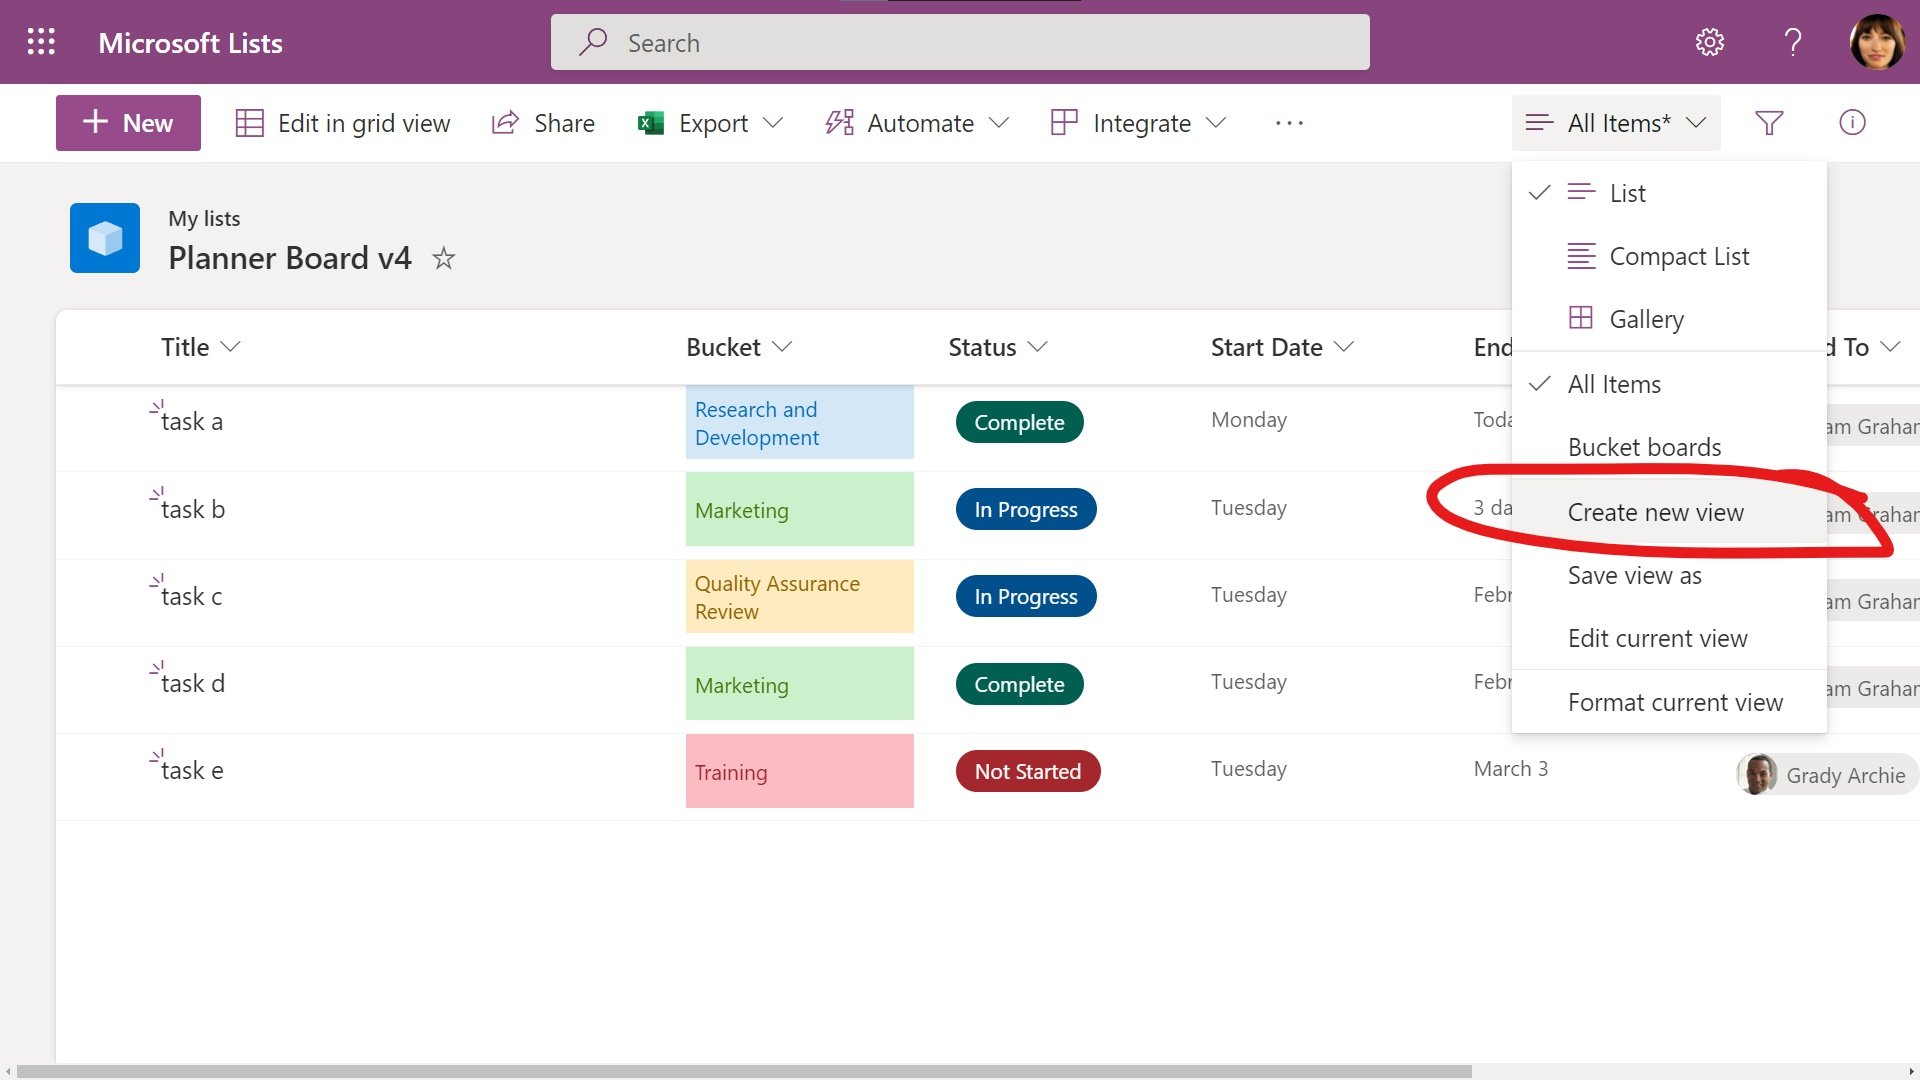
From the “Create View” window, give your new view a name, and then choose “Board”. If you don’t see that option, then this feature may not be available to you yet.
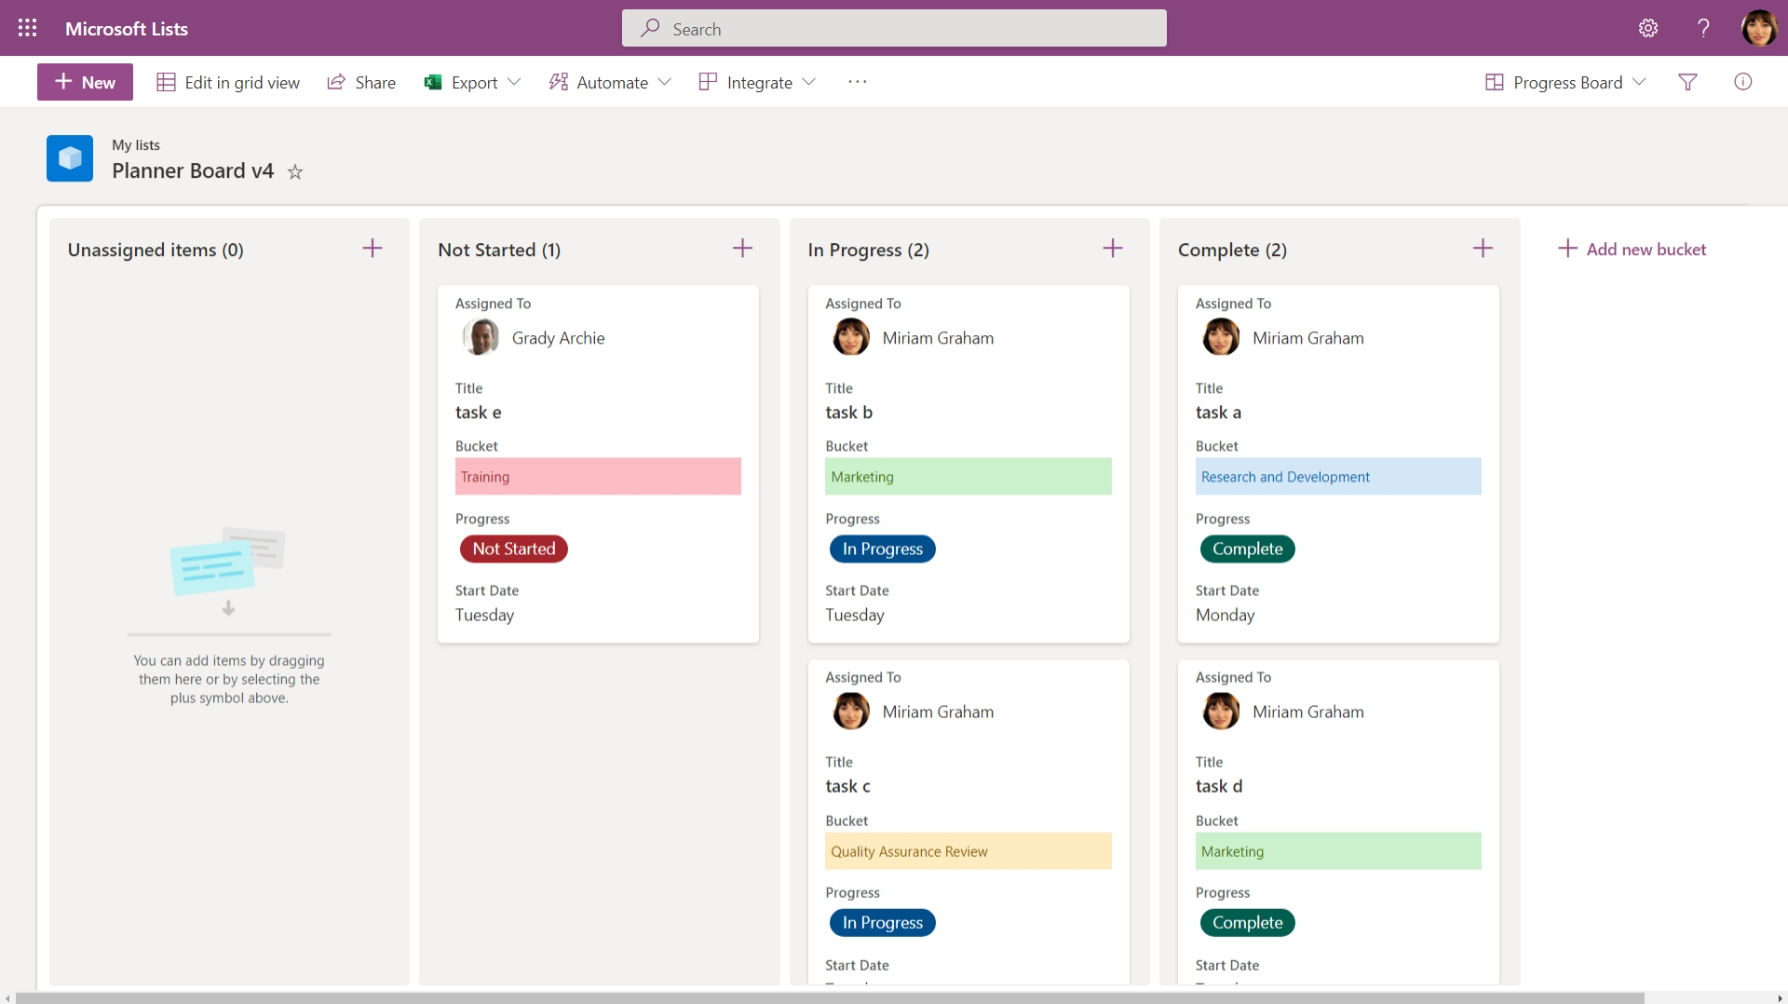
In the “Organize your board by” dropdown menu, choose the “Progress” field and then click CREATE.

This is a good time to mention that only single-select Choice fields can be used in Board view. If you want to see additional options in the future, let Microsoft know.
Repeat this process to create additional views for your “Bucket” and “Priority” columns and you’re good to go!
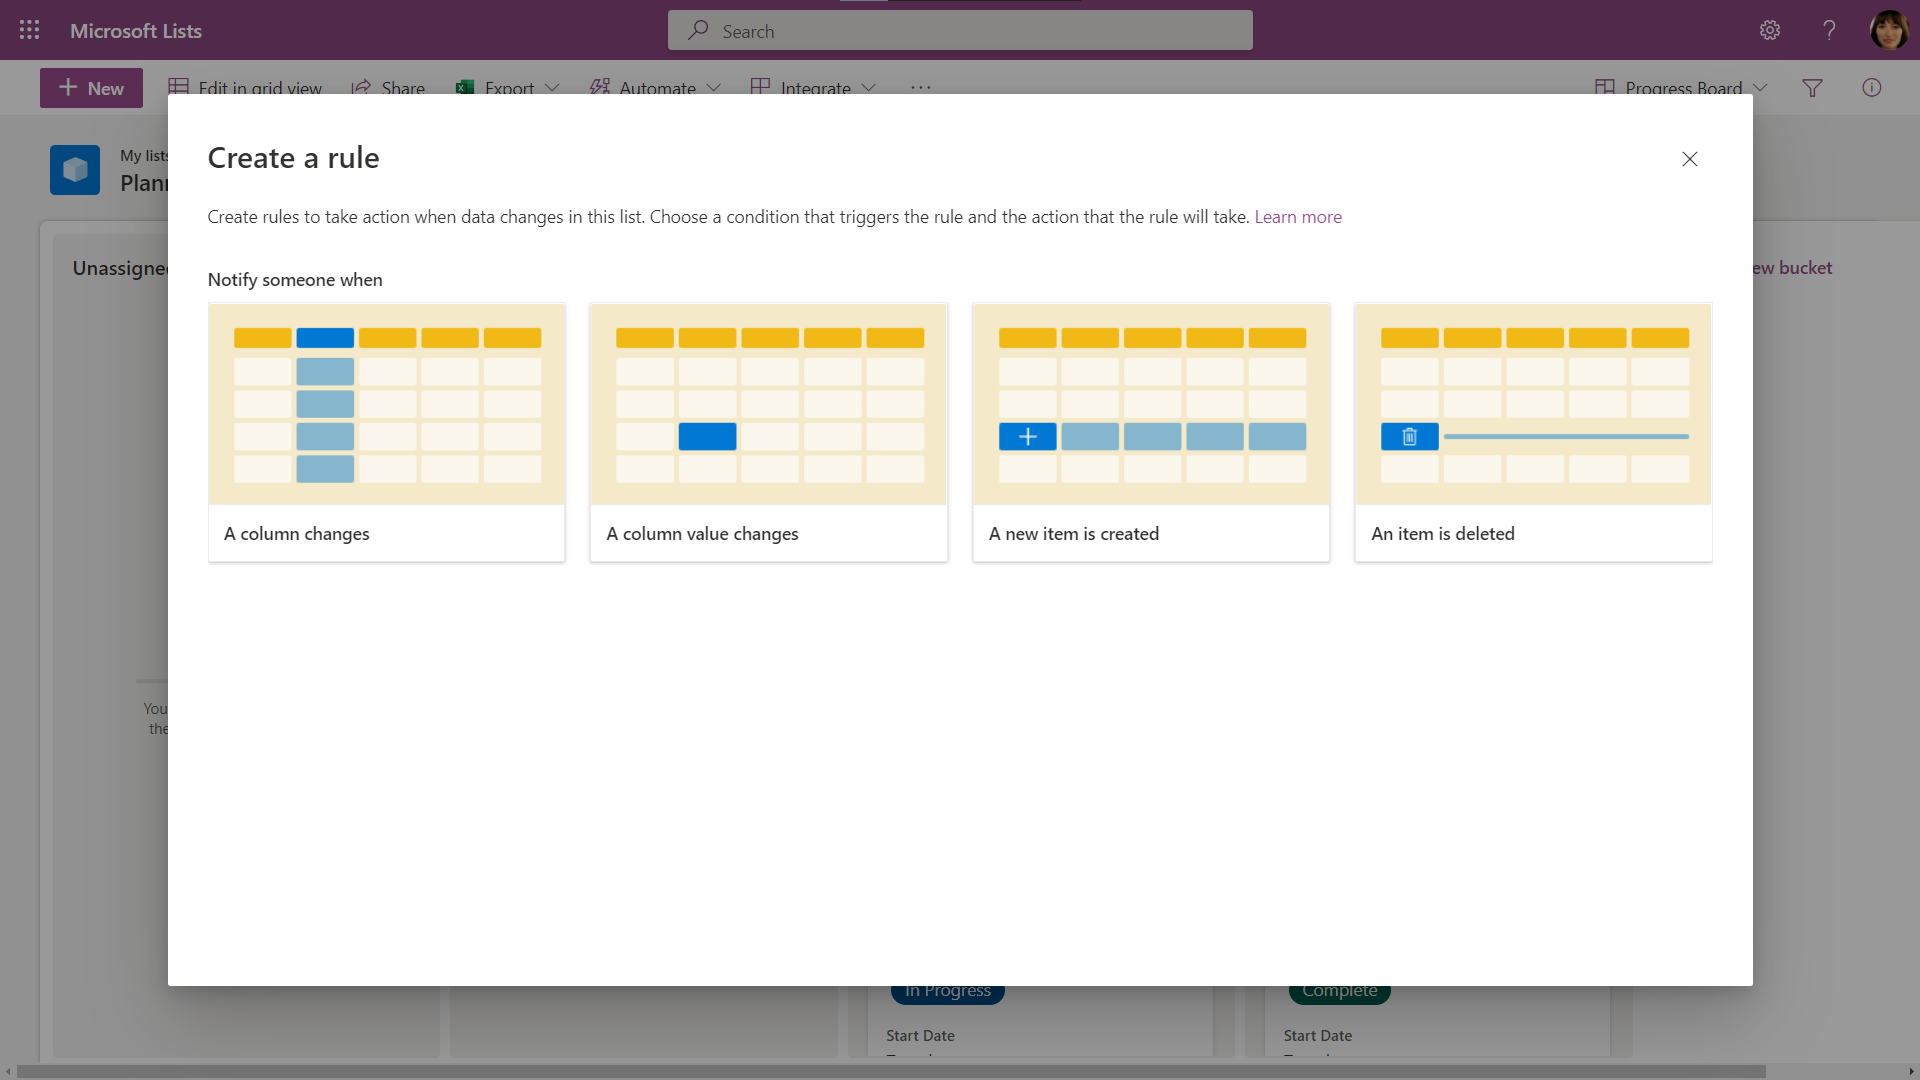
Step #5 - Setup Notifications
If you want to get email notifications from your board, click here to learn about Rules in Microsoft Lists.
Alternative Setup with Excel
If you have a LOT of tasks to add to your board immediately, then you might find some time-savings by setting up your data in Excel first and then uploading it to Microsoft Lists.
This method is isn’t without its own flaws, so we’ll focus on some “gotchas” to look-out for:
Gotcha #1: Your excel data must be formatted as a table
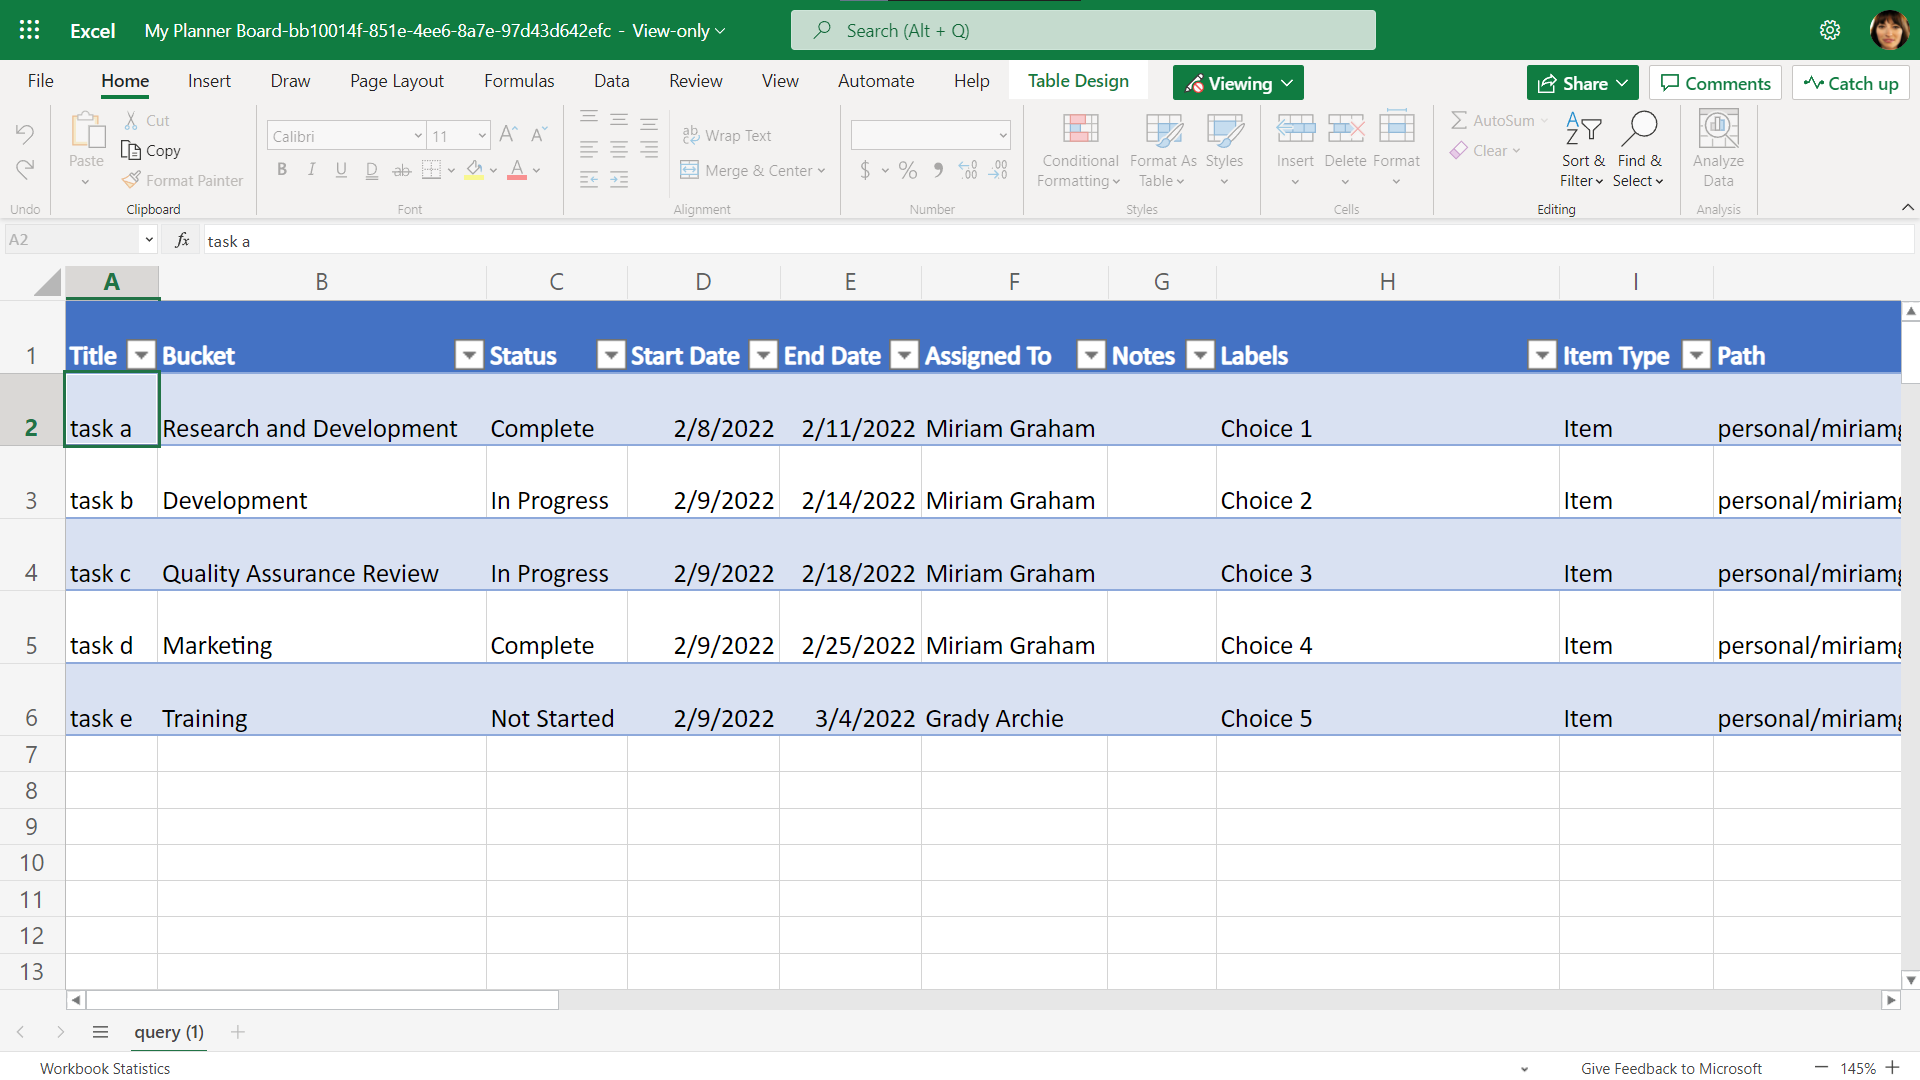
This is a simple oversight if you don’t use Excel often. Simply make sure your data is formatted as a table before importing it to Microsoft Lists.
Gotcha #2: Not all field types can be specified during the import process
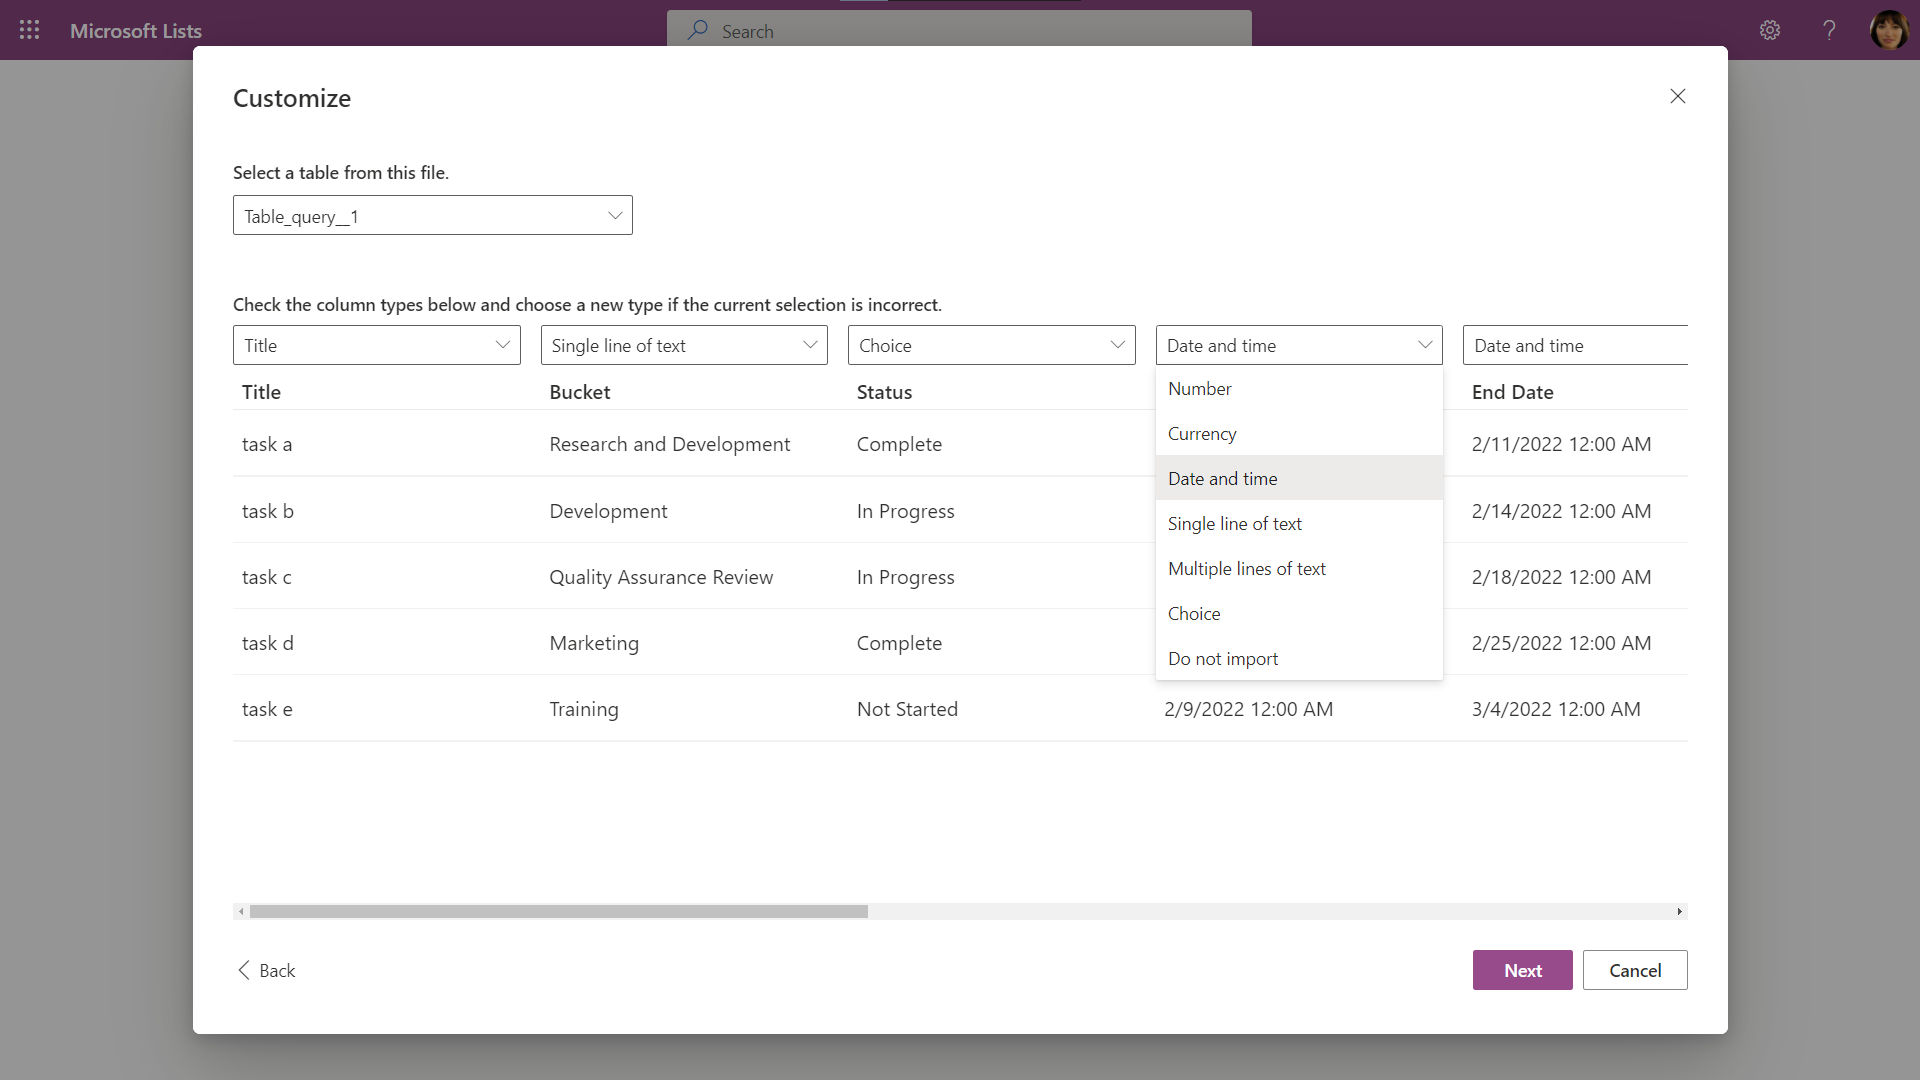
Before importing your data into a list, you can set some of the column types to help ensure your data is displayed properly. For example, you can specify CHOICE and DATE/TIME fields, but not PERSON fields.
When in doubt, my recommendation is use the default “Single line of text” field as it can be modified into different column types after the import process.
The only field that MUST be added post-import is the “Assigned To” (PERSON) field.
Gotcha #3 - “Board View” can be a little flaky with how it handles CHOICE fields
As Board view is new to Microsoft Lists at the time of writing this, it’s not surprising to find a few bugs. We can only hope they’ll be ironed out in the coming weeks and months.
One bug I’ve stumbled across is when Board view doesn’t display any of the values from the CHOICE field we selected. Thankfully, this seems to resolve itself after a page refresh or two so it’s not a showstopper.
Another bug I’ve discovered is very similar to the first, but occurs if you choose to create a new CHOICE field along with your new Board view.
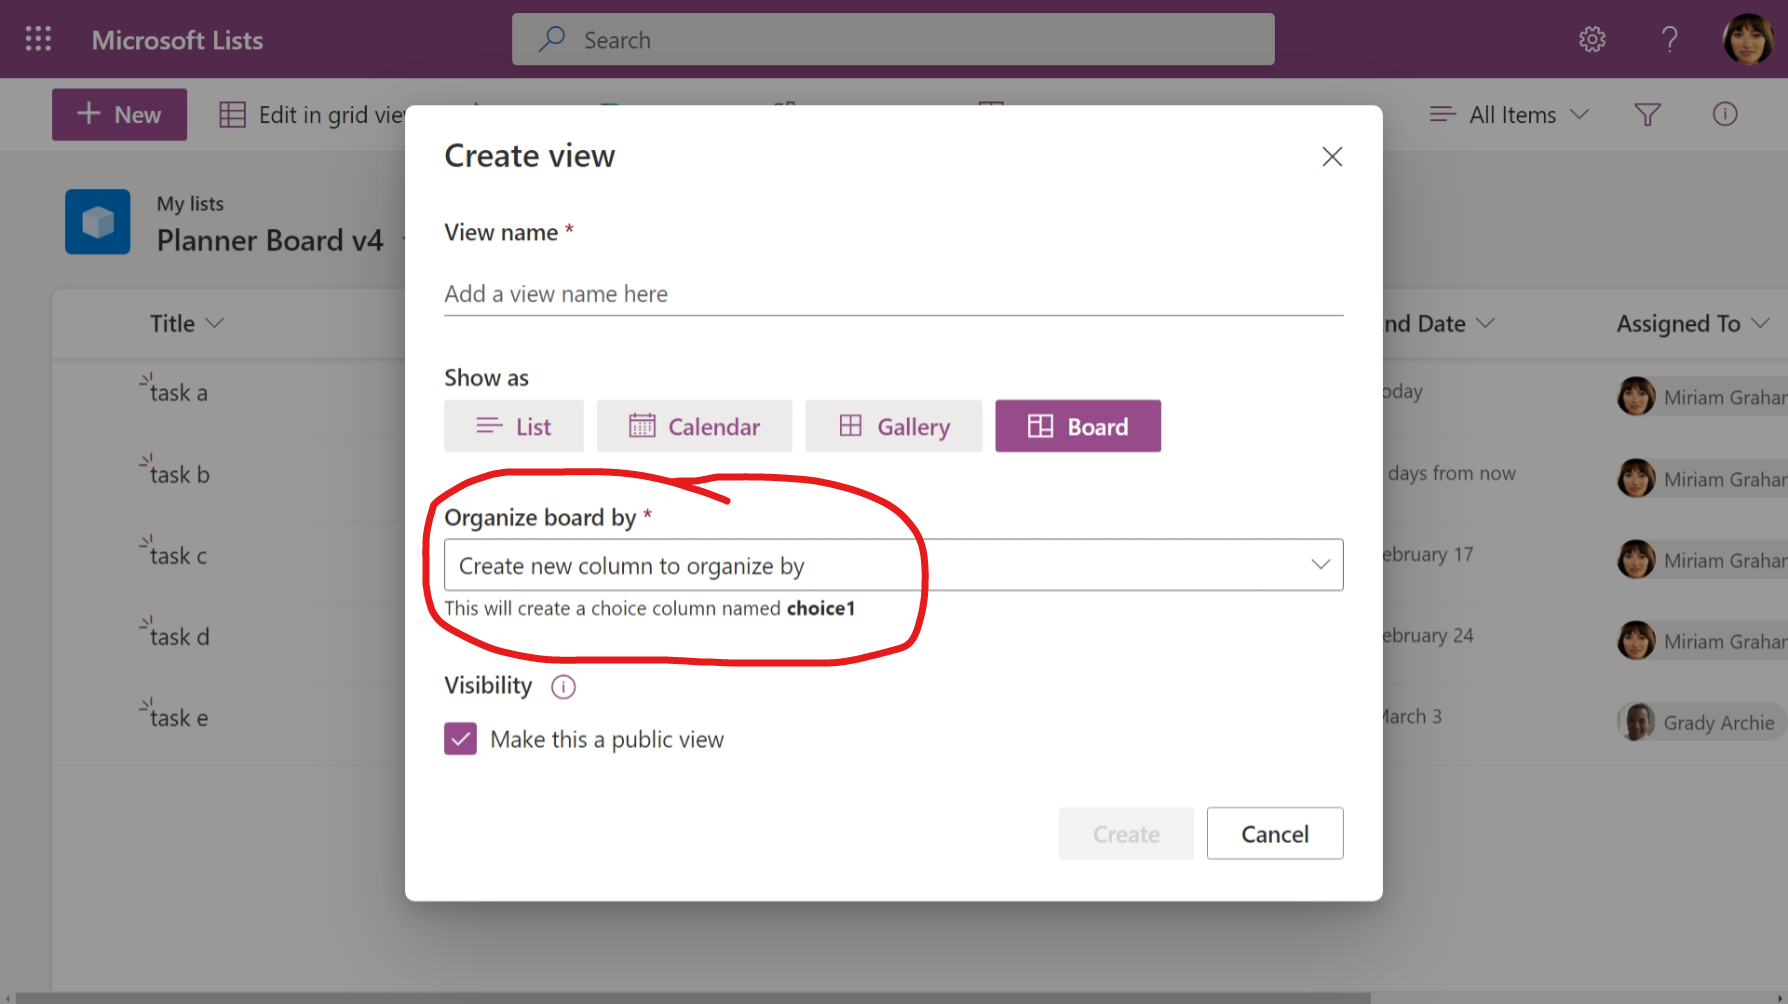
The newly created CHOICE column isn’t always visible in the new Board view, and in some instances, this new field doesn’t appear in the default “All Items” view either. However, the column will appear when editing a single record in the list.
In closing
Board view in Microsoft Lists may be another nail in the coffin for Microsoft Planner. With Lists, we get significantly more control over our data, but it does come with a slightly higher learning curve.
If you are in the market for a task management tool that simply does tasks and does them well, then Planner is still your go to. If you are in the market for something that offers greater controls and customization, then give Microsoft Lists a try.
Thanks for reading!