

How to Create a Q&A Forum in Office 365

Contents


Learn how to create a Q&A community forum using Yammer, SharePoint and Microsoft Teams. Steps and screenshots inside
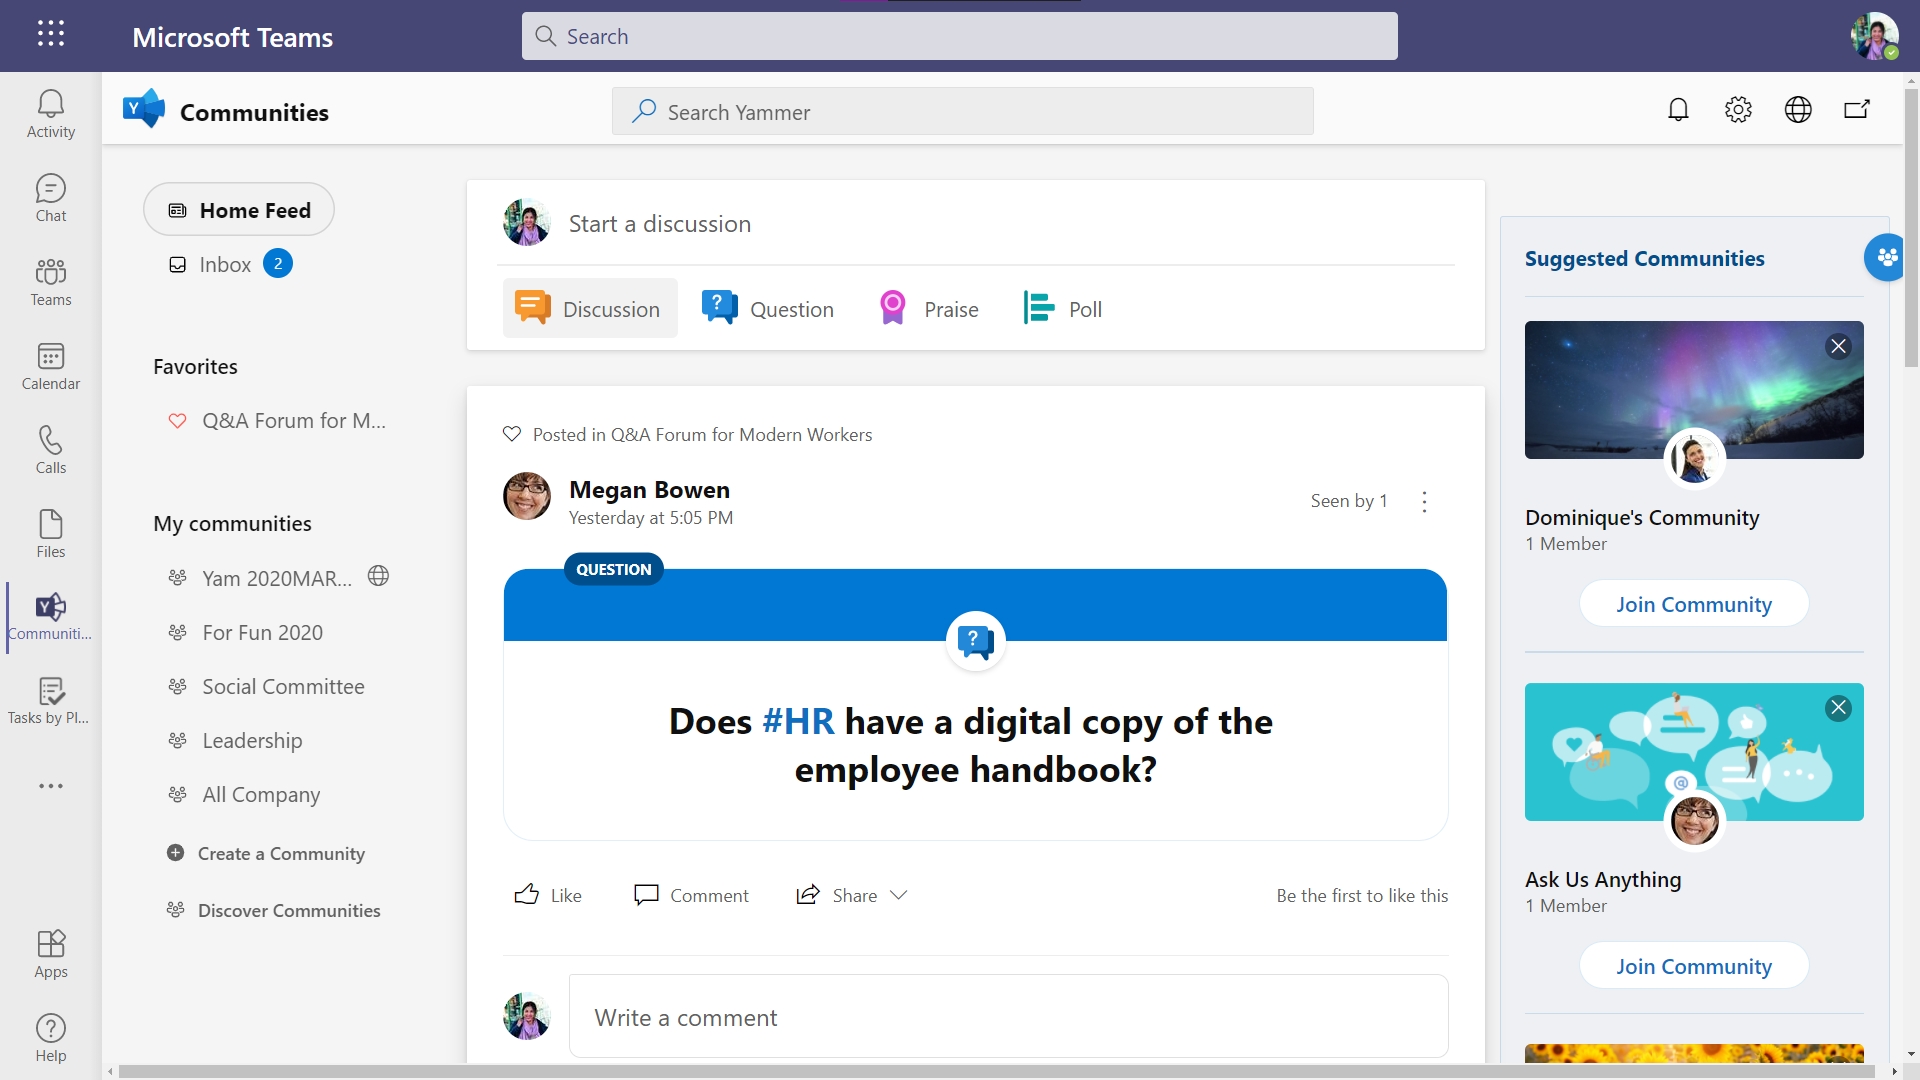
The Q&A forum is a public Yammer Community. Don't worry, the term "public" in this case, simply means anyone in your organization (with an active O365 license).
In practice, public communities allow anyone in your organization to engage, without having to be invited first.
The purpose of this community forum is to redirect common questions out of your email inbox and into a more effective space.
Also, who wouldn't appreciate a few less emails per day?
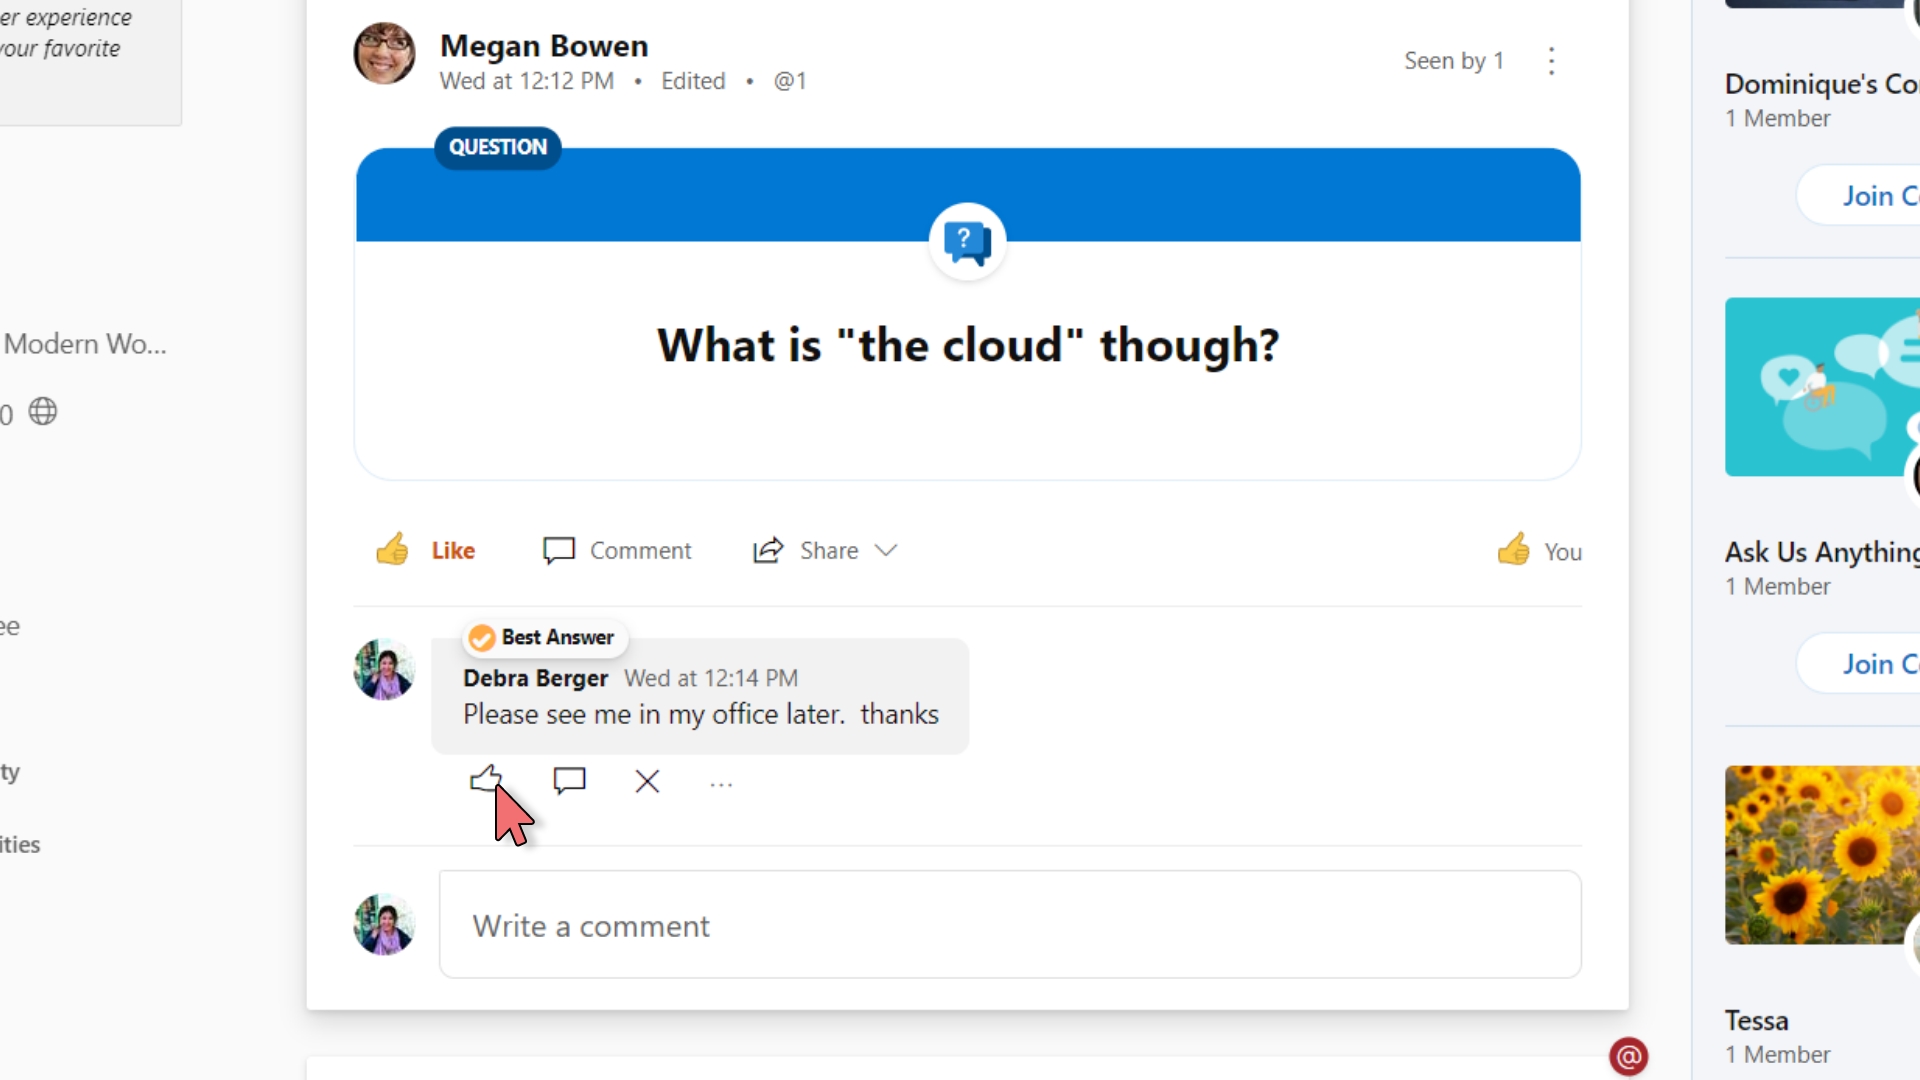
We've also setup this community to use the "Question" post type as the default. This not only helps questions stand out, but also allows your subject matter experts to mark the best response in the comments.
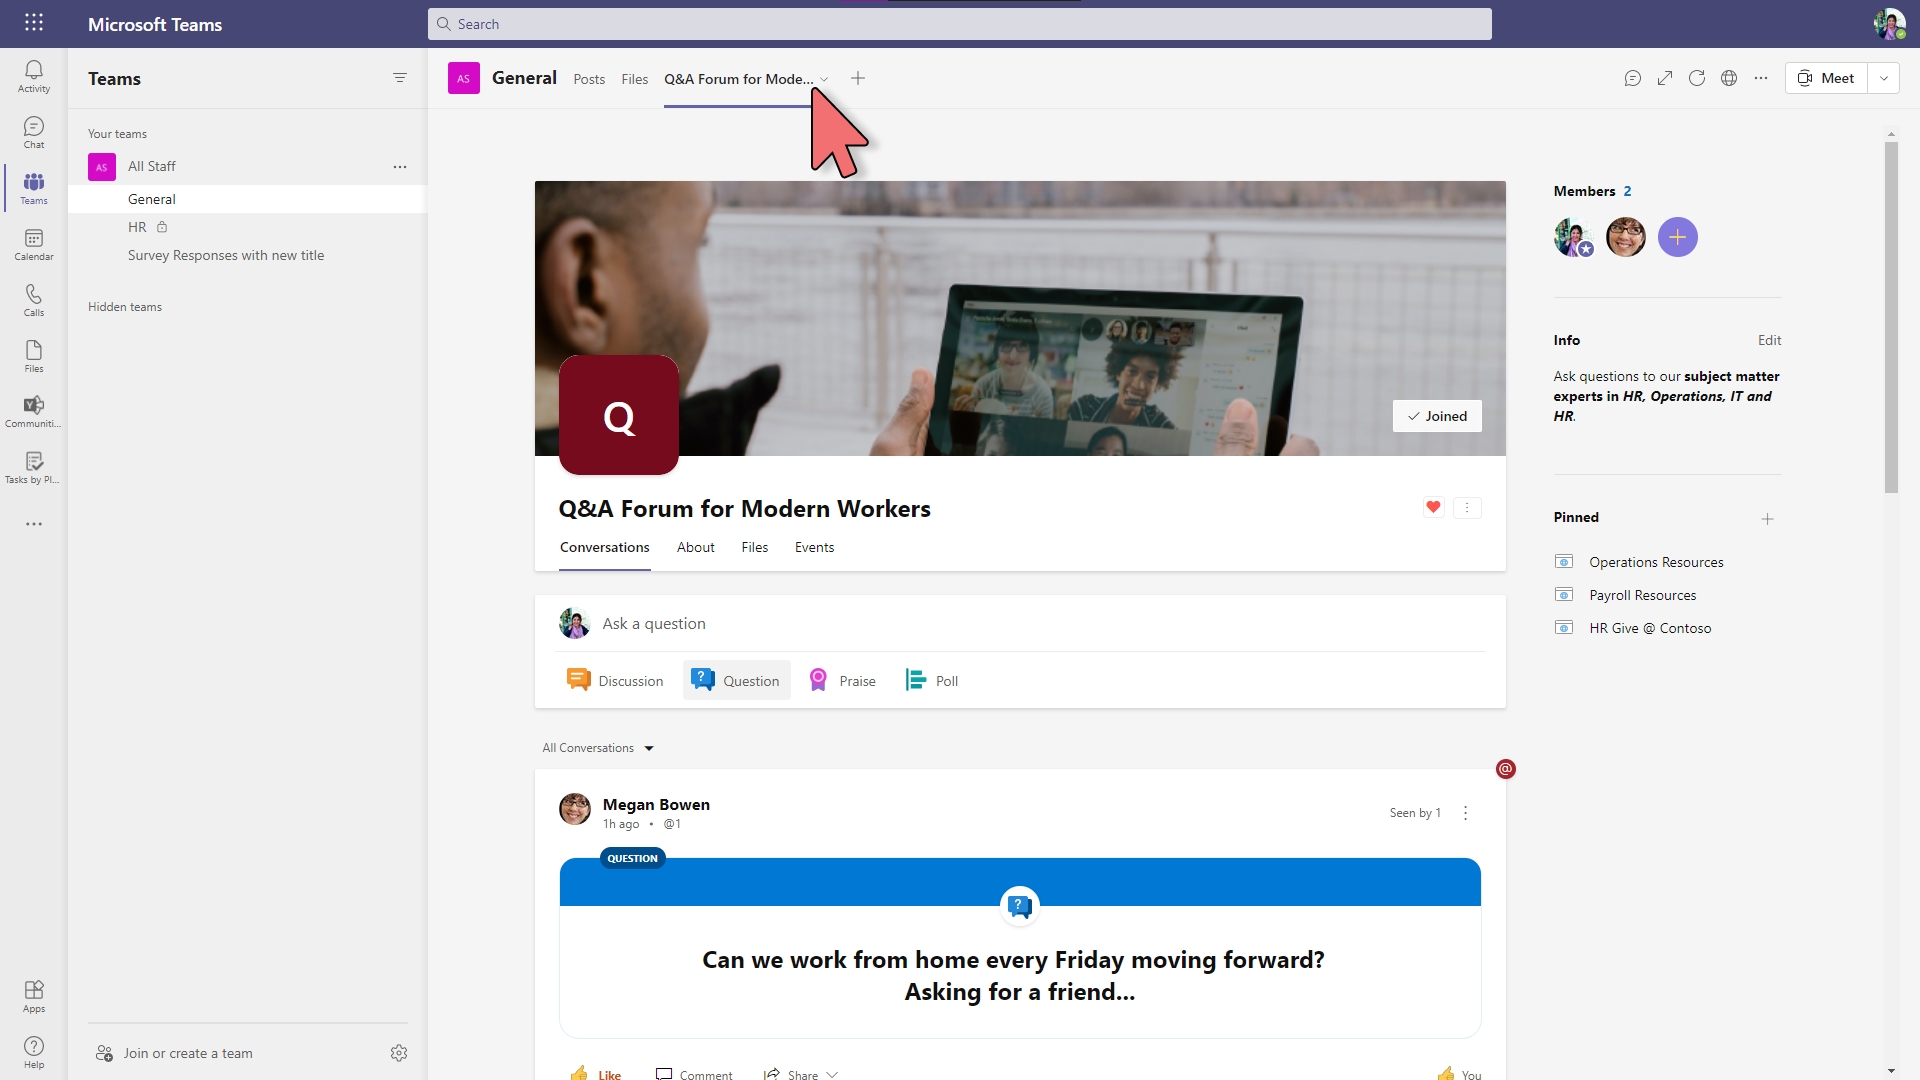
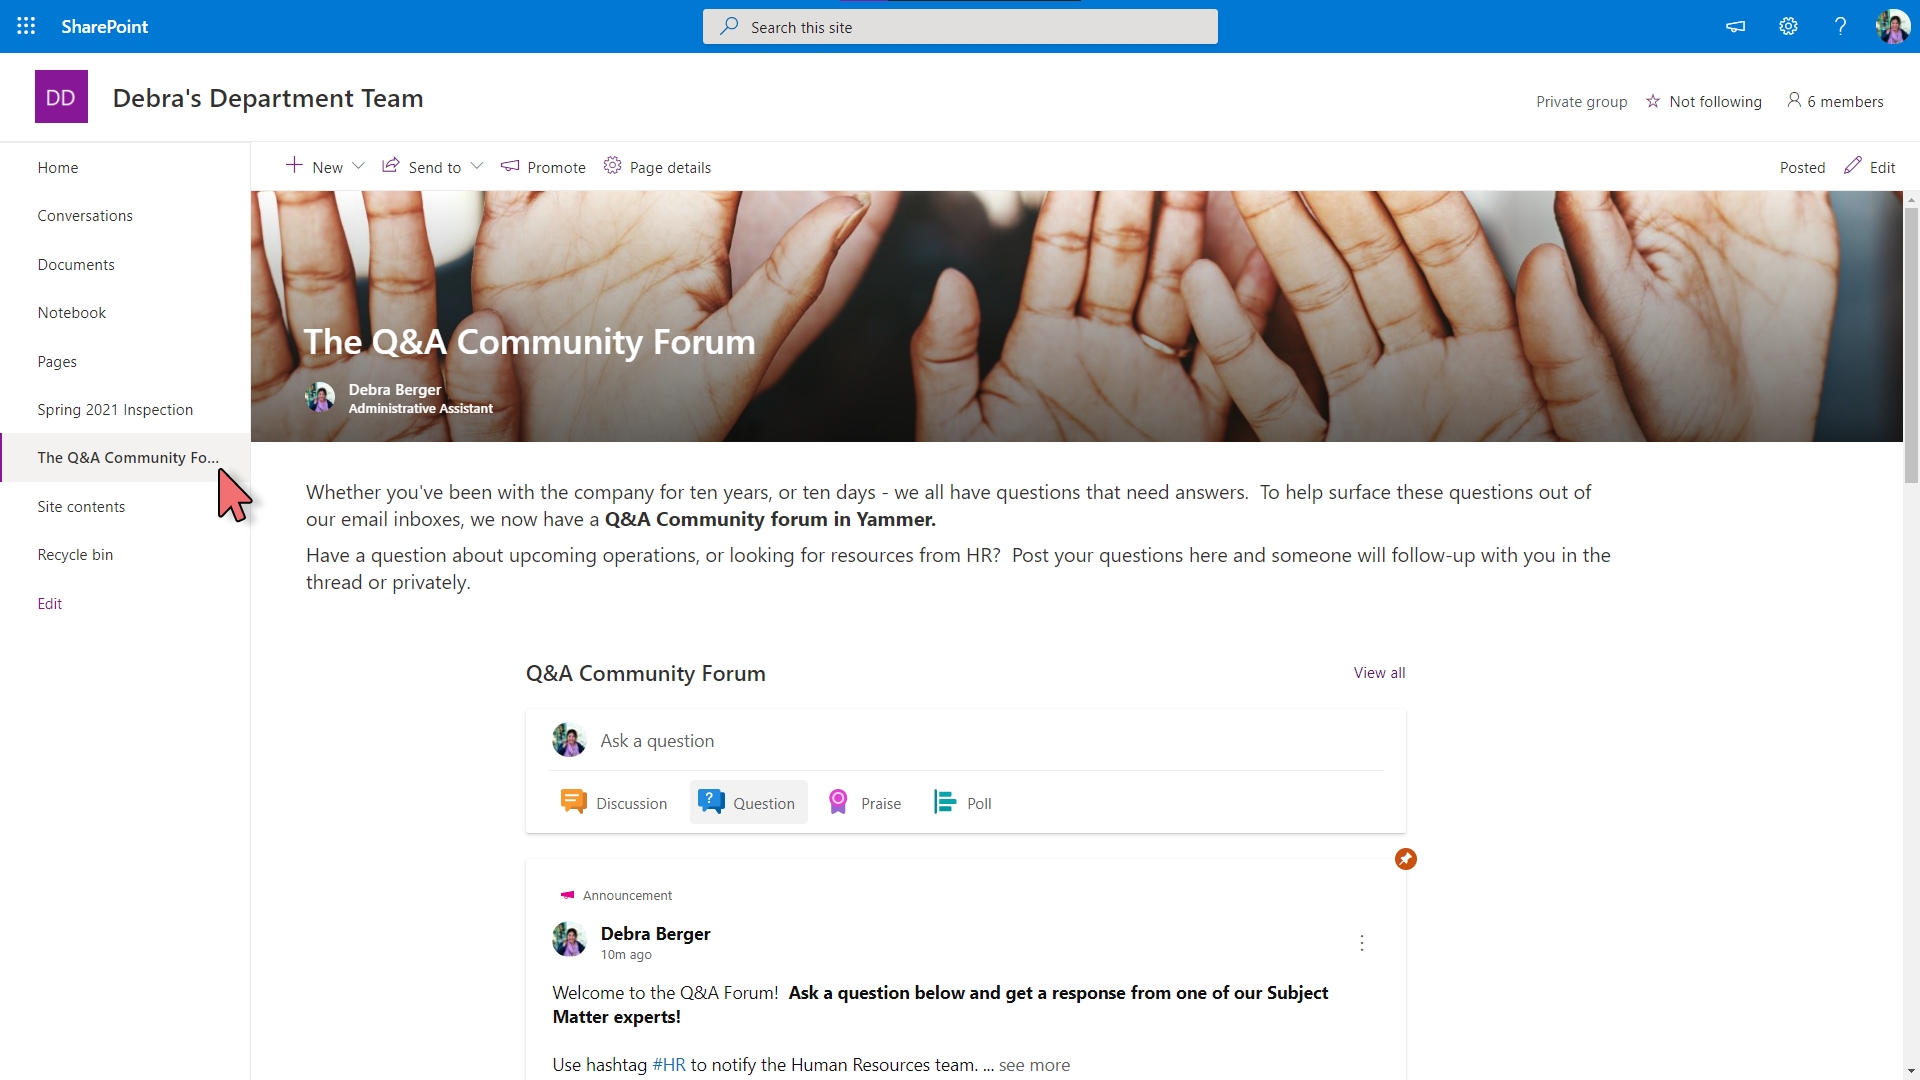
To increase exposure and access to the community - we've embedded it to a high-traffic SharePoint site. Because it's a public community, staff members can post their questions right from SharePoint.

Lastly, you can also add Yammer communities as channel tabs in Microsoft Teams. For example, a Q&A Community would be a welcome addition to an "Onboarding/Training" channel to help new staff members find the support they need.
Interested in trying this yourself? Read the steps below to build your own Q&A community forum.
Create the Q&A Community
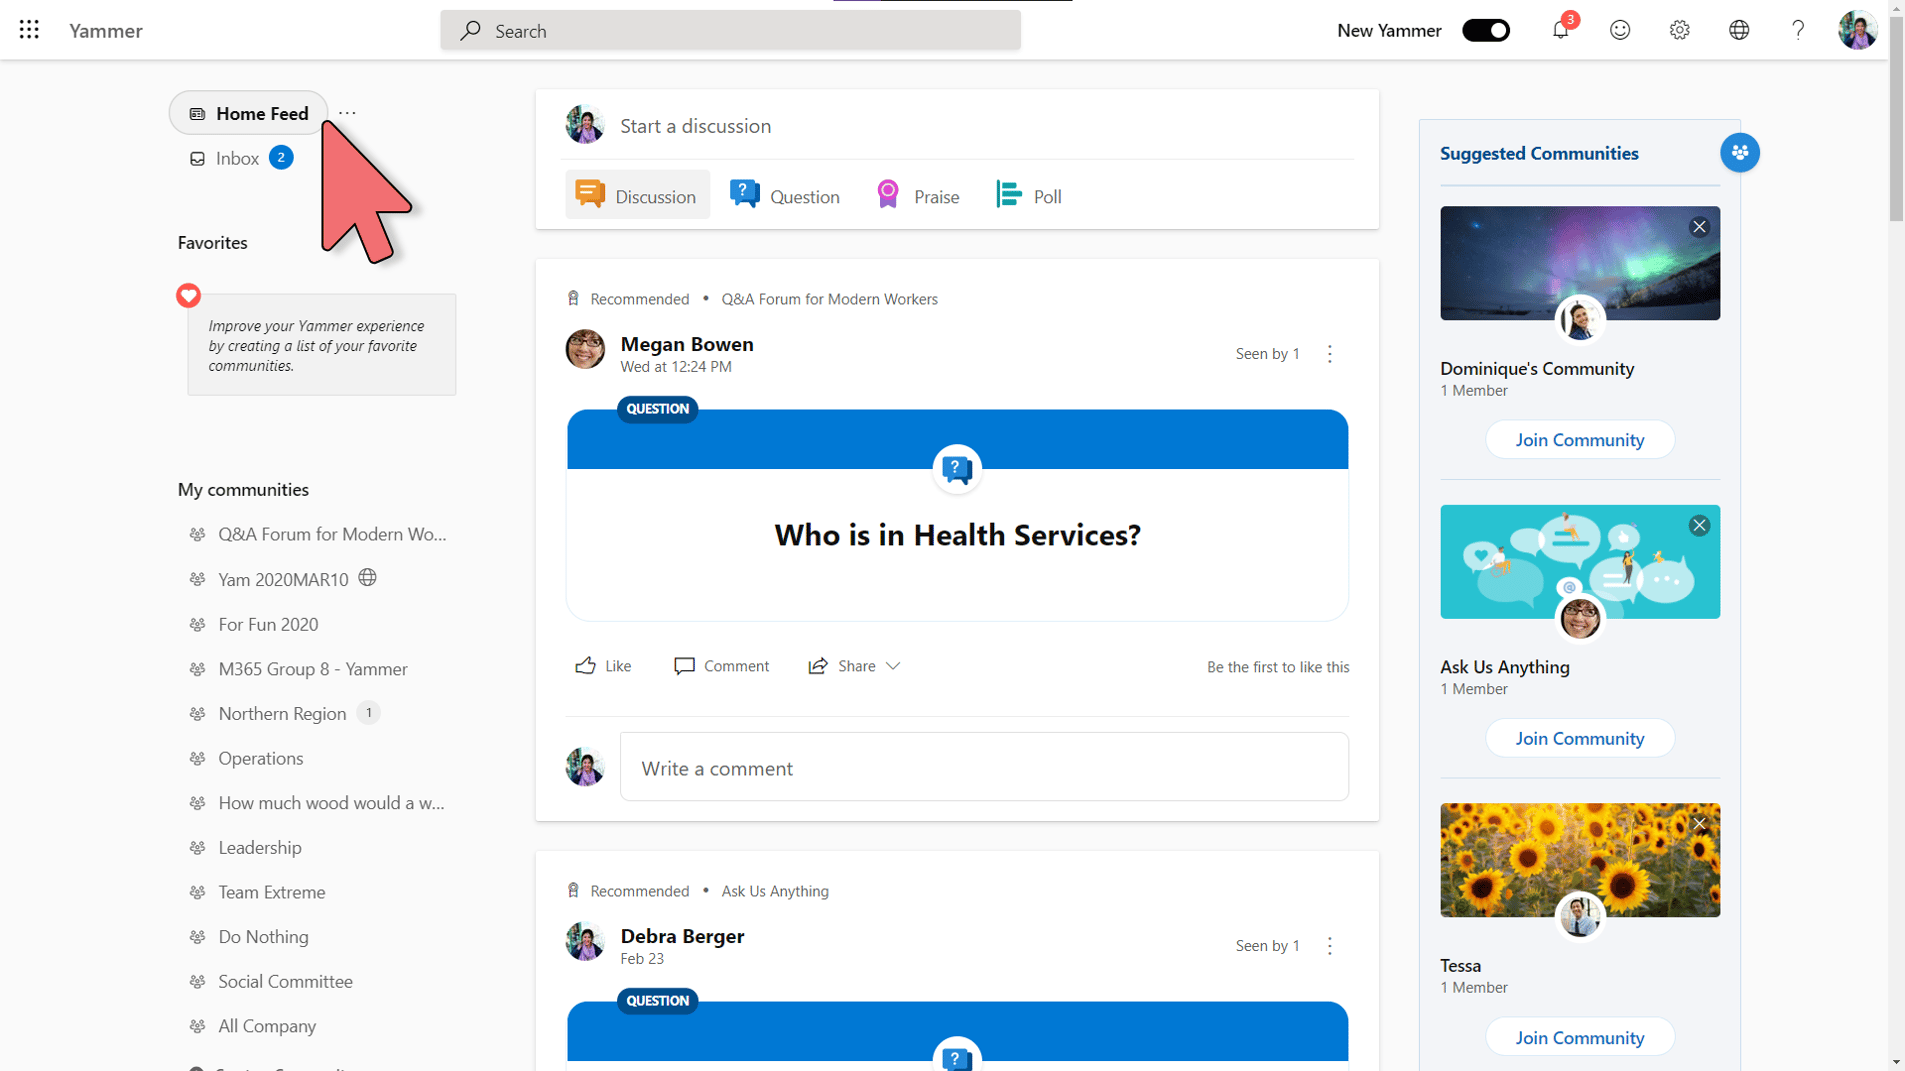
1.) Login to the New Yammer
- Login from www.office.com by locating Yammer in the navigation bar.
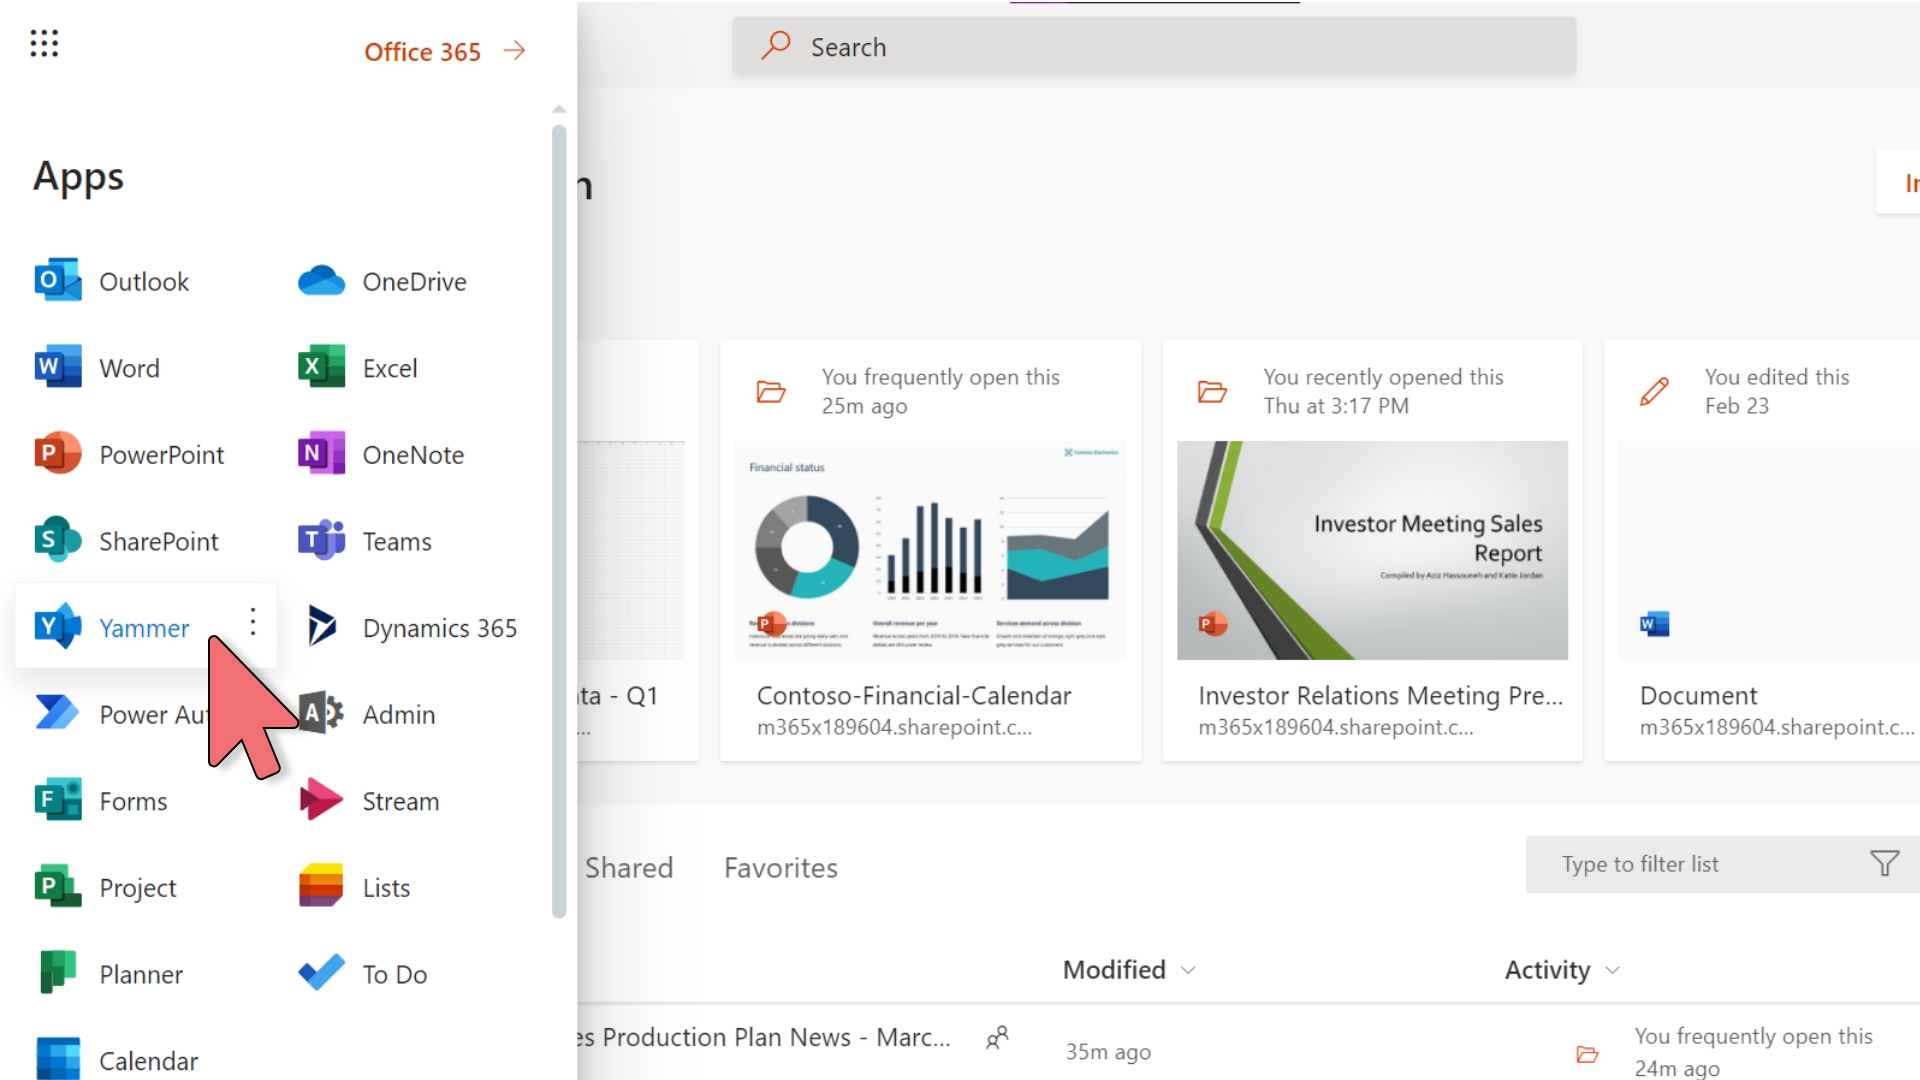
- You can also login from anywhere in Office 365 using the waffle menu
- You can also use the Communities app in Microsoft Teams to access and create Yammer Communities
2.) Create a new Public Community
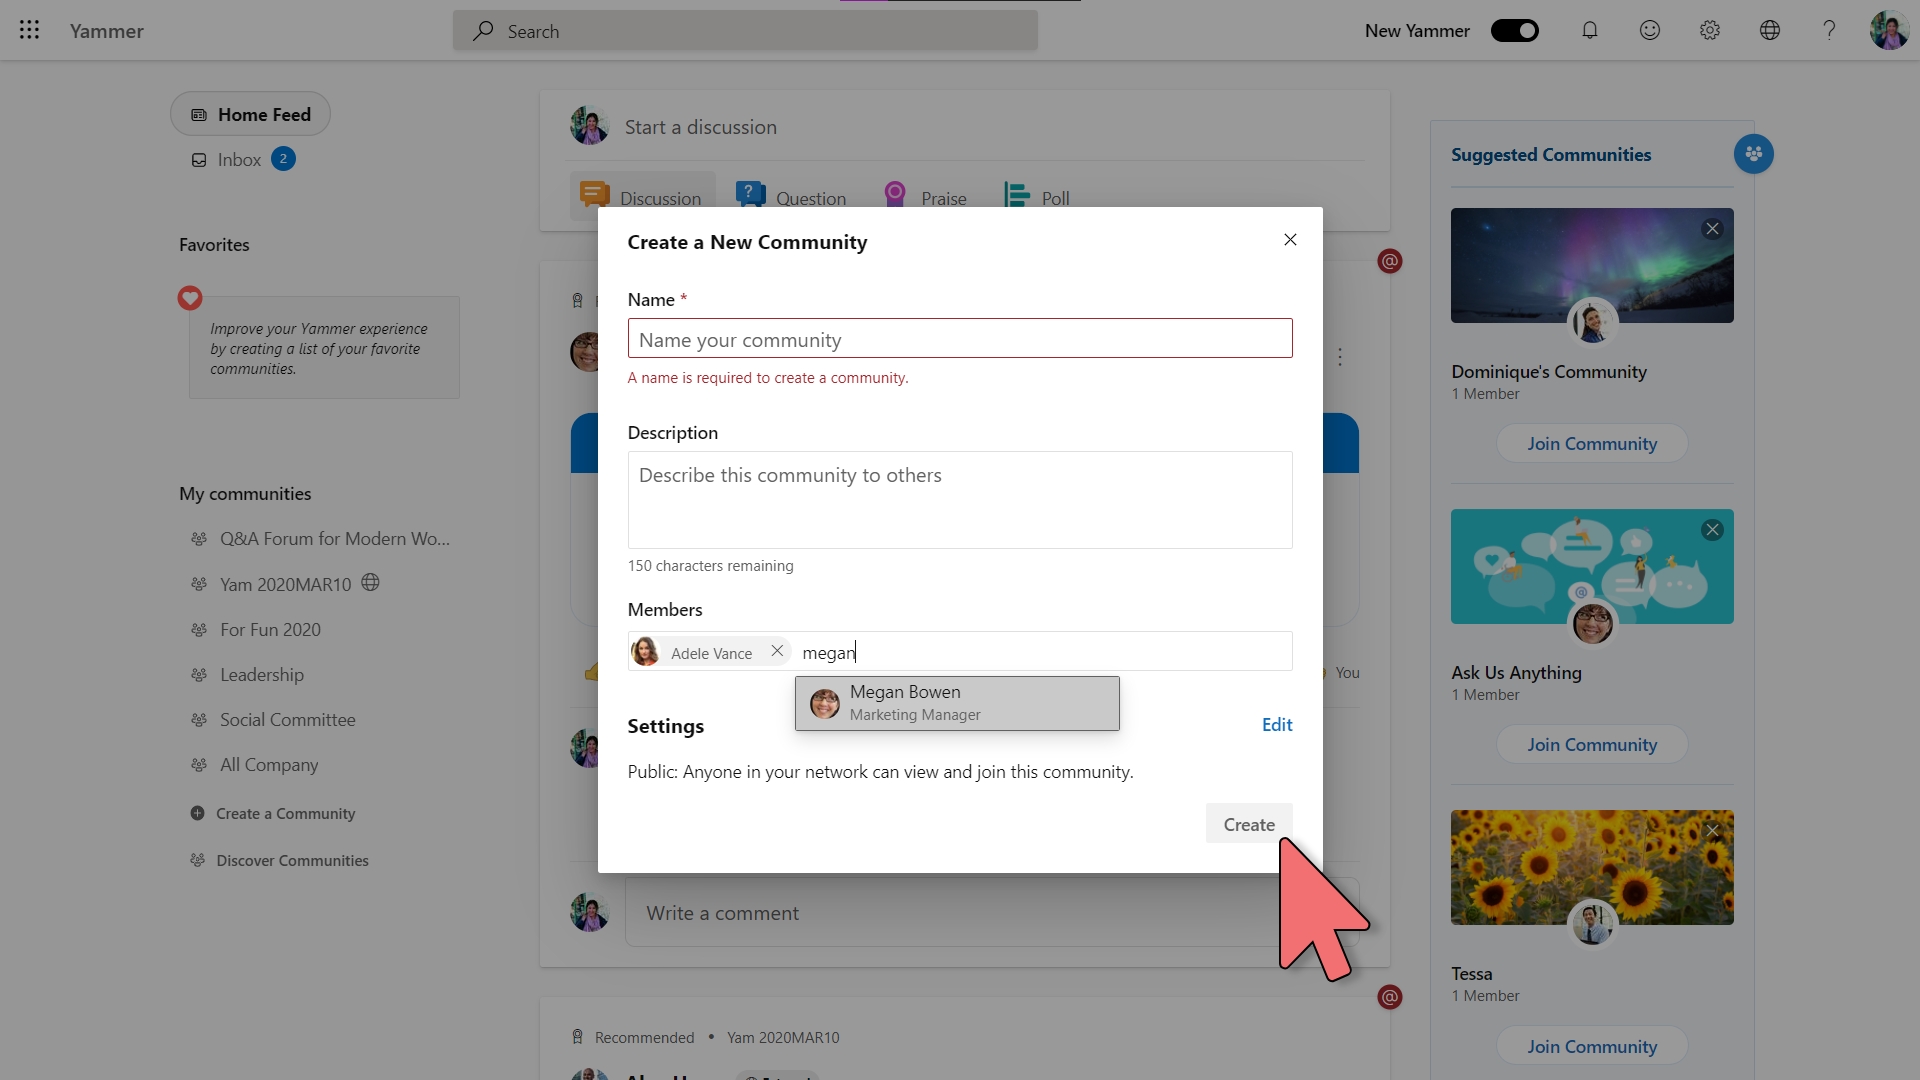
- The default community type will likely be set to "Public" already, so you shouldn't have to do much beyond giving your new community a catchy name and description.
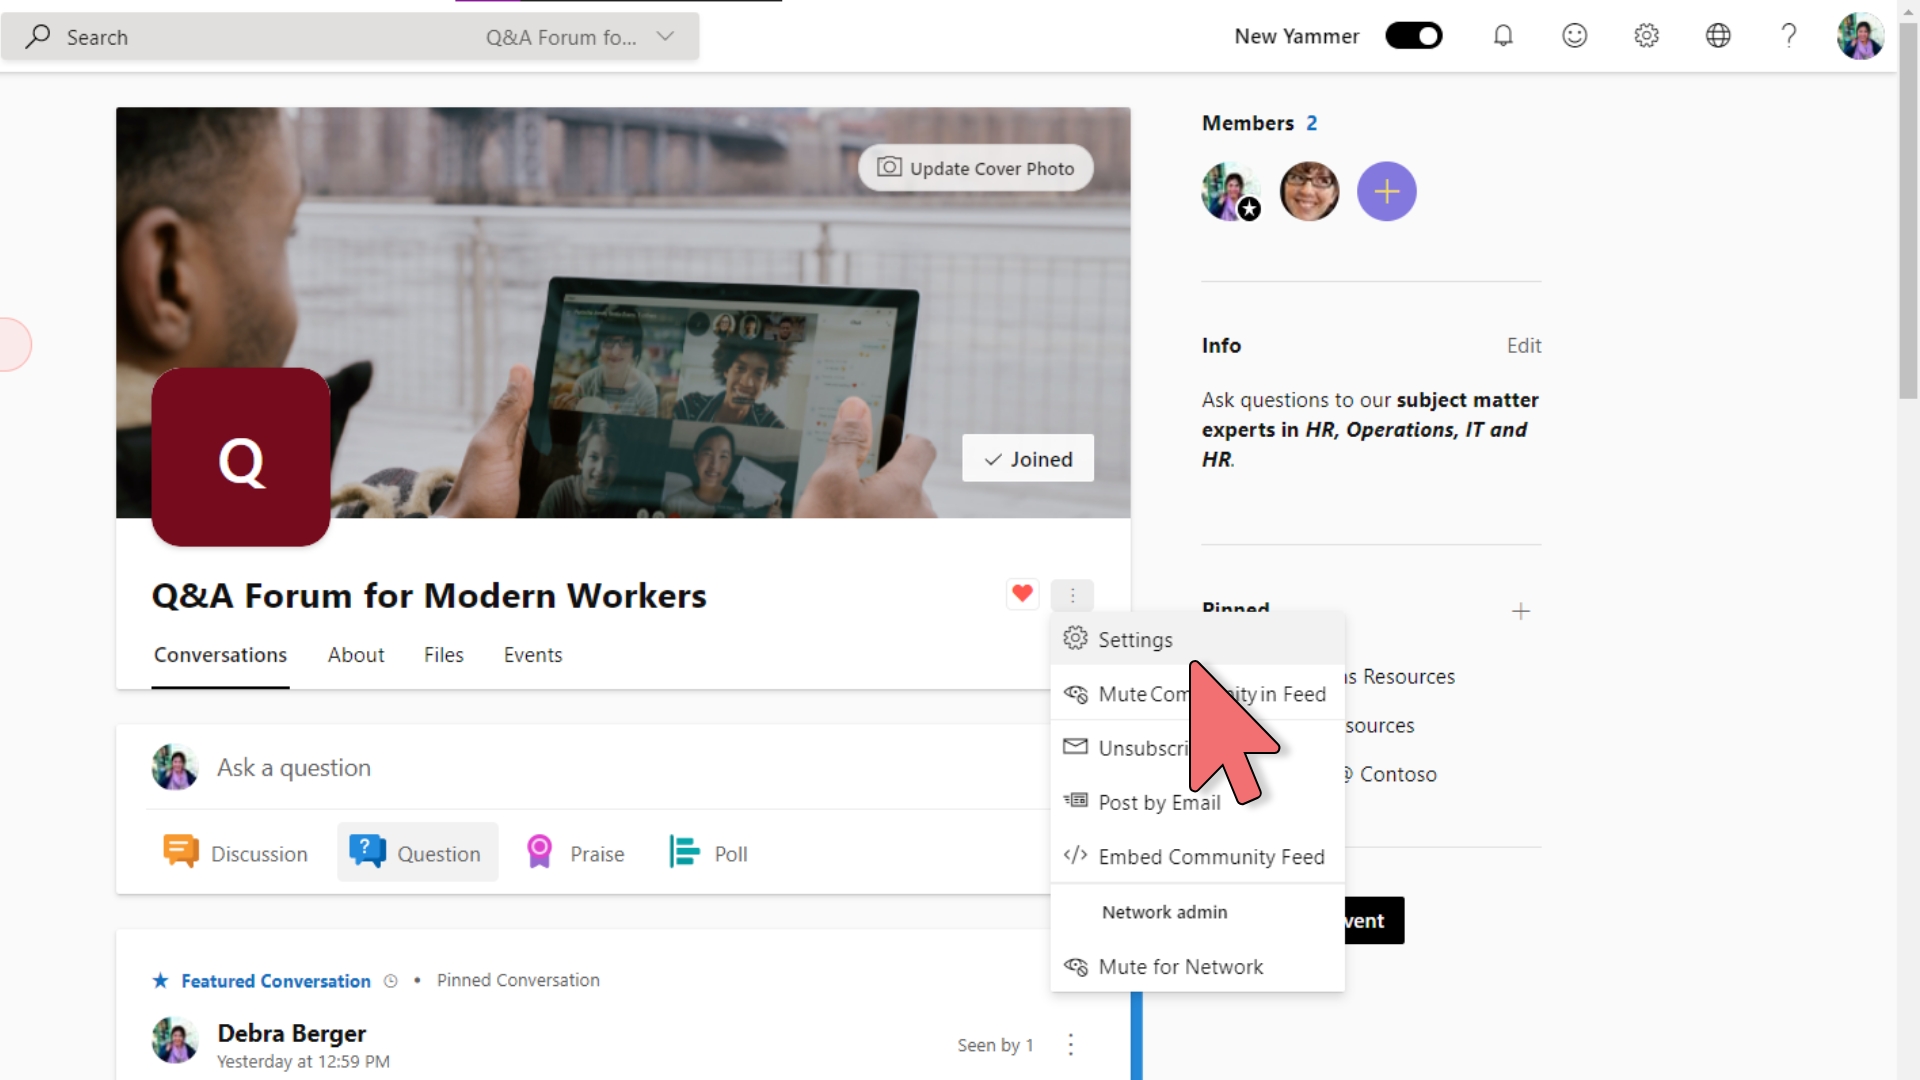
3.) Open community settings
4.) In Settings, set the "default publisher type" to "Question"
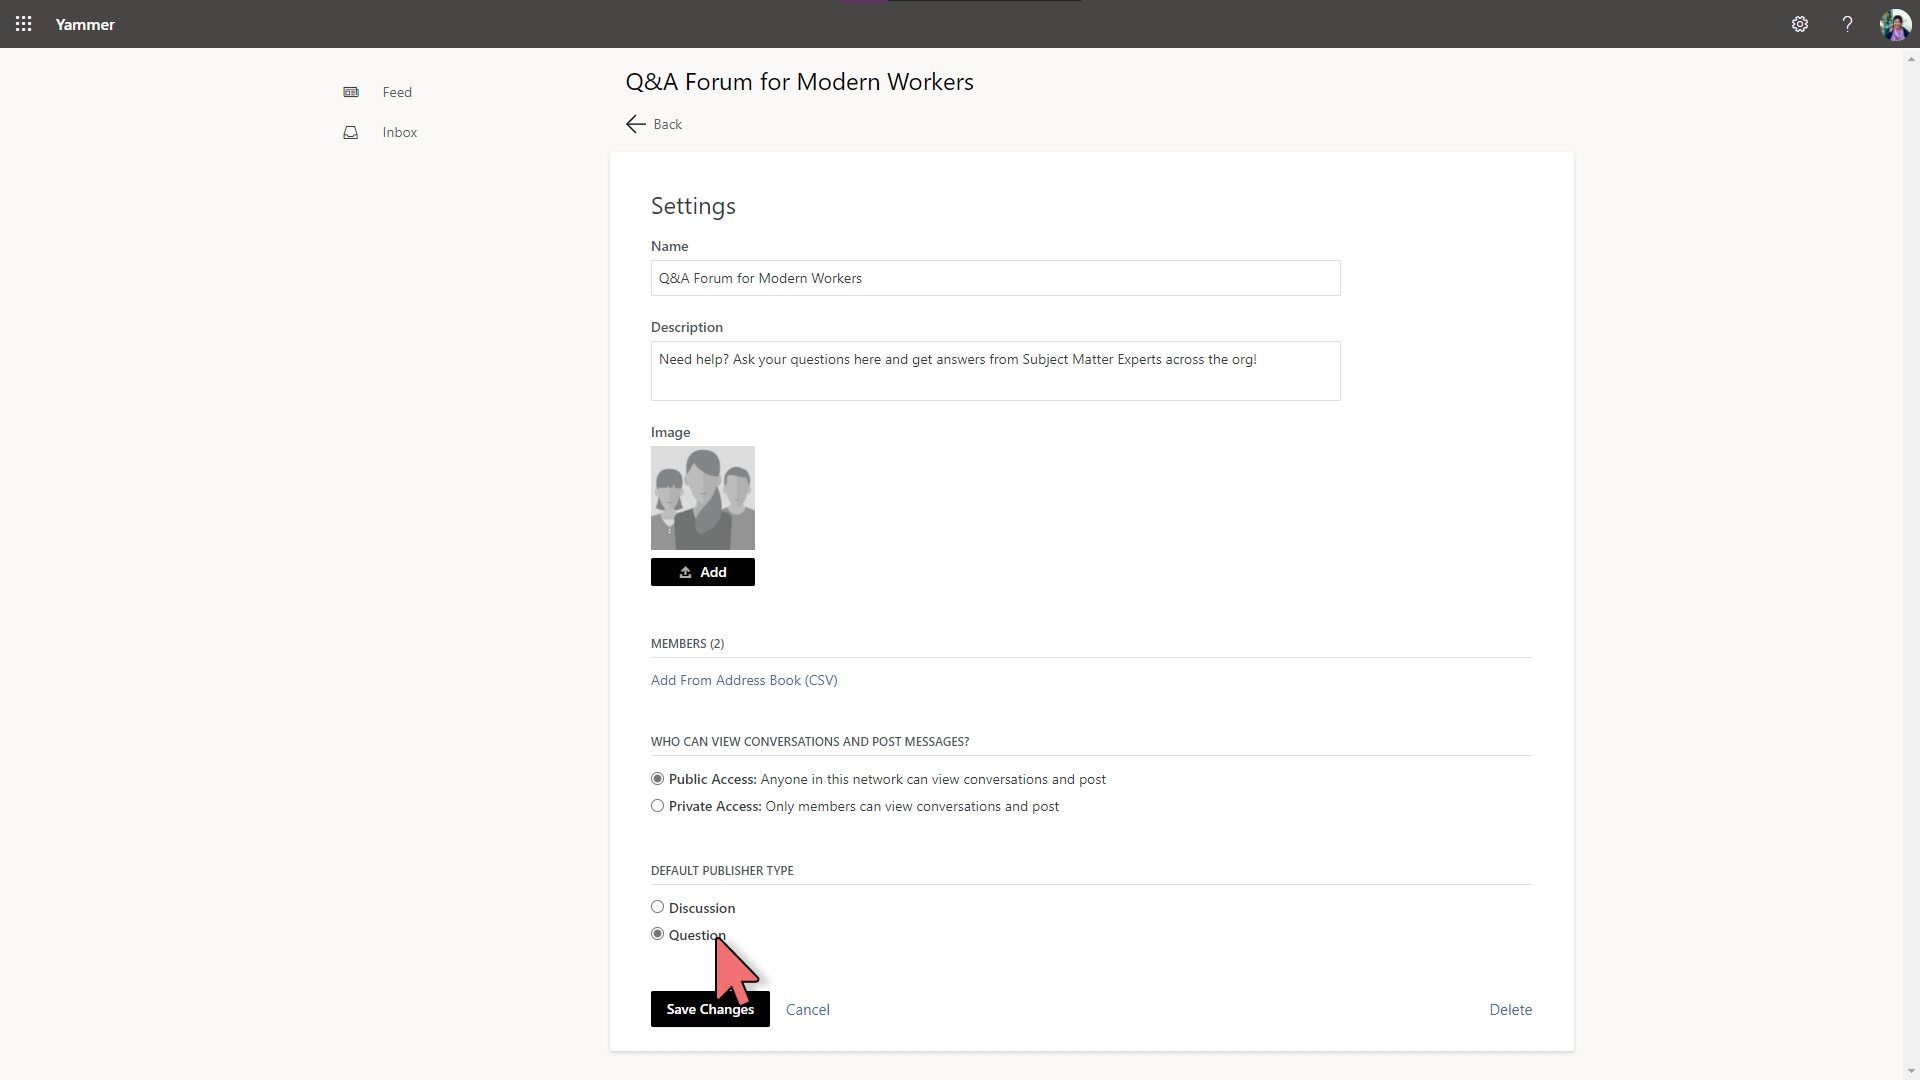
- Don't forget to hit "SAVE".
5.) Invite Subject Matter Experts (SMEs) to the community (optional)
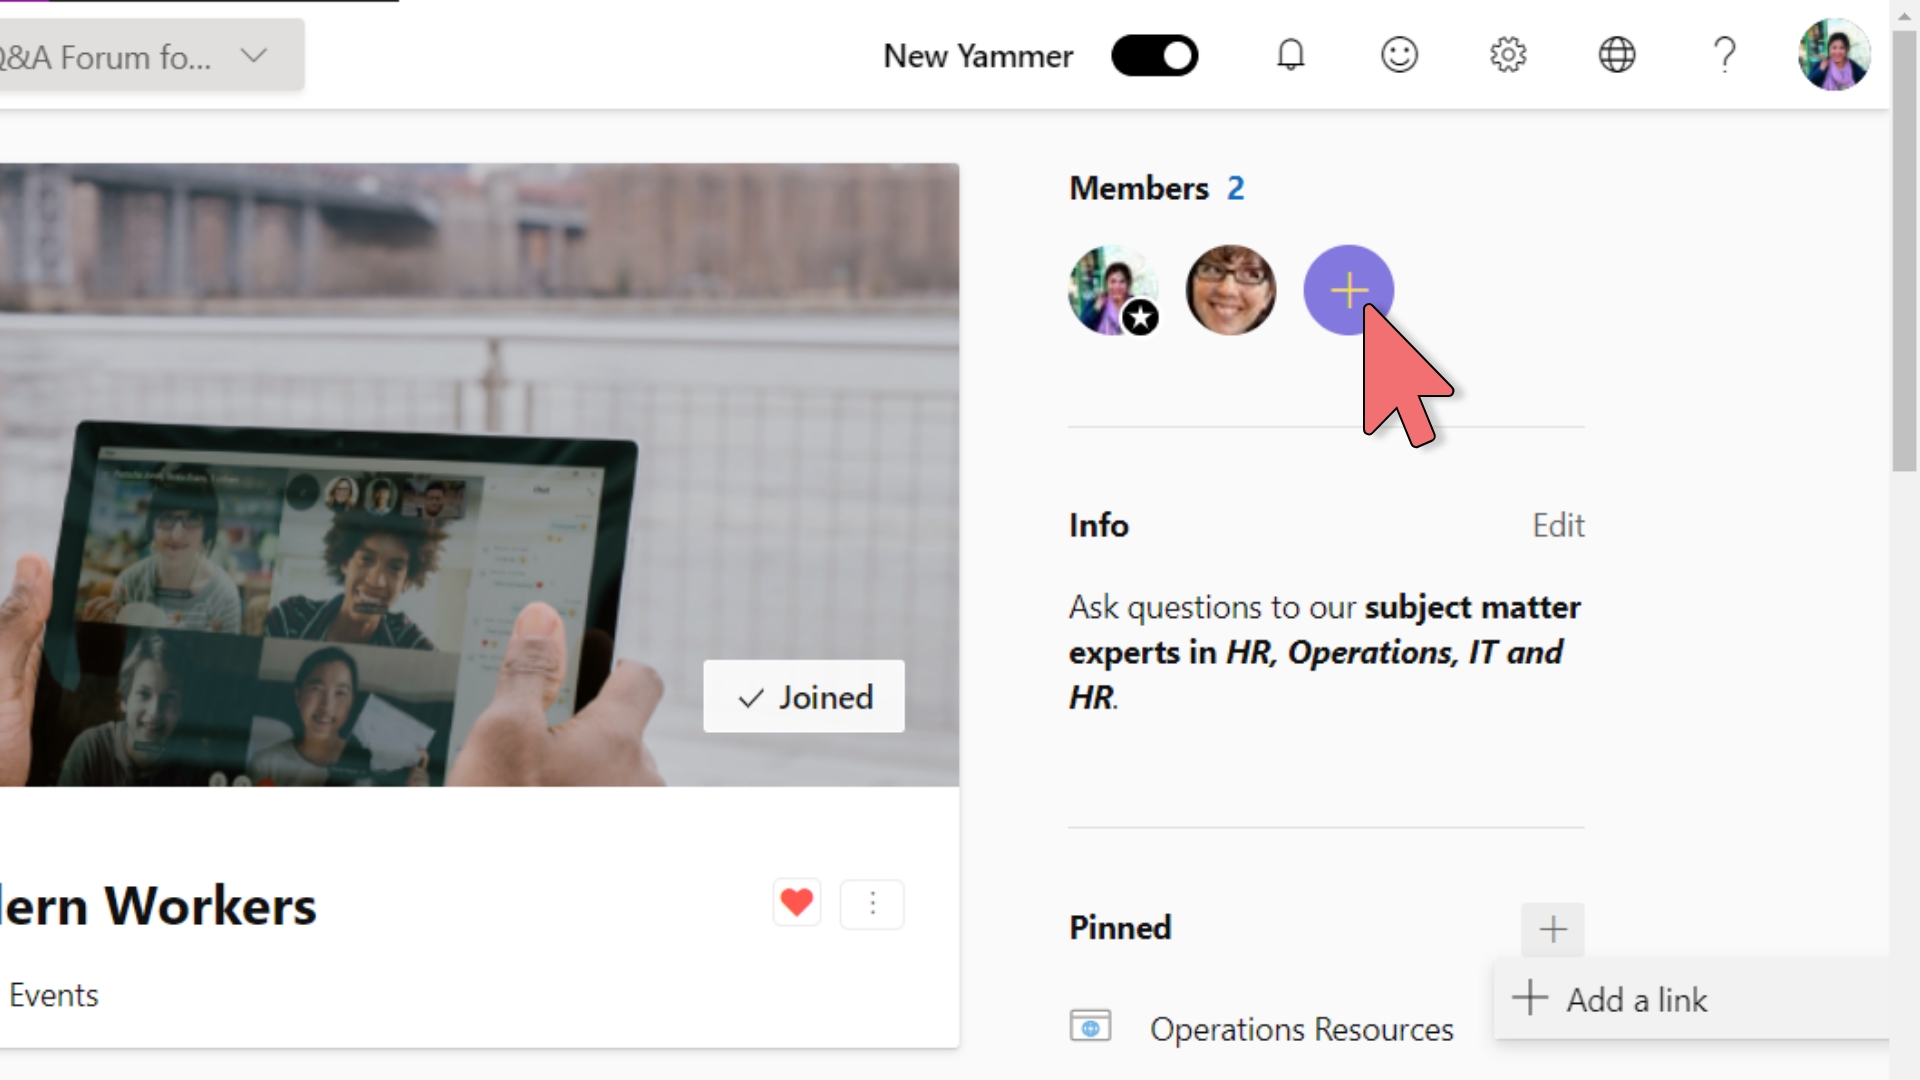
- Inviting additional SMEs to your community will help grow adoption of the forum.
- After joining, SMEs can opt-in for push notifications to monitor when new questions come in.
6.) Add a Community Cover Photo (optional)
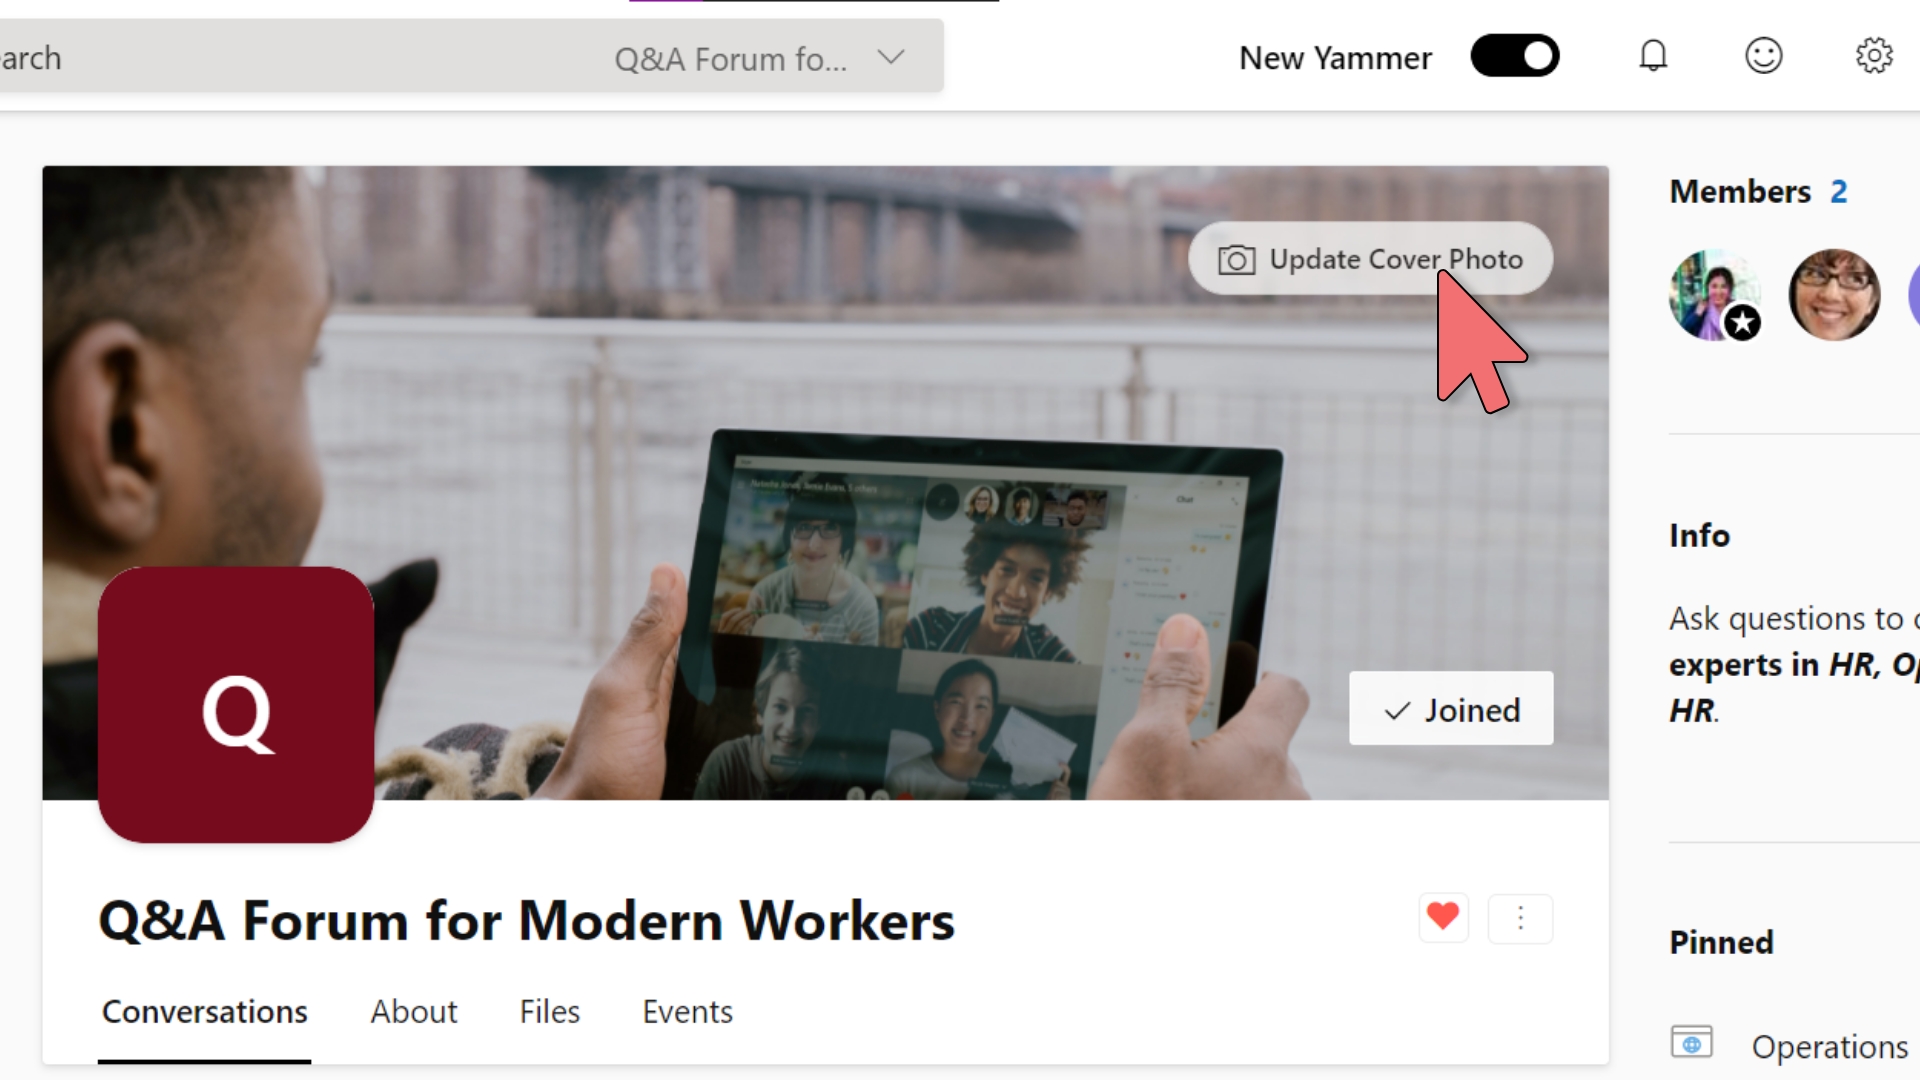
- Make the community your own by adding a cover photo. As per Microsoft:
The file must be 20 MBs or less and either a .png, .jpeg, or a non-animated .gif. The web cover photo dimensions are 680 px by 275 px.
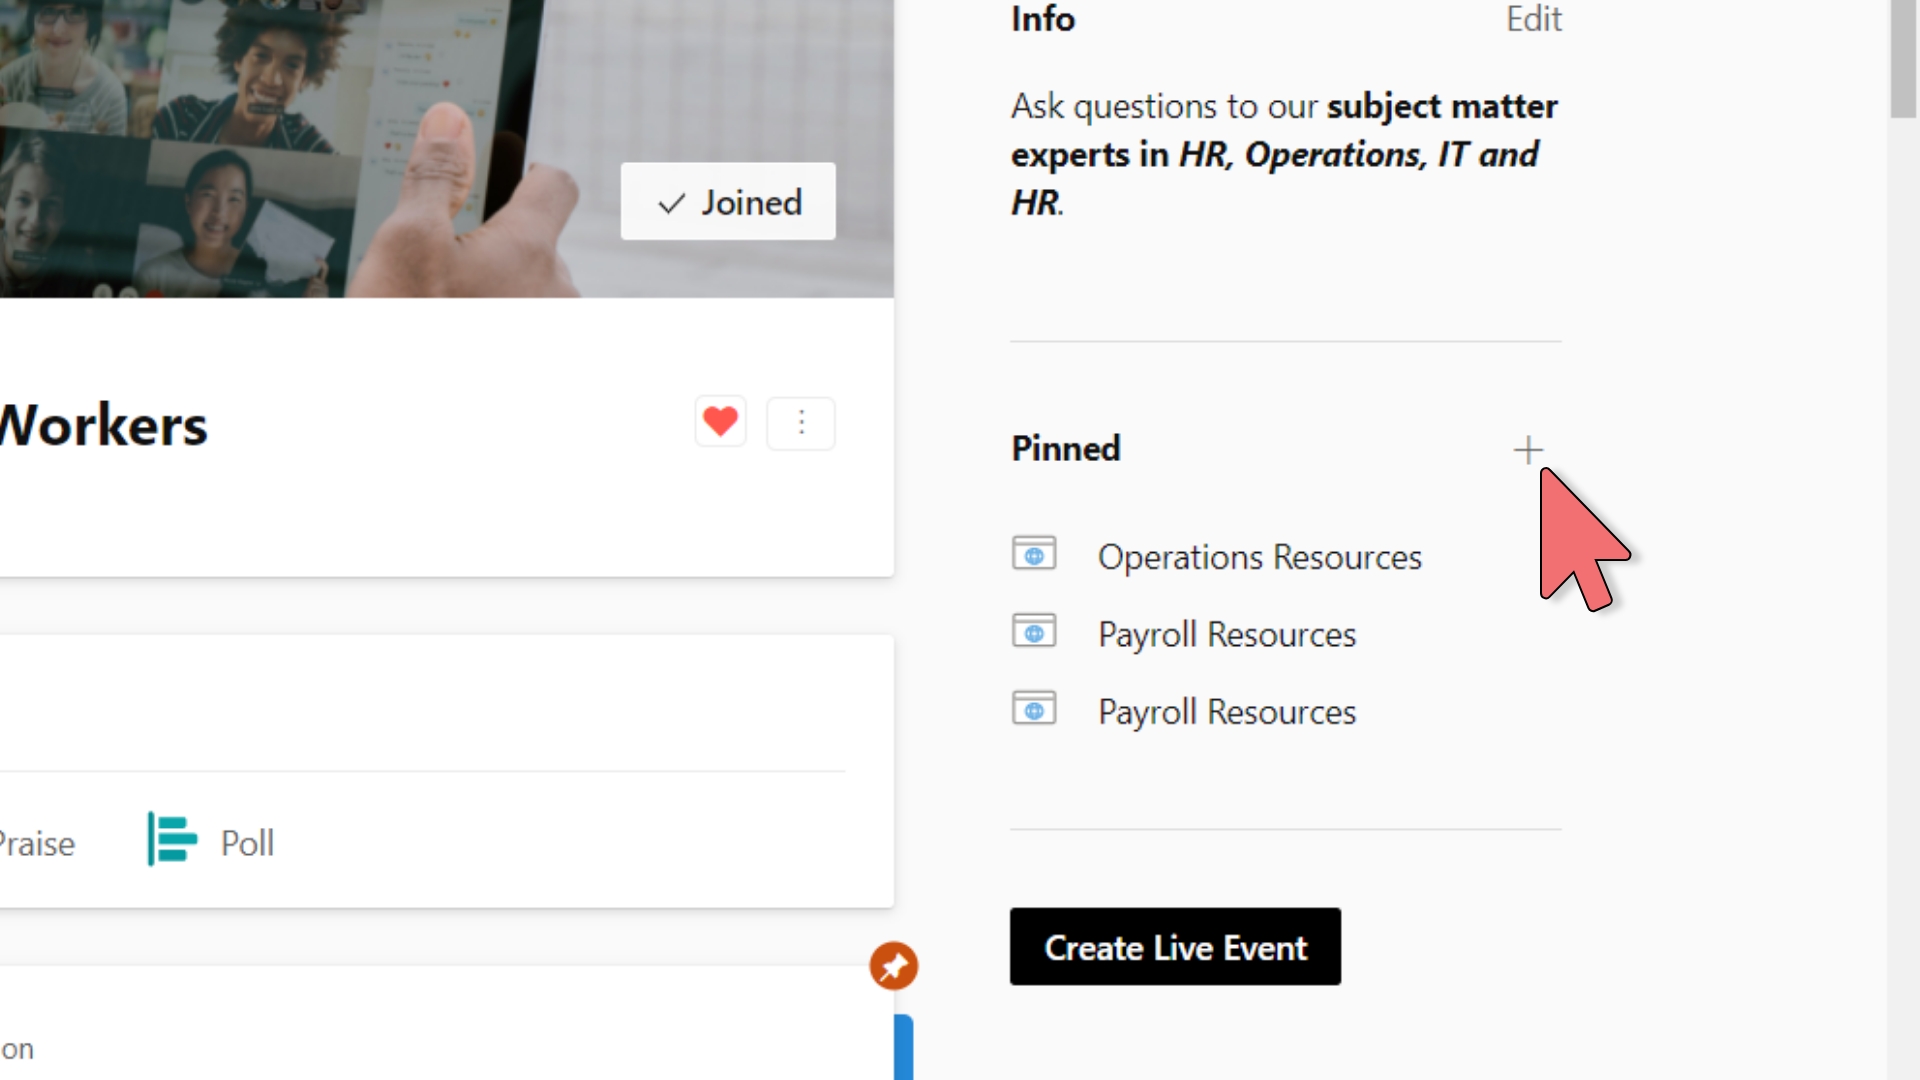
7.) Update the "Pinned" section with links to popular resources (optional)
8.) Pin a Welcoming Message to the Top of the Community Forum (optional)

- Pinning a brief post to the top of the community is the easiest way to get important information seen by community visitors.
Now that the community is setup, let's promote it to the rest of the organization.
Promote the Q&A Community Forum via SharePoint
The following steps assumes that you have Member or Owner permissions to the SharePoint site you are working with. We will be embedding the Yammer community to a new SharePoint page.
If you do cannot create or edit pages, talk to your IT Admin.
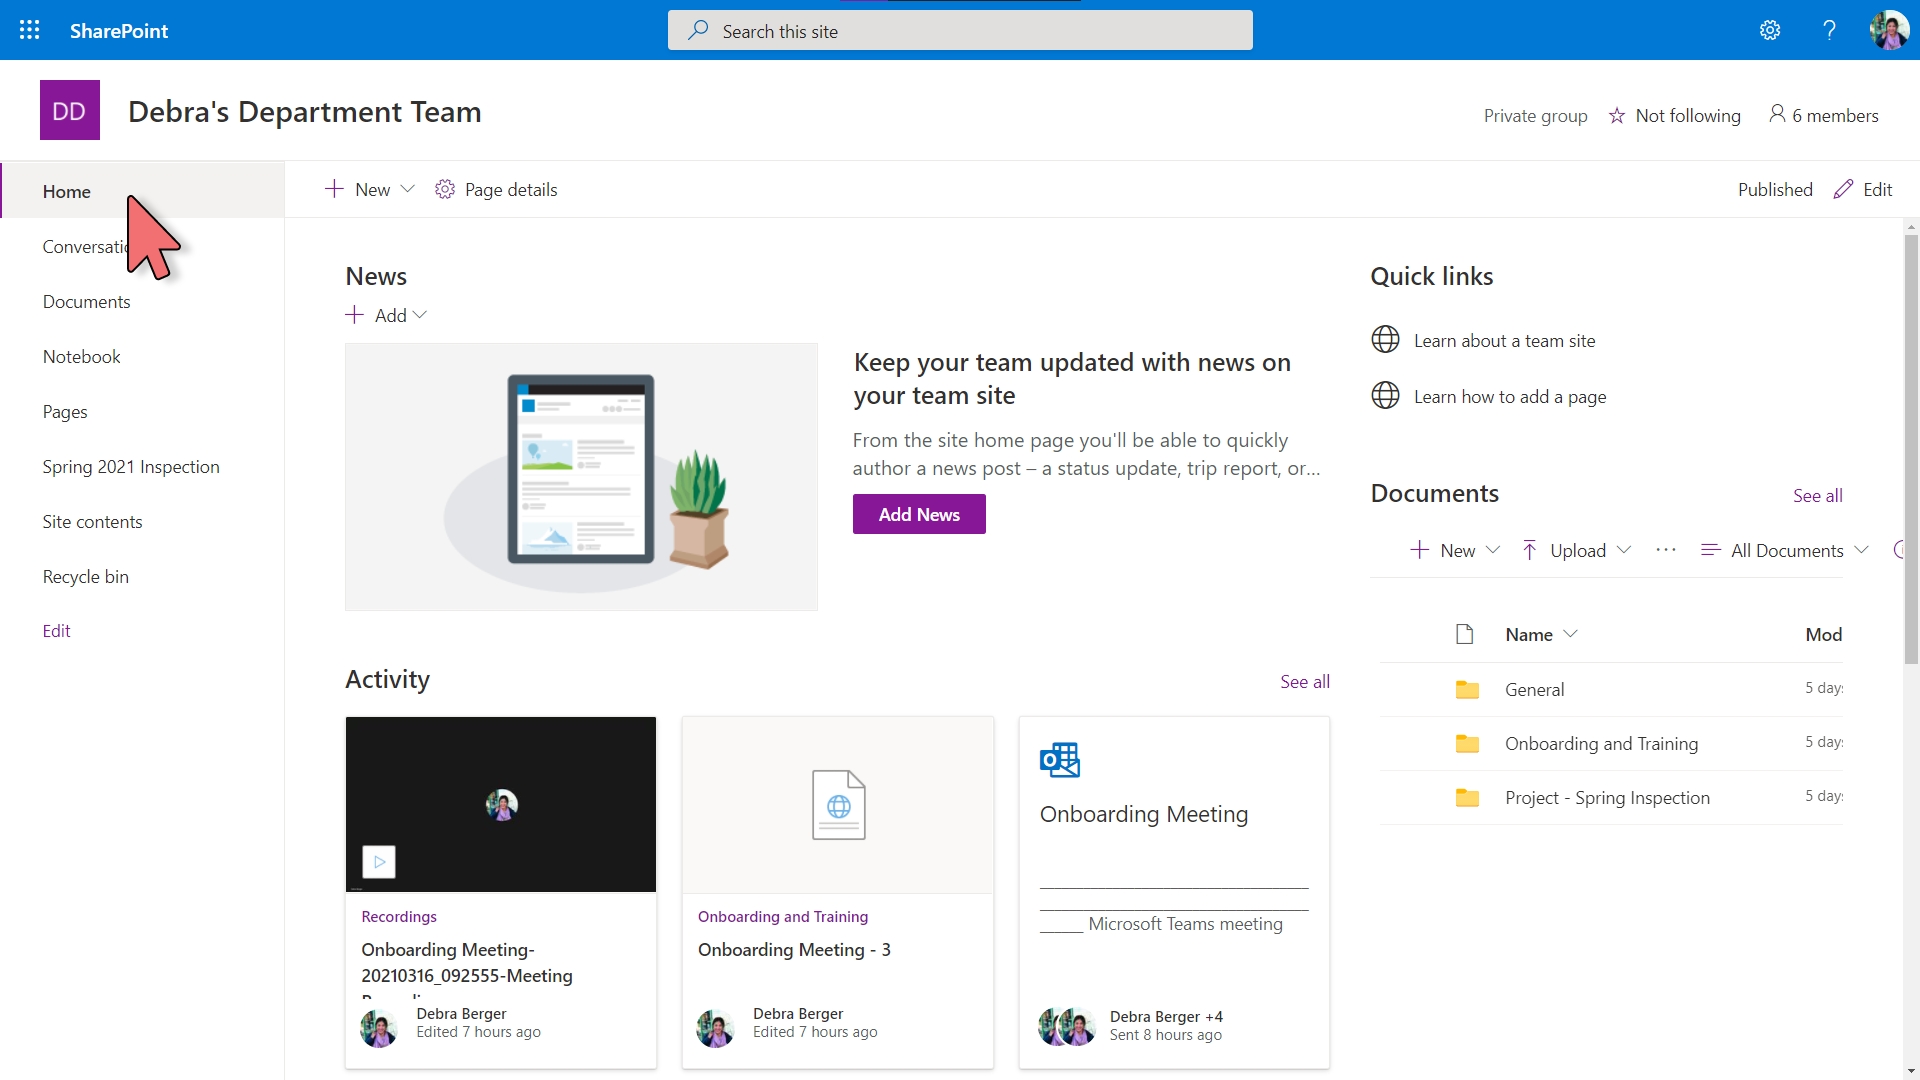
1.) Open the SharePoint site
-
This can be done on any SharePoint Team Site or Communication Site in Office 365
2.) Create a new blank page
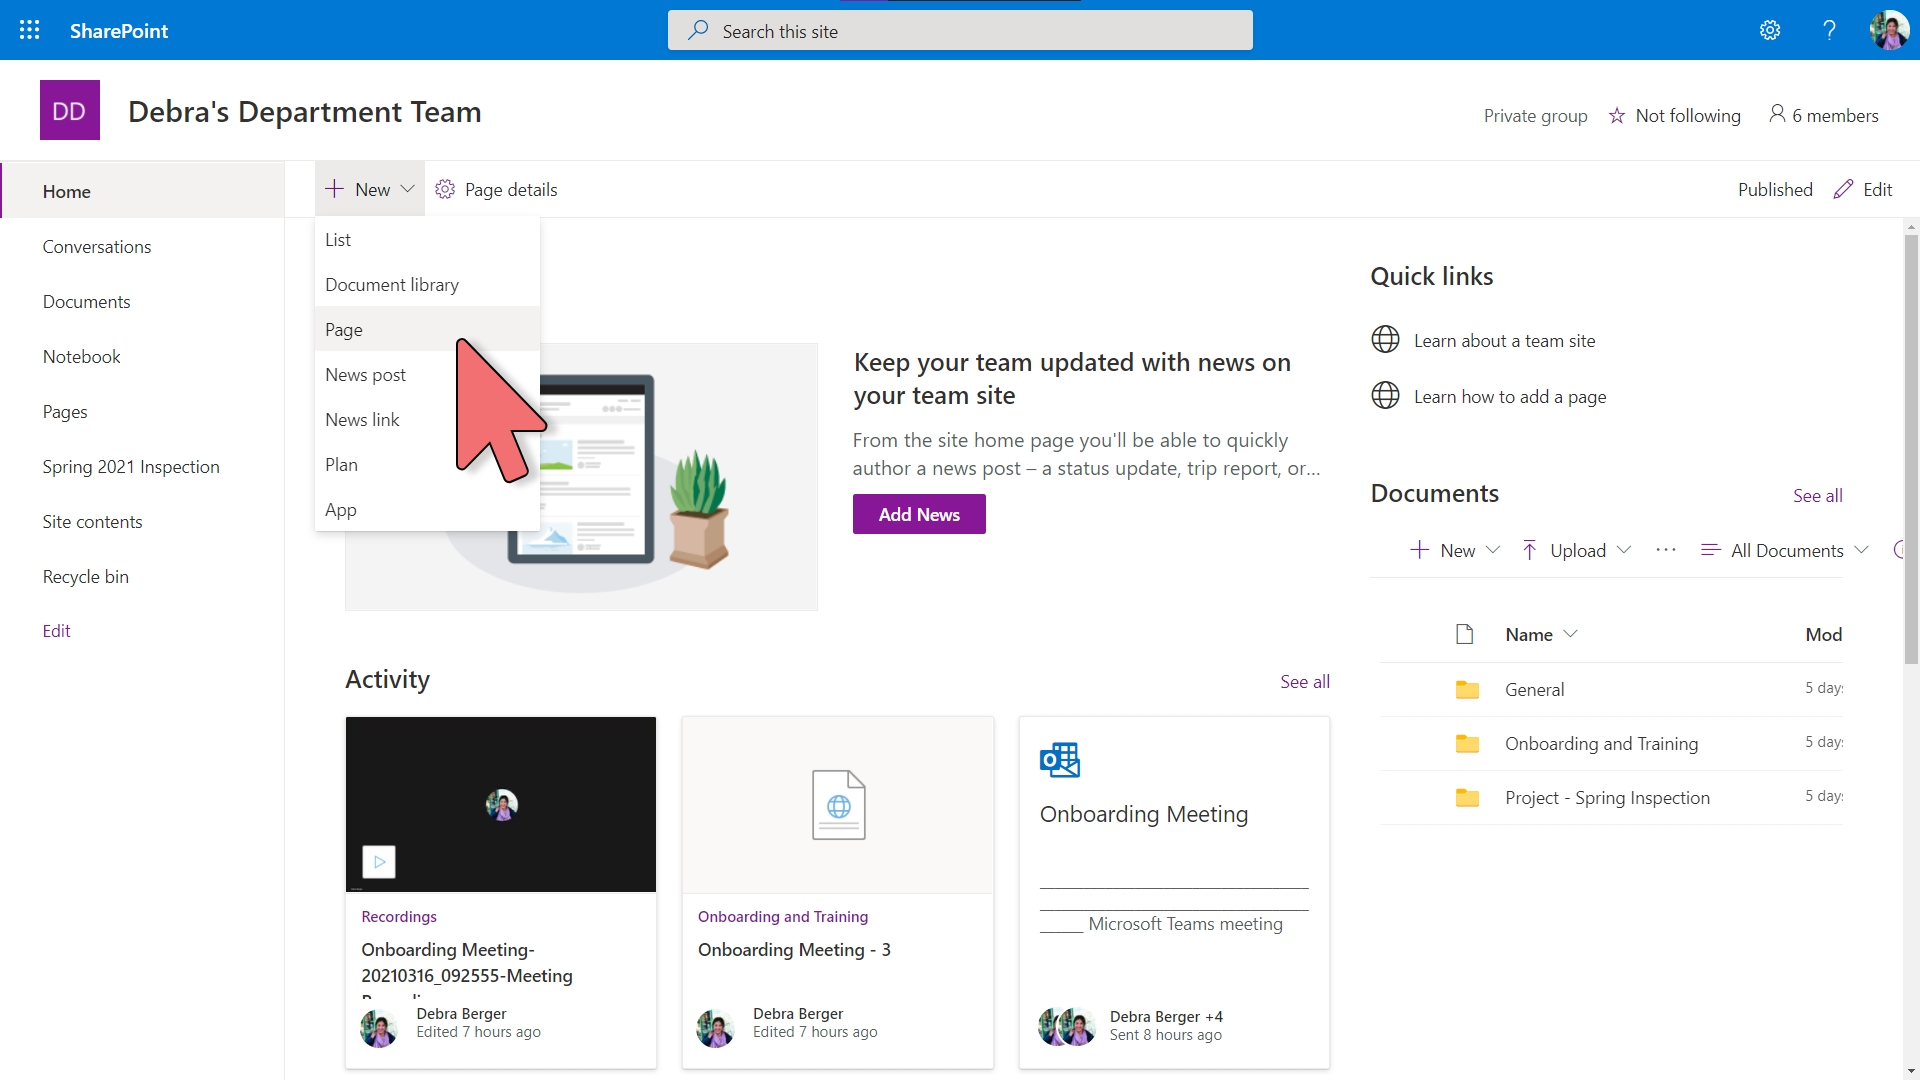
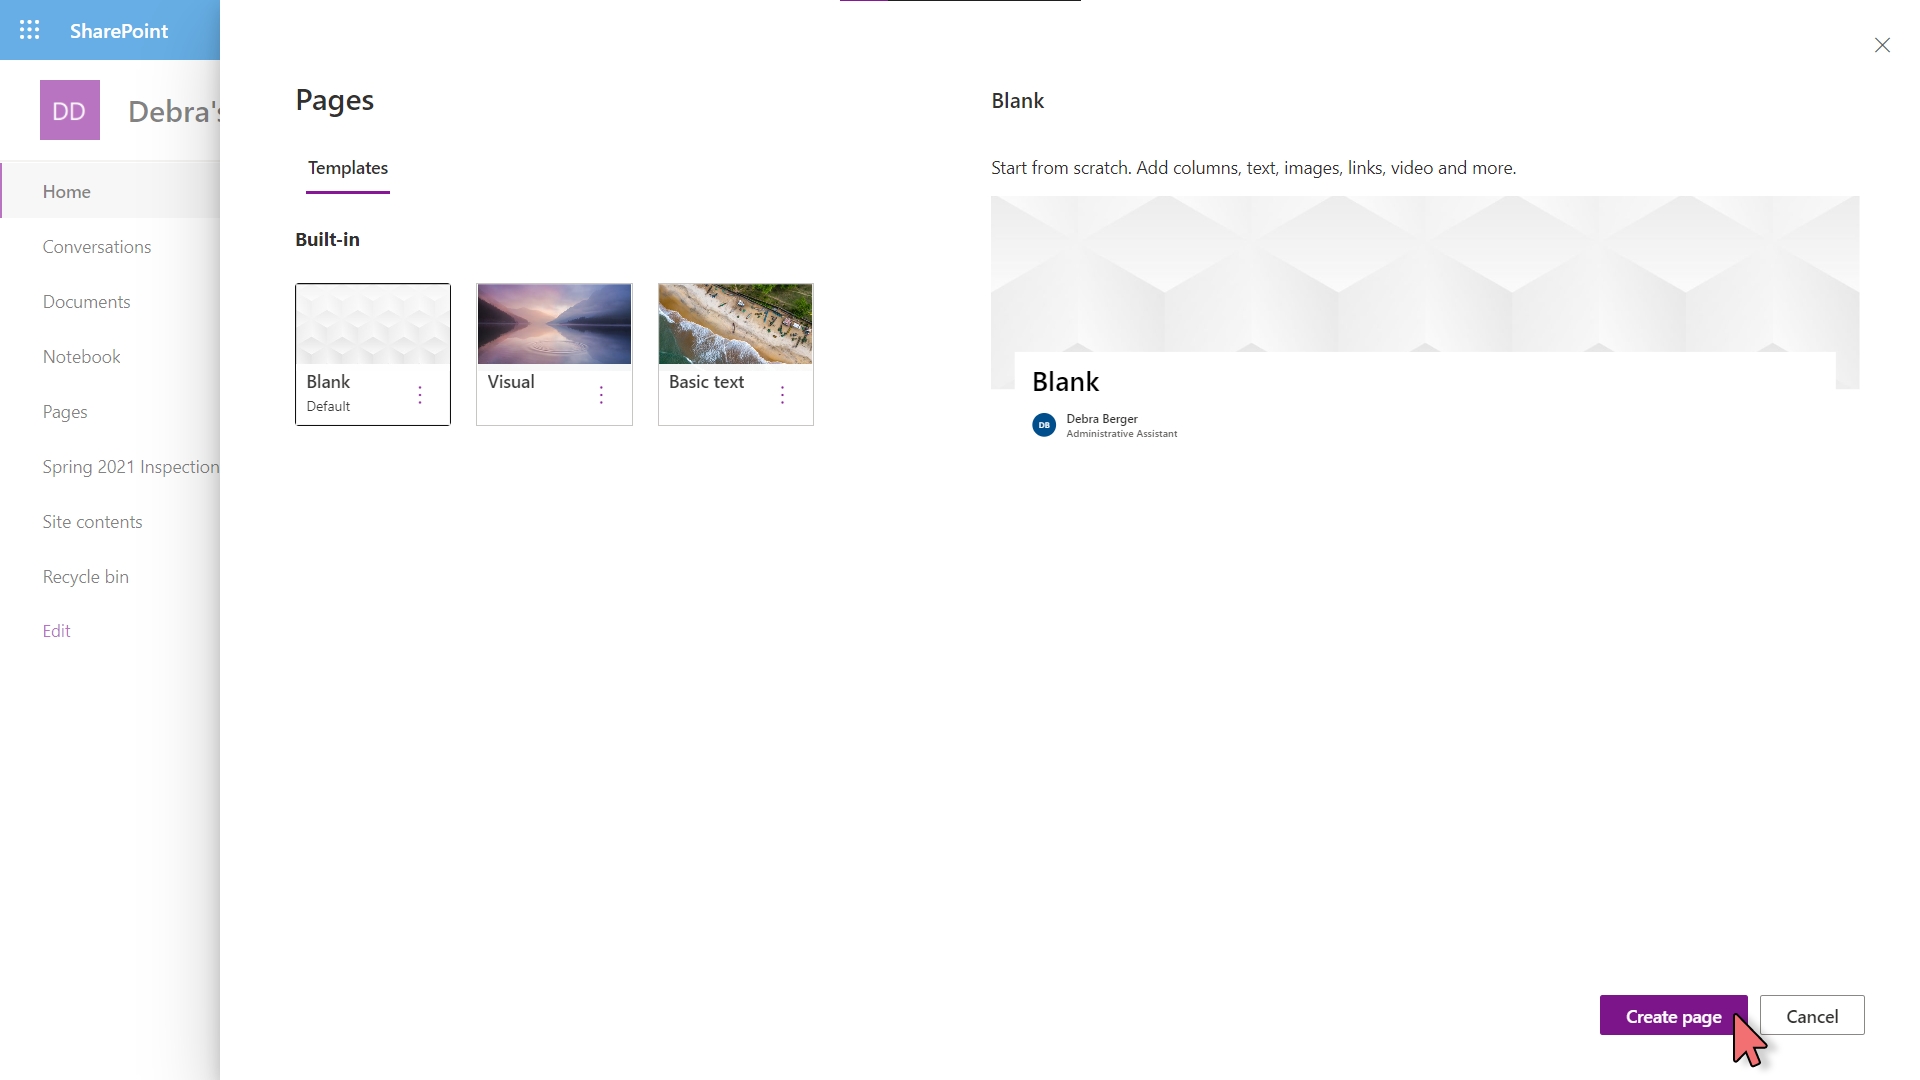
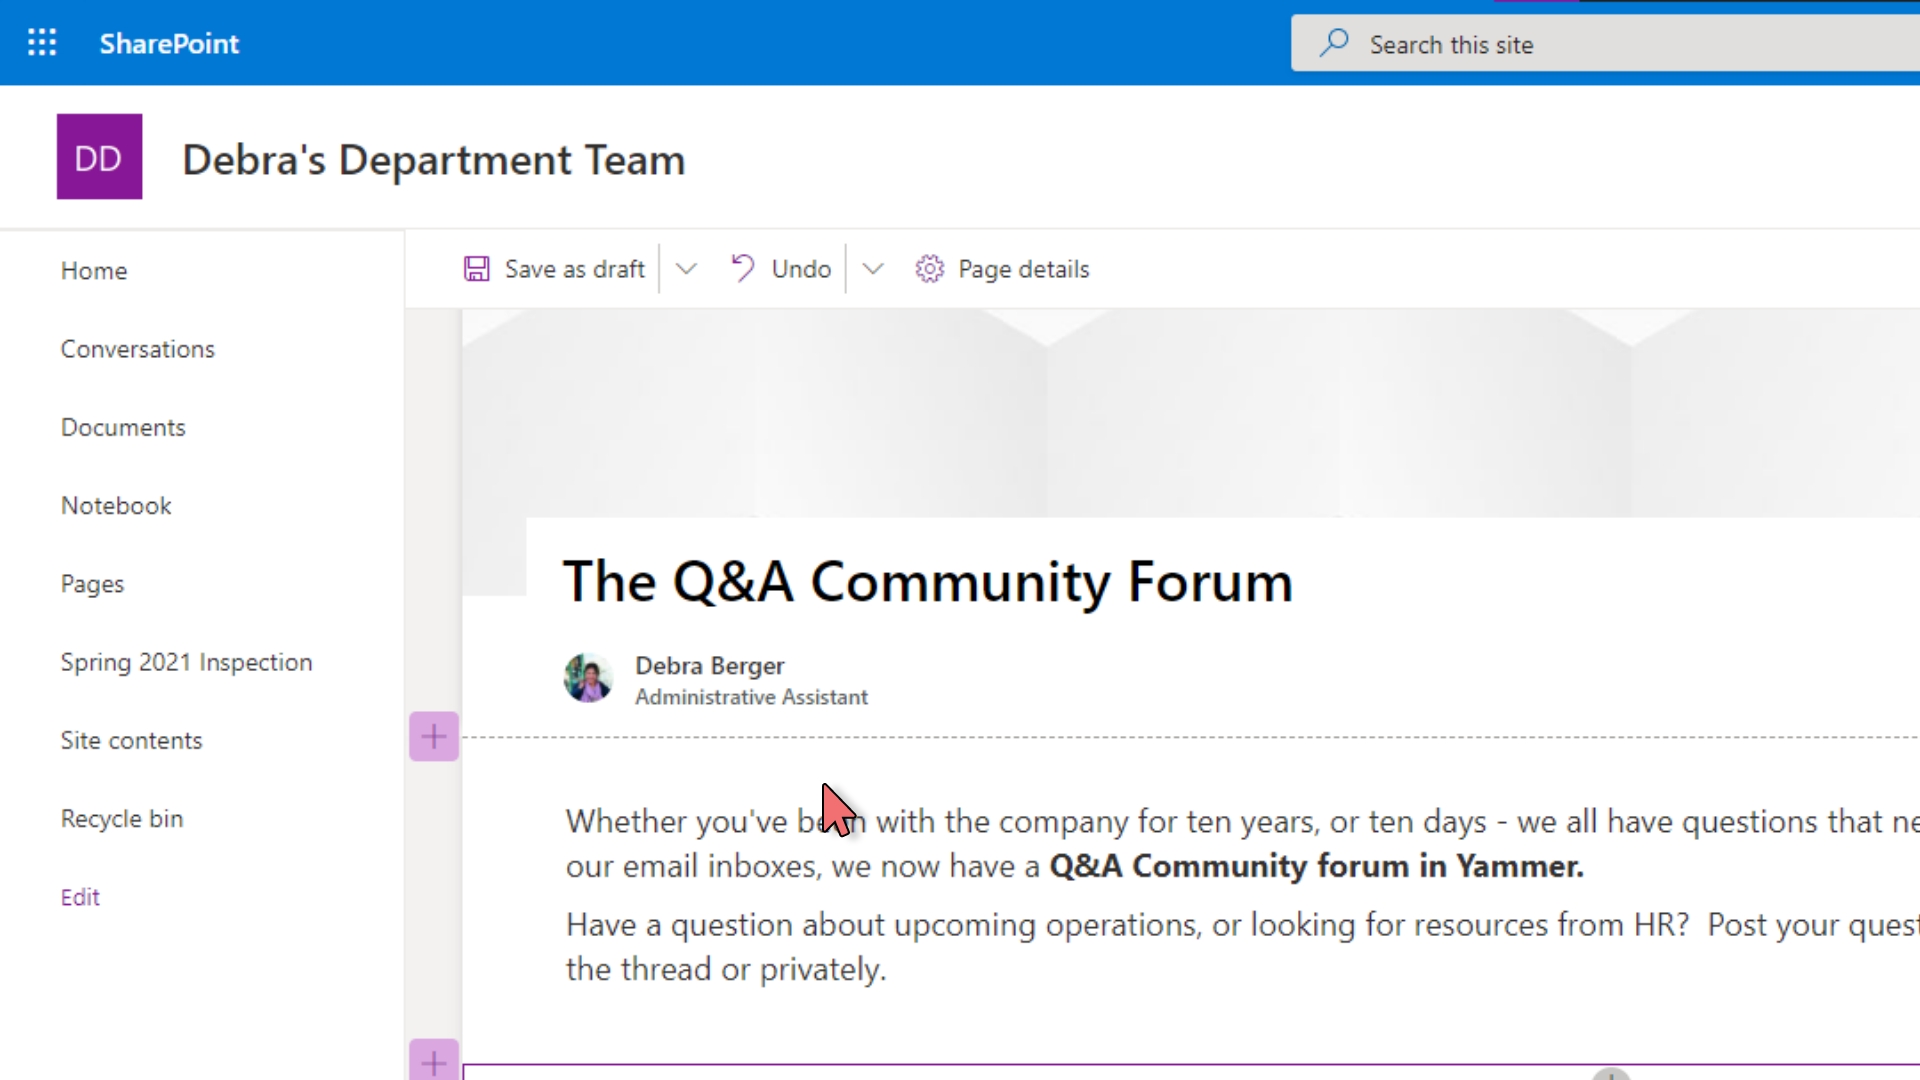
3.) Add a page a title and opening paragraph
4.) Add the "Conversations" web part to the page
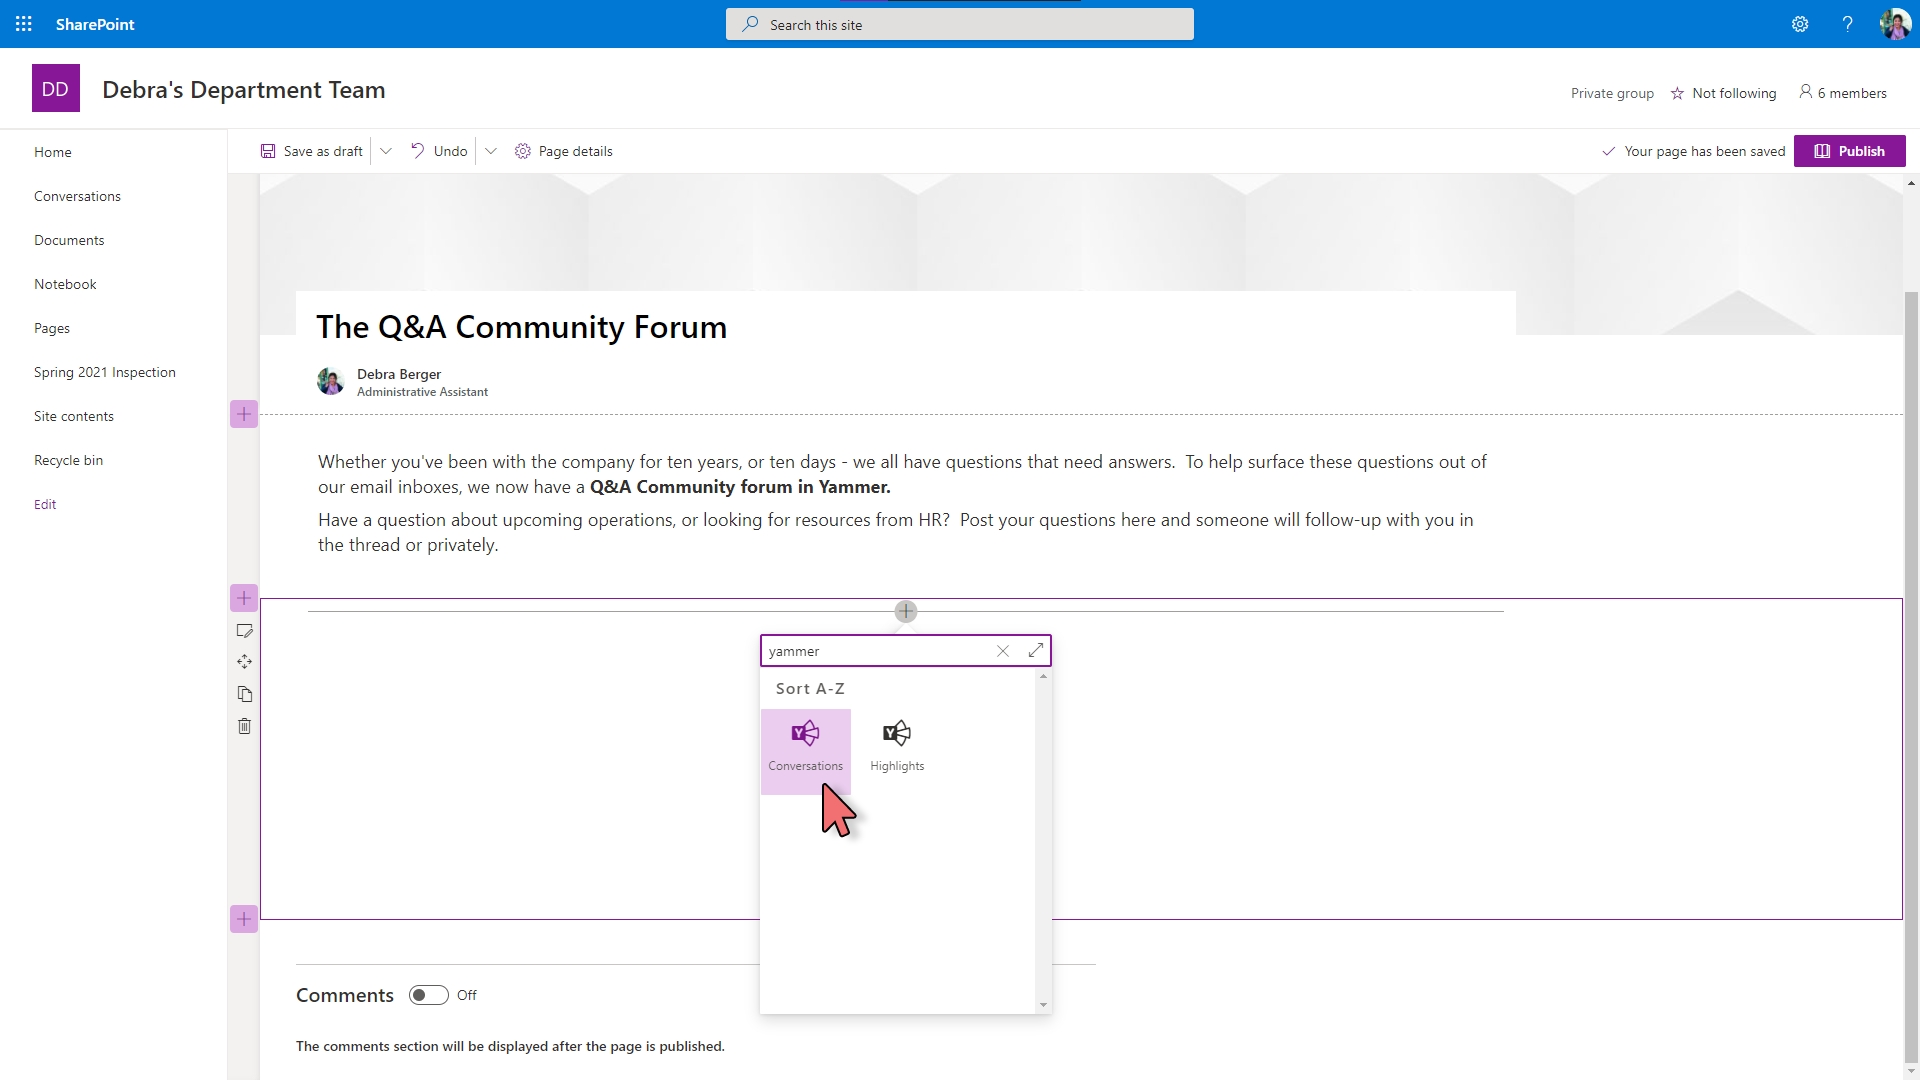
- You can also find the web part by searching "Yammer" in the menu
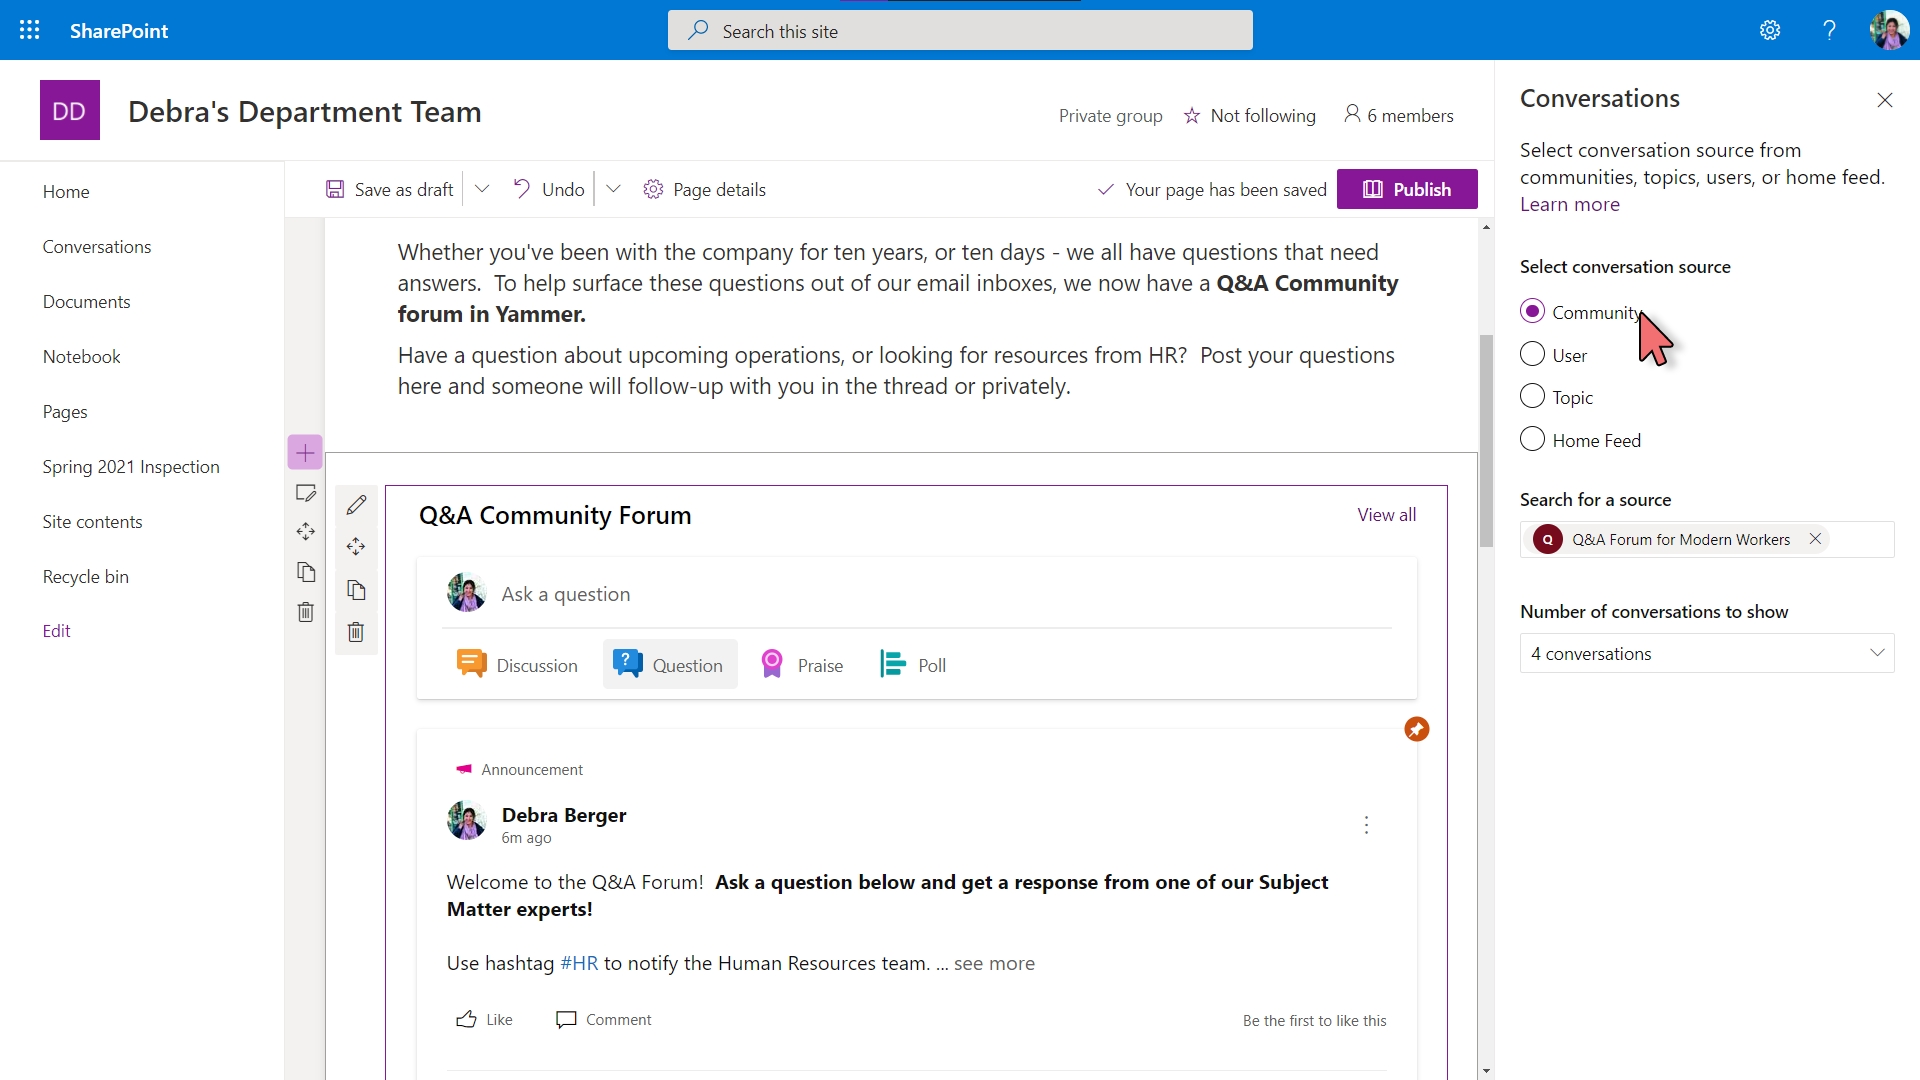
5.) Configure the web part to display the Q&A Community
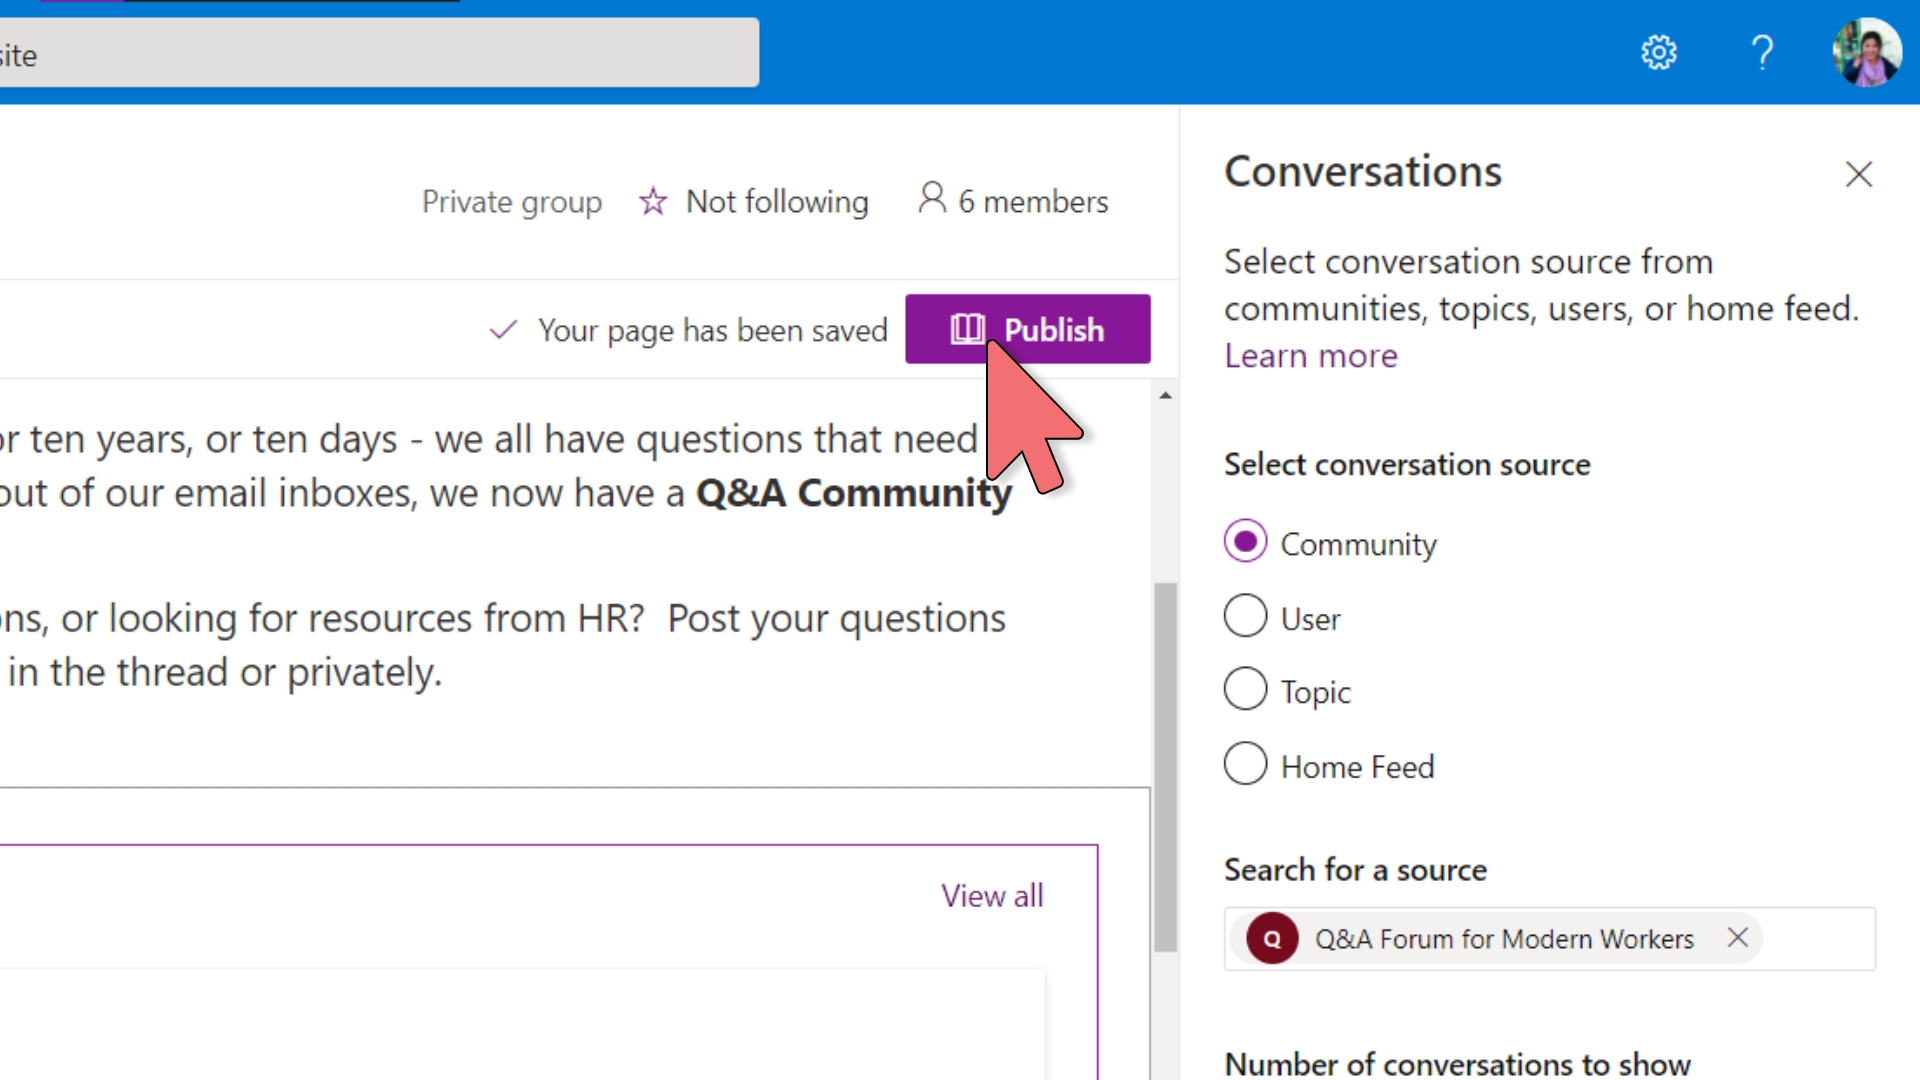
6.) Publish the SharePoint Page
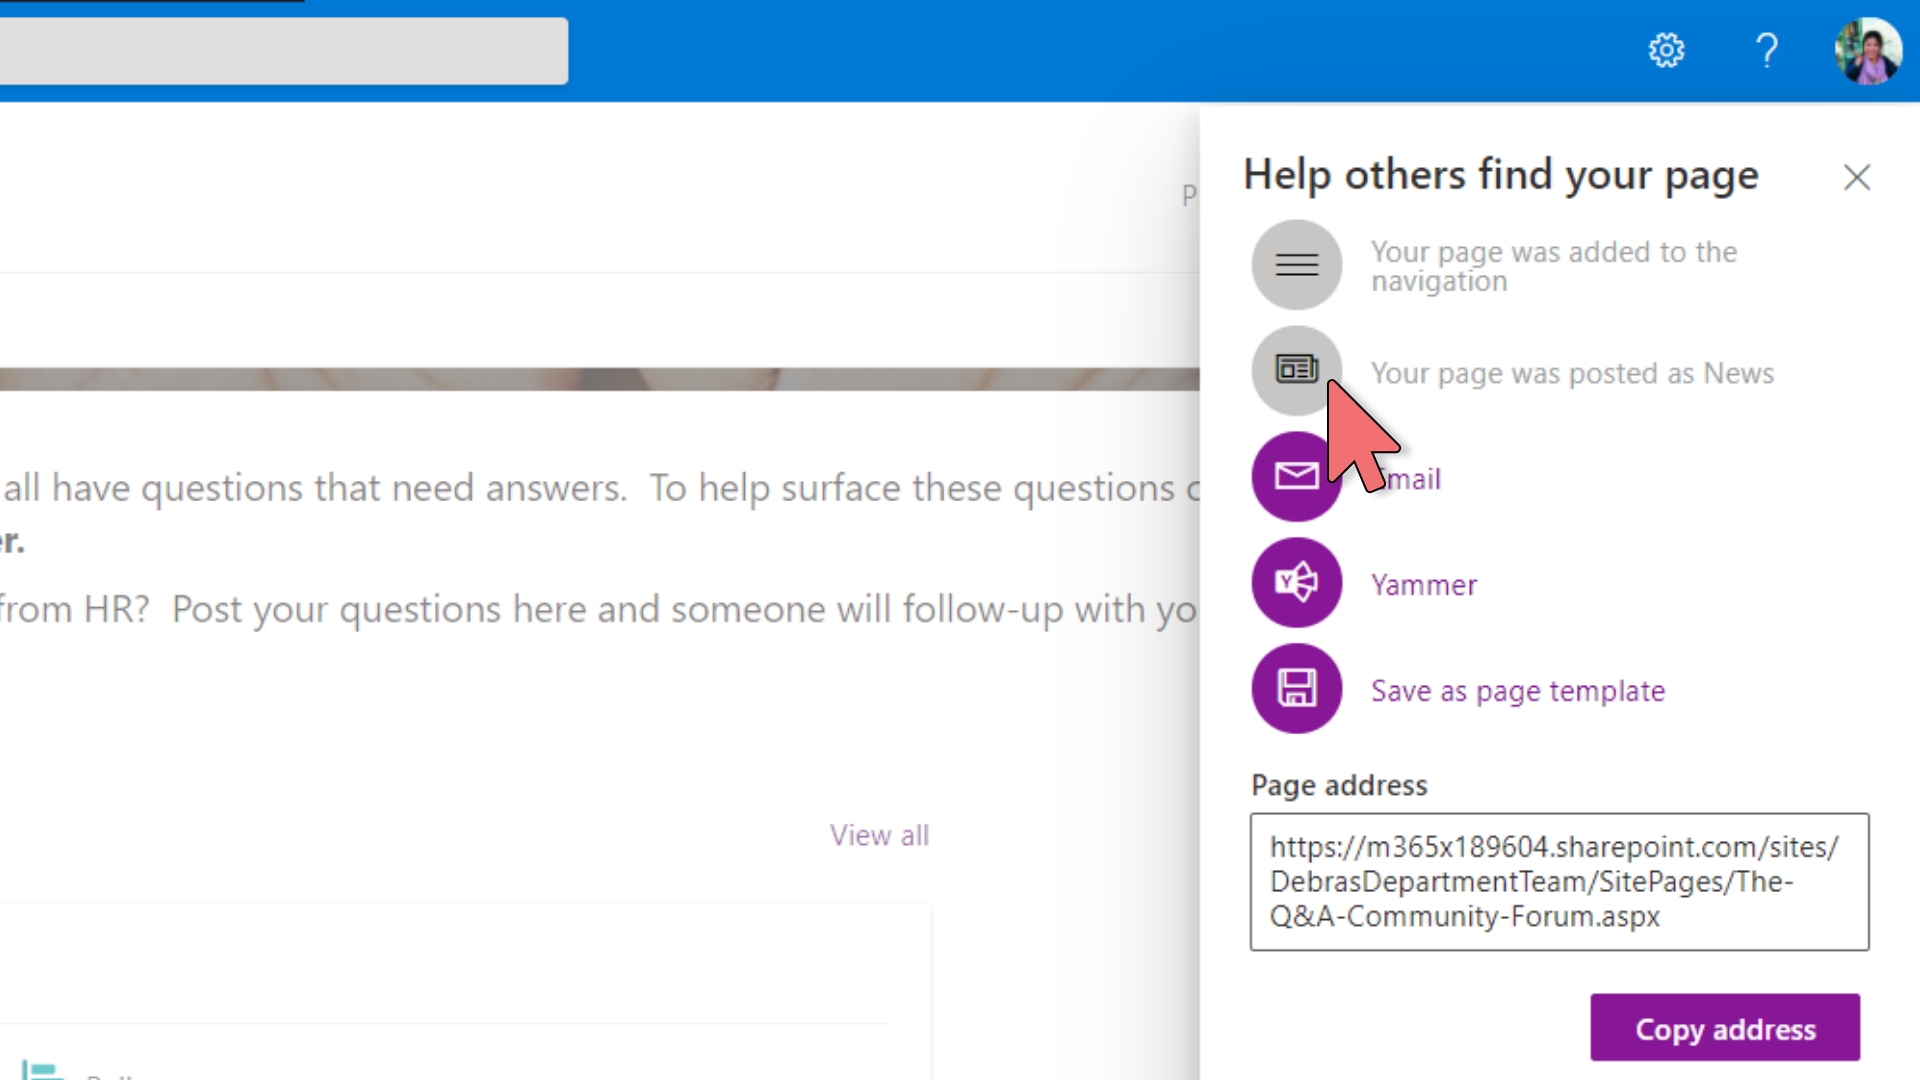
7.) Promote the page as "News"
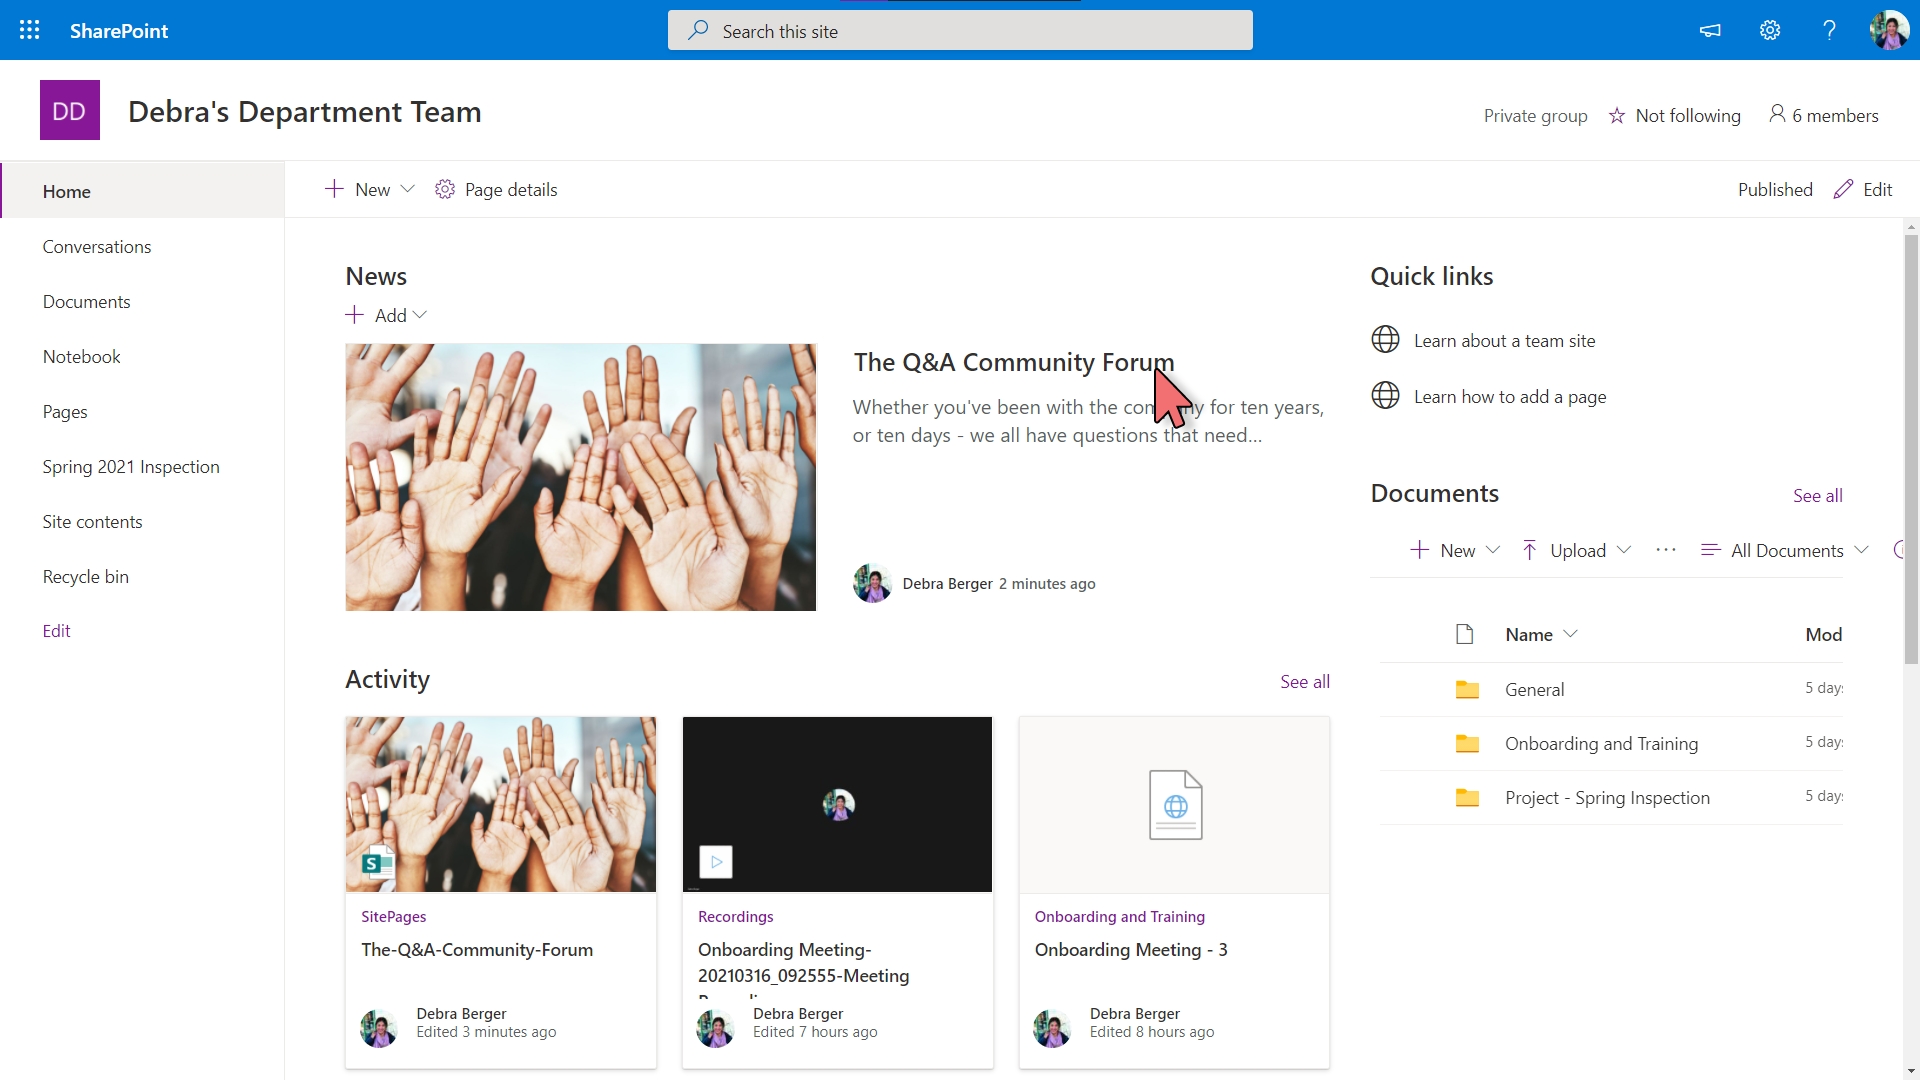
8.) Add page to site navigation (optional)
9.) Email the news to your org
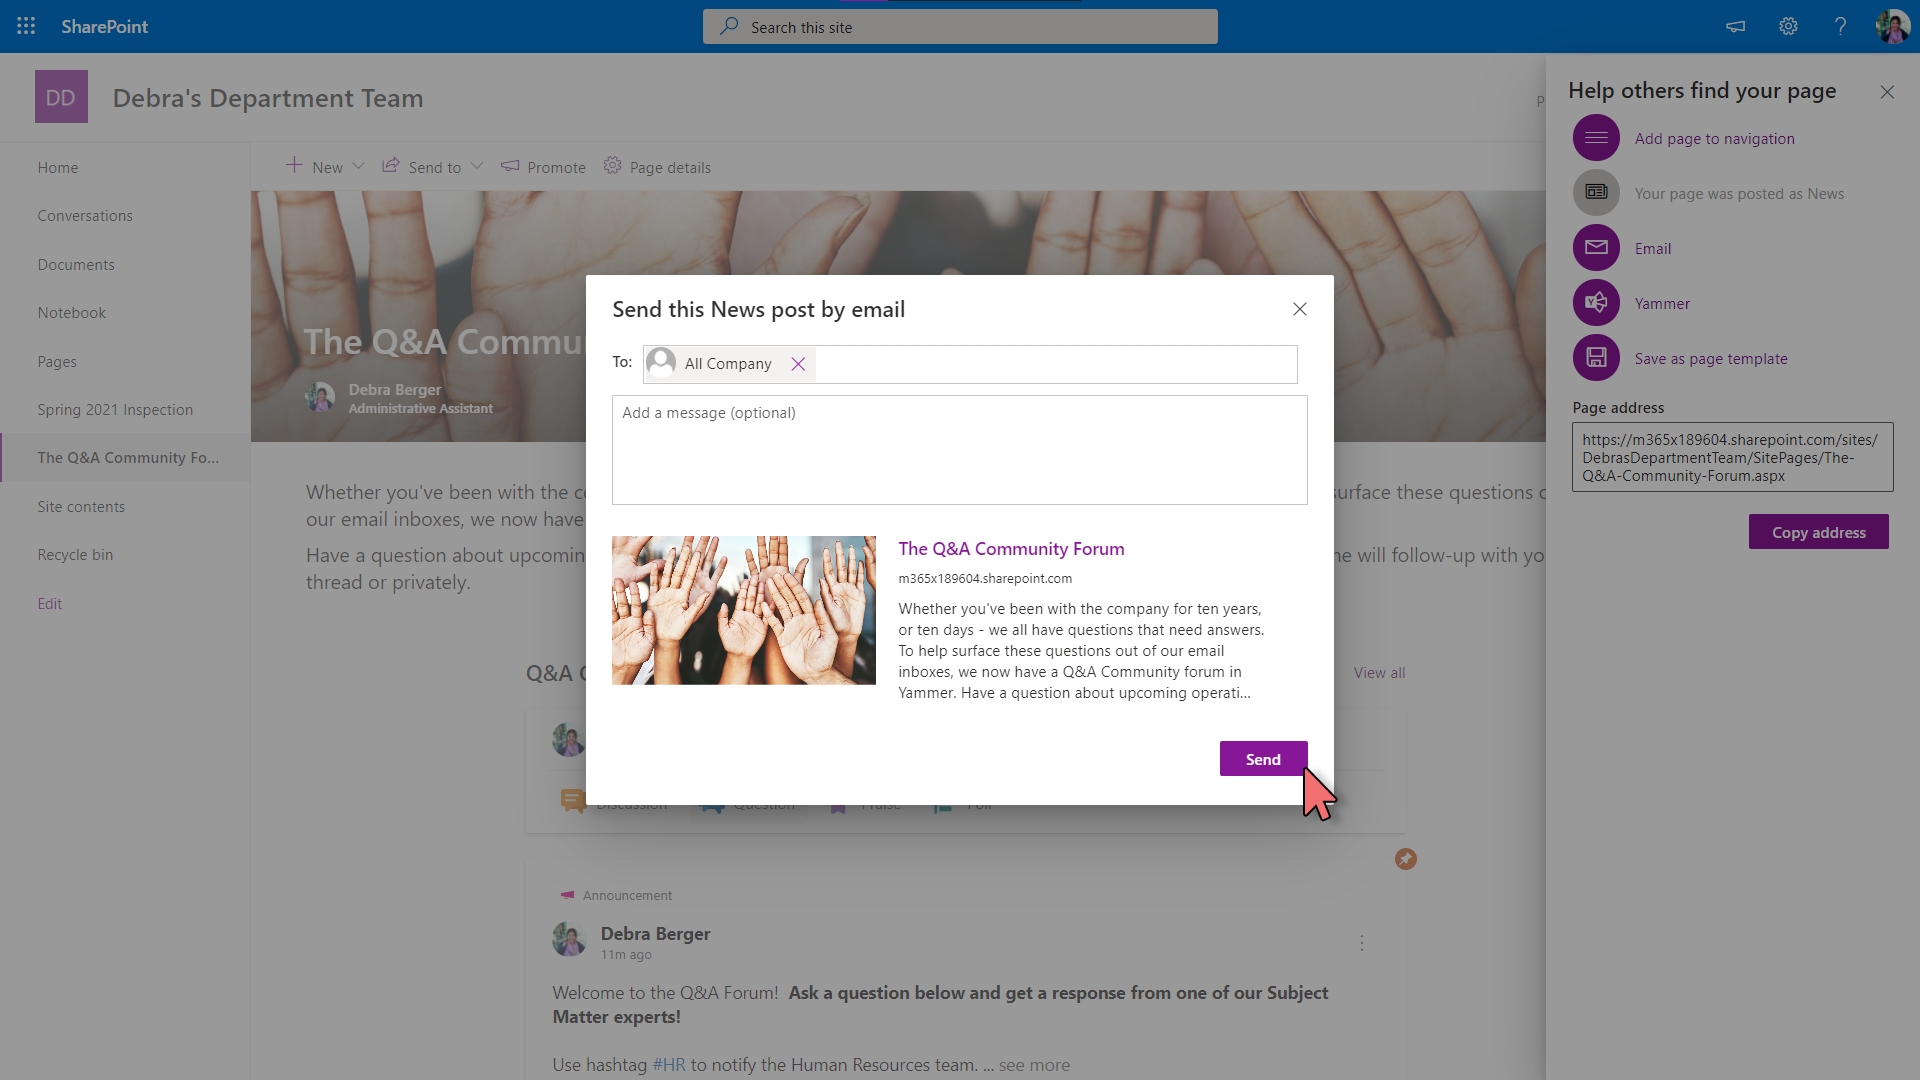
- While you could have written a plain old email and notified your organization that way, posting it in SharePoint will help ensure the news stays visible and accessible for longer.
- It may be unfair to expect your colleagues to adopt this new community overnight. Be patient - change takes time!
The final part of this article will show you how to monitor the community from Microsoft Teams.
Monitor the Community with the Yammer Connector in Microsoft Teams
The following steps is for Subject Matter Experts who wish to receive push-notifications within a Microsoft Team Channel. This allows groups to collaborate on a question before responding in Yammer.
1.) Open the Connector menu in the Team channel you want the Yammer notifications to be posted
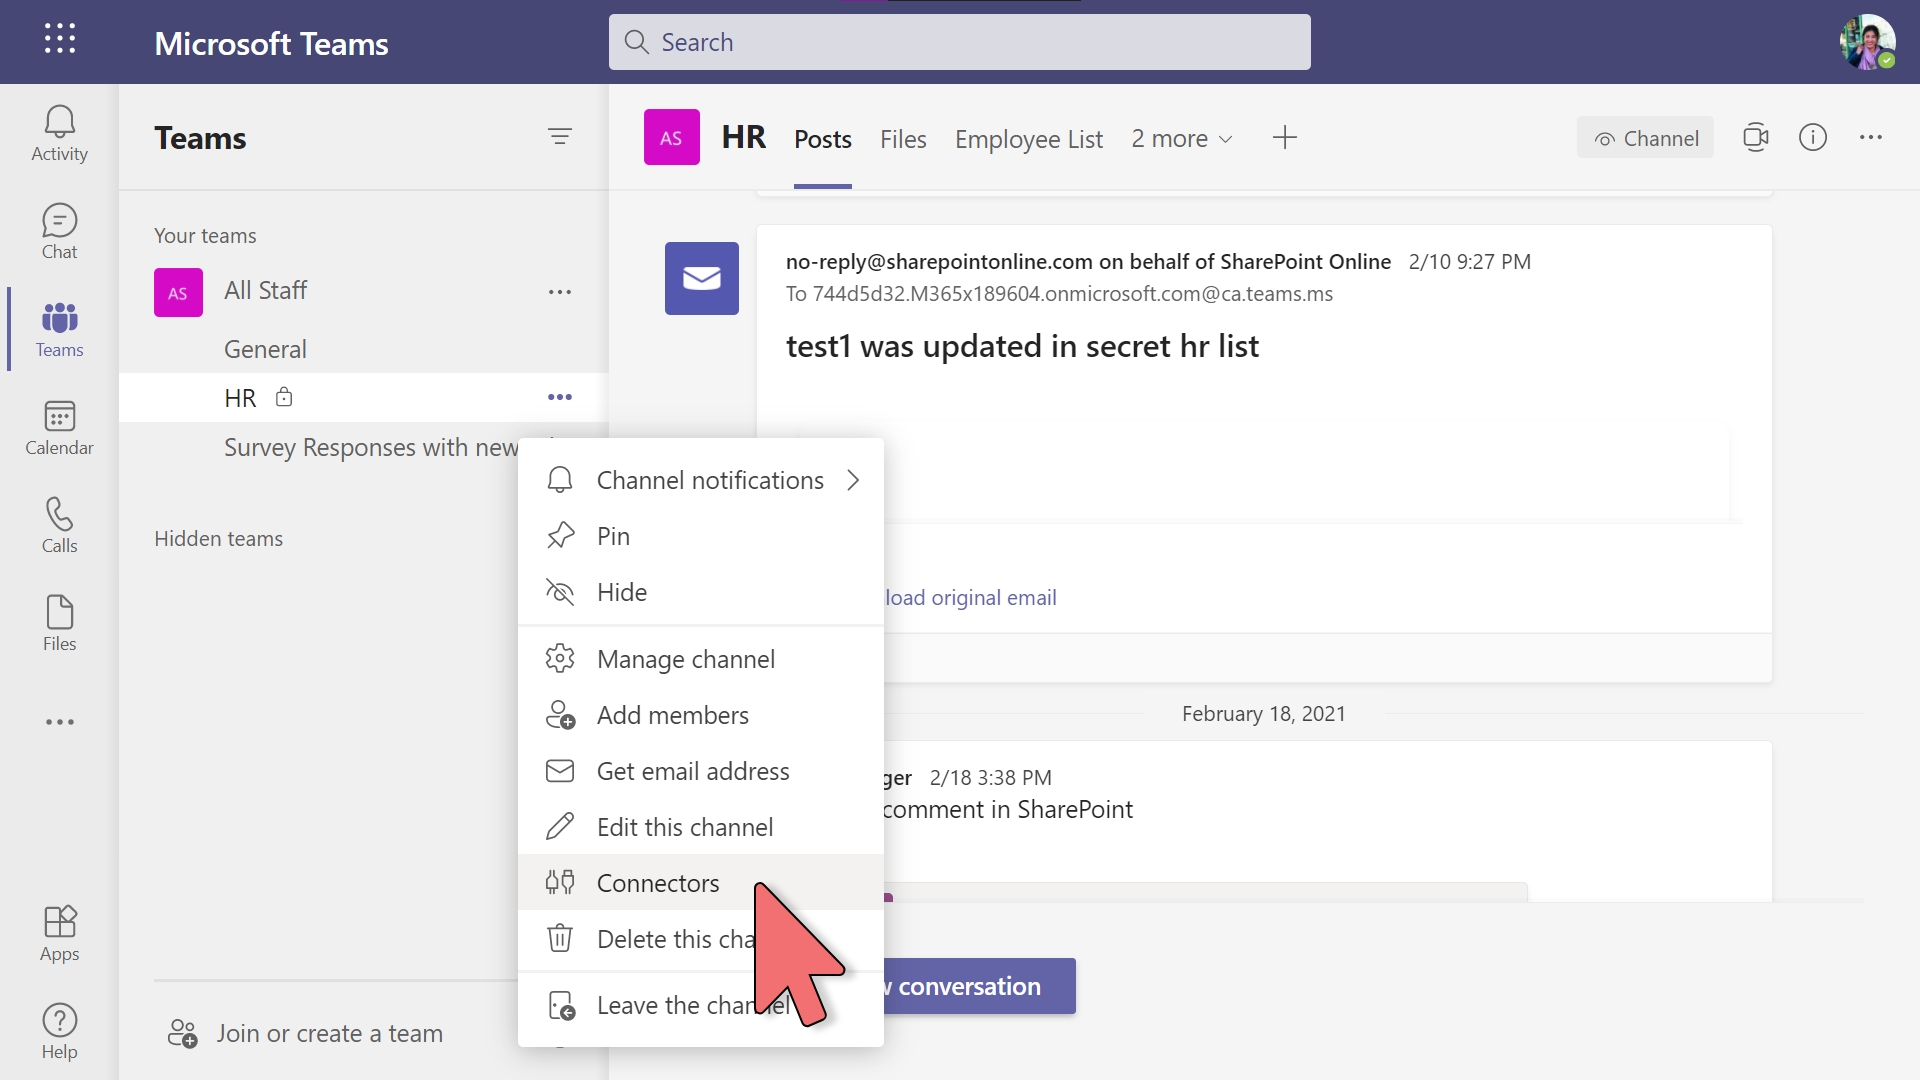
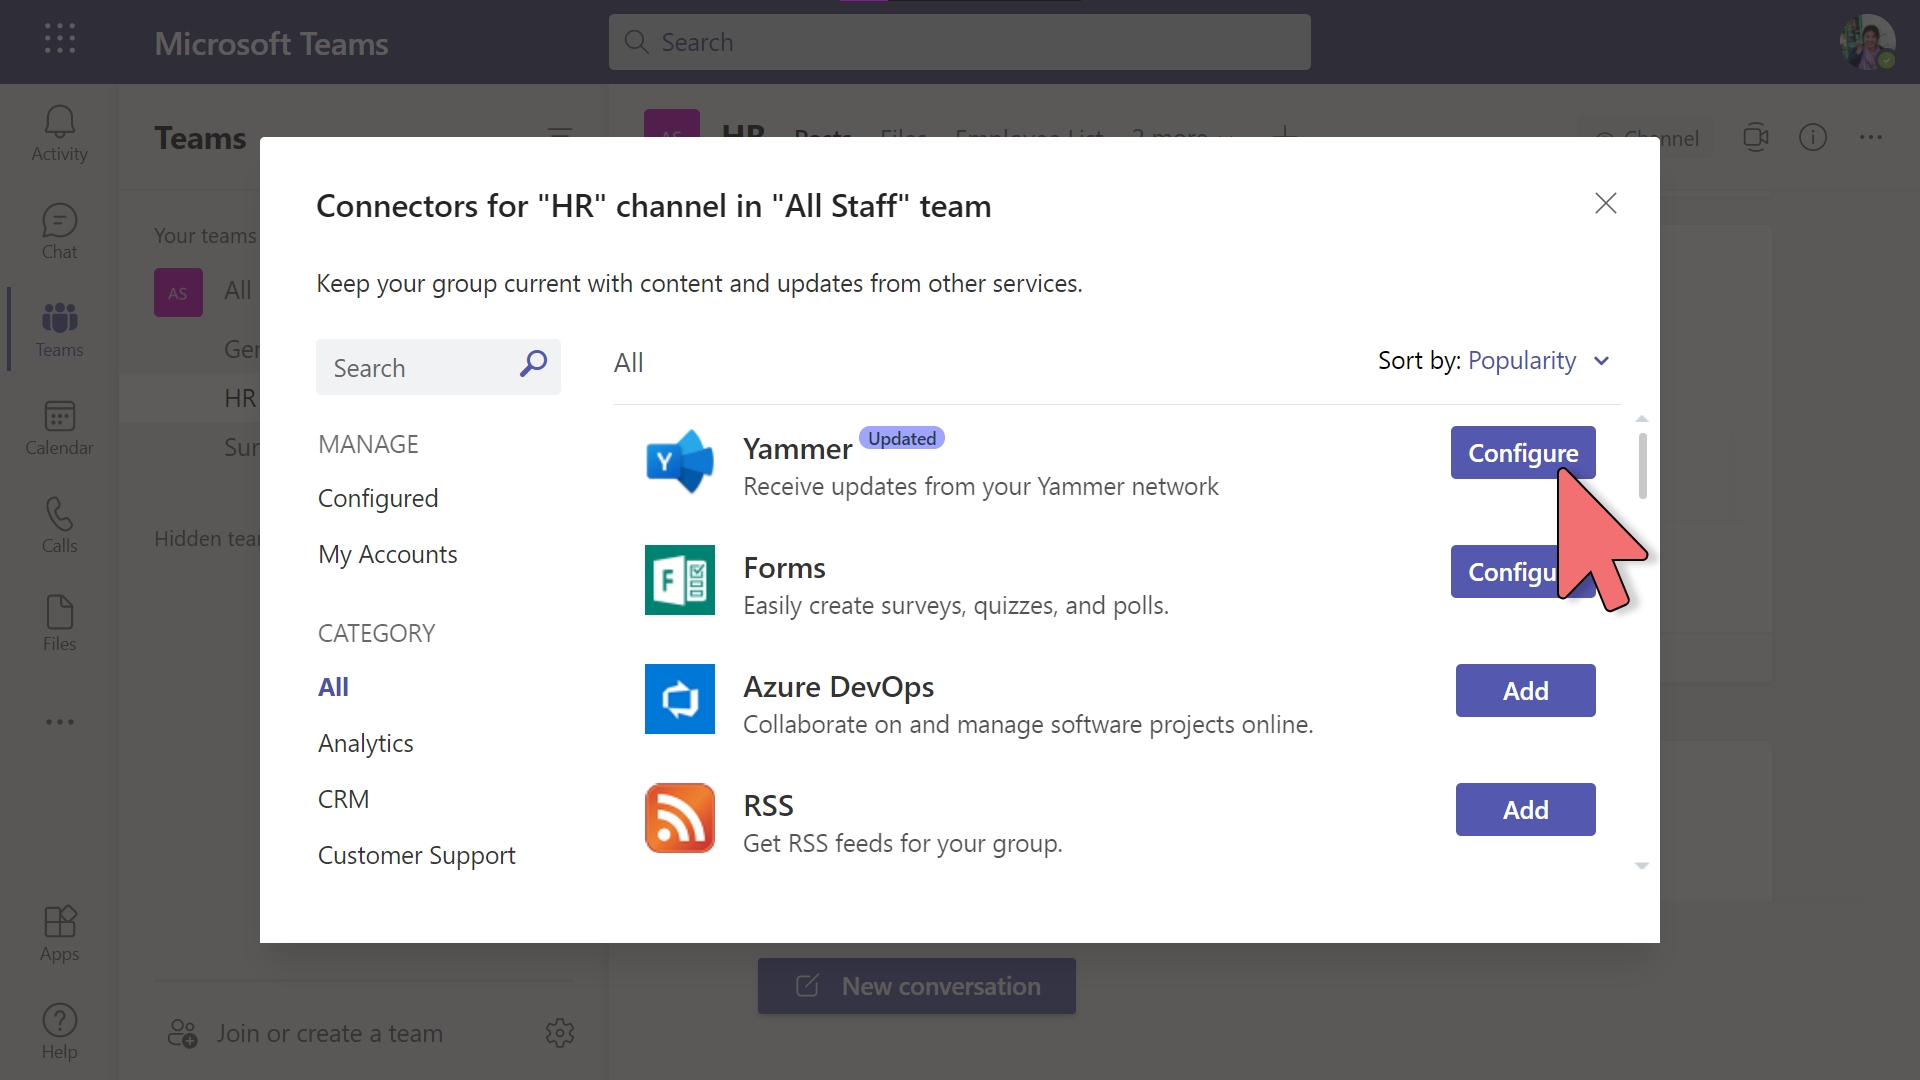
2.) Add the Yammer connector to your channel
3.) Configure the connector to watch for new questions from the Q&A community based on specific keywords
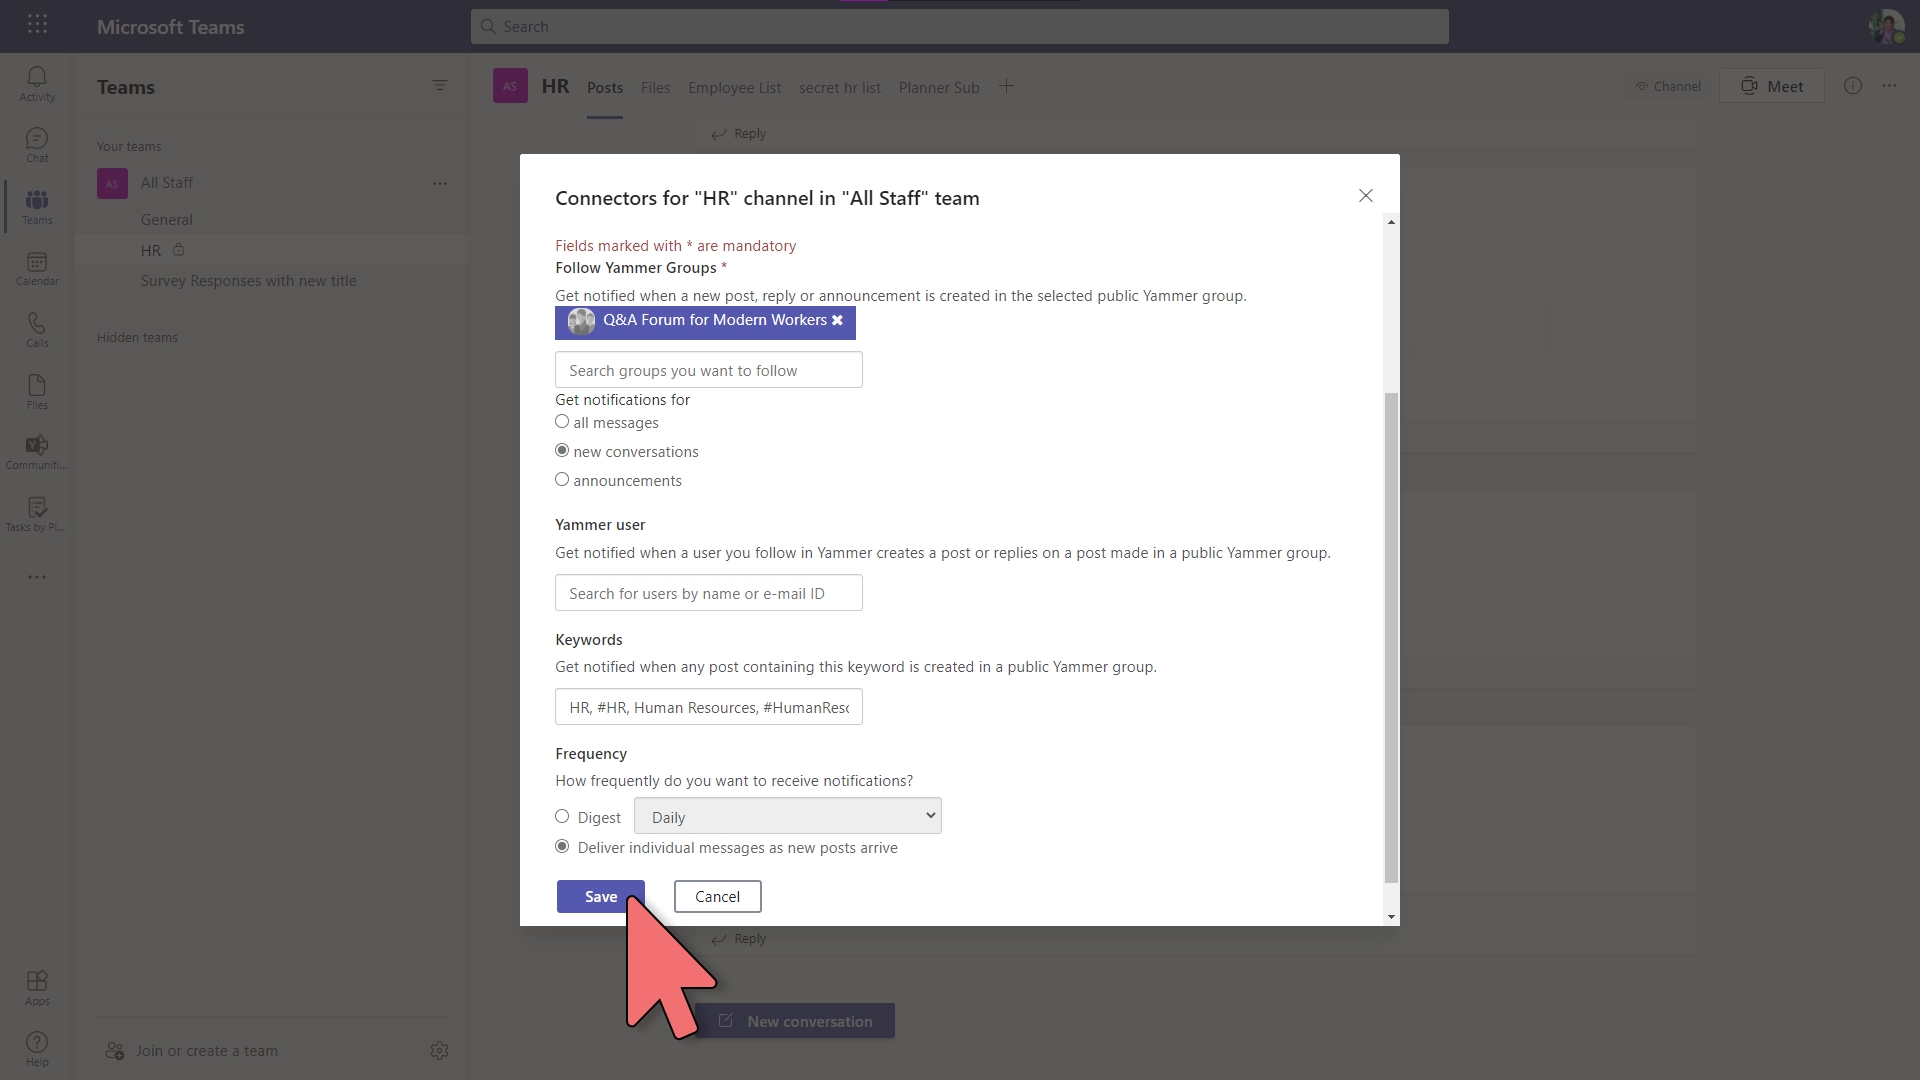
- Pro-tip: Promote the use of specific keywords or hashtags within the Q&A community so staff know how to notify the right group of SMEs
4.) Test the connector
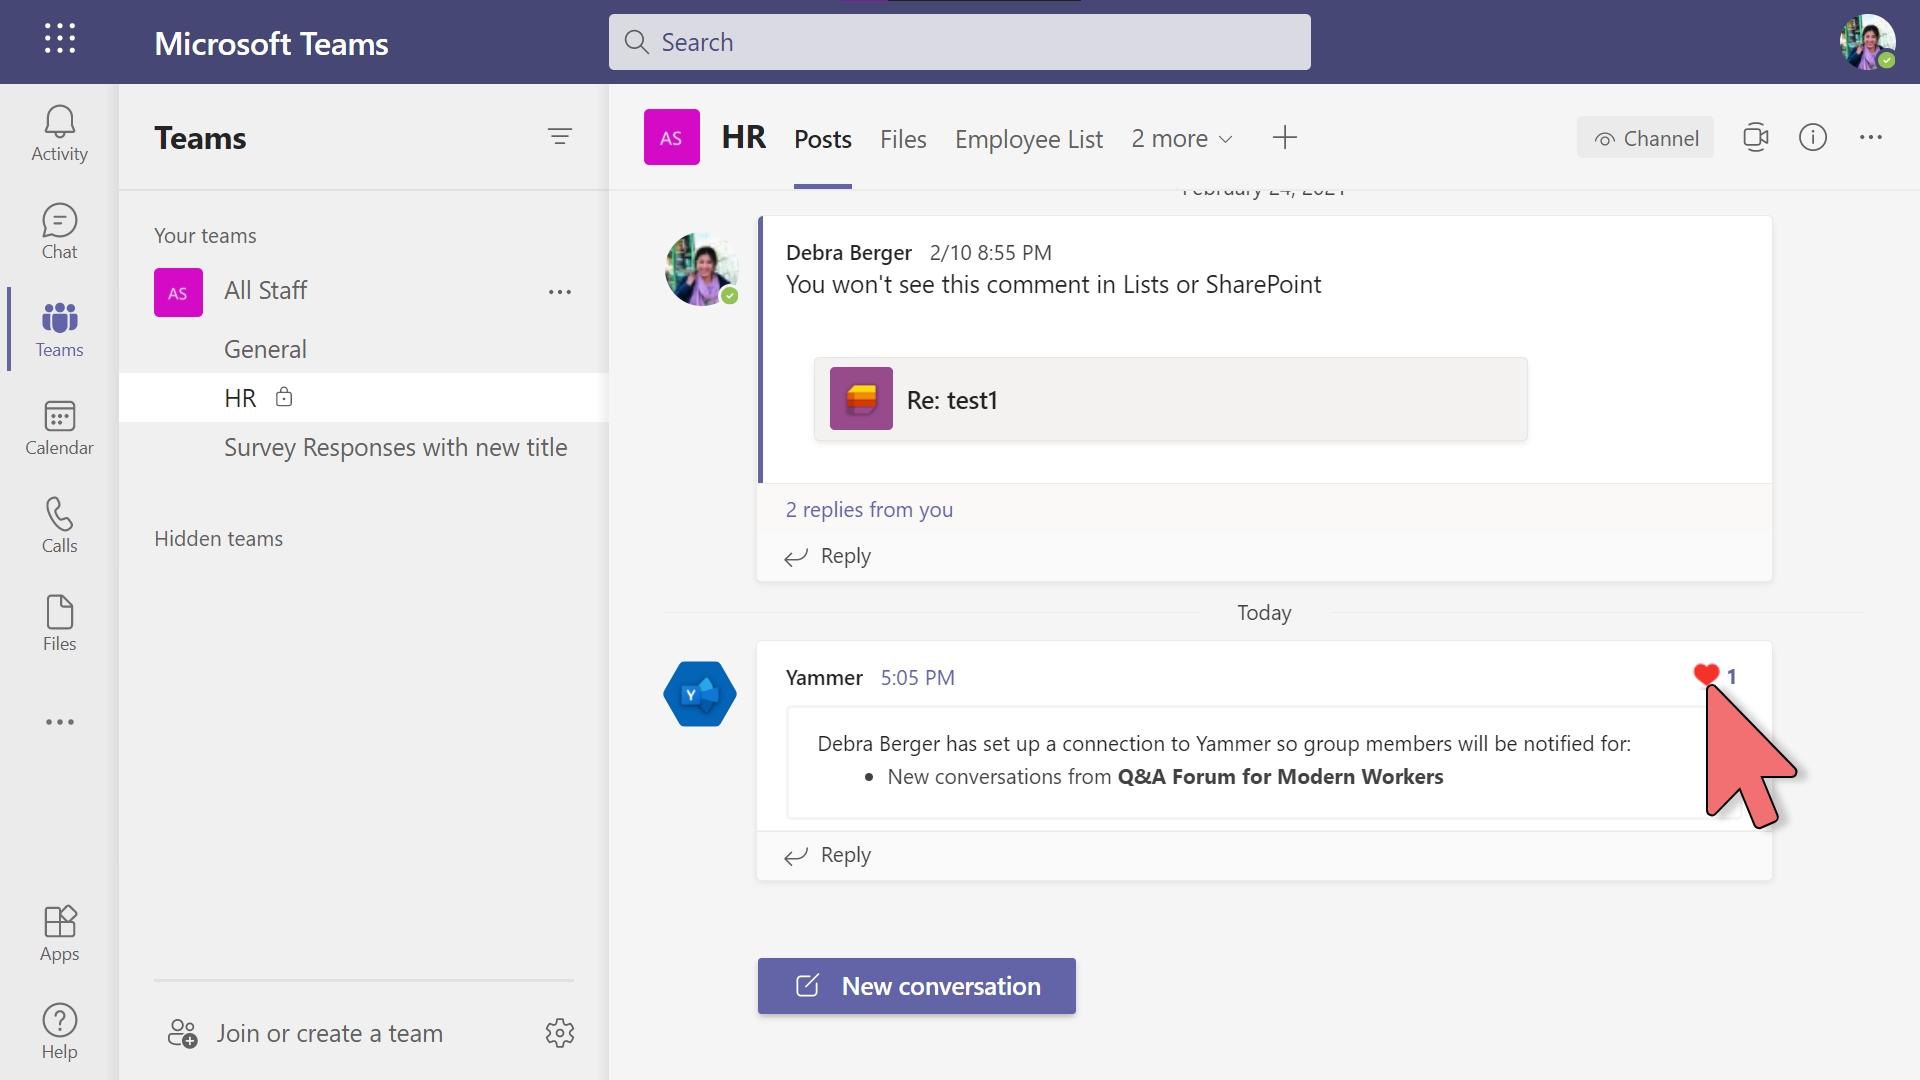
- Post a few questions with your keywords (or hashtags) in the Q&A community to ensure the connector is working as expected.
- Note that the connector may not run instantly. If you do not see a post within 30-minutes, review your connector settings and try testing again.
That's it! I hope this helped inspire you to try a new approach to an old problem.
