

Navigating Microsoft Planner

Contents


In this blog post, I break down the user interface of Microsoft Planner to provide a look at what it can do.
Microsoft Planner is always trying to strike a balance between ease-of-use and functionality. For better or worse, it leans towards the former – simplicity. Maybe too simple for many use-cases out there.
In either case, Planner provides a nice jumping point for users who want to move beyond Excel spreadsheets for managing group tasks. Anyone willing to spend a couple of hours playing around in a Planner board will learn 90% or more of what it offers.
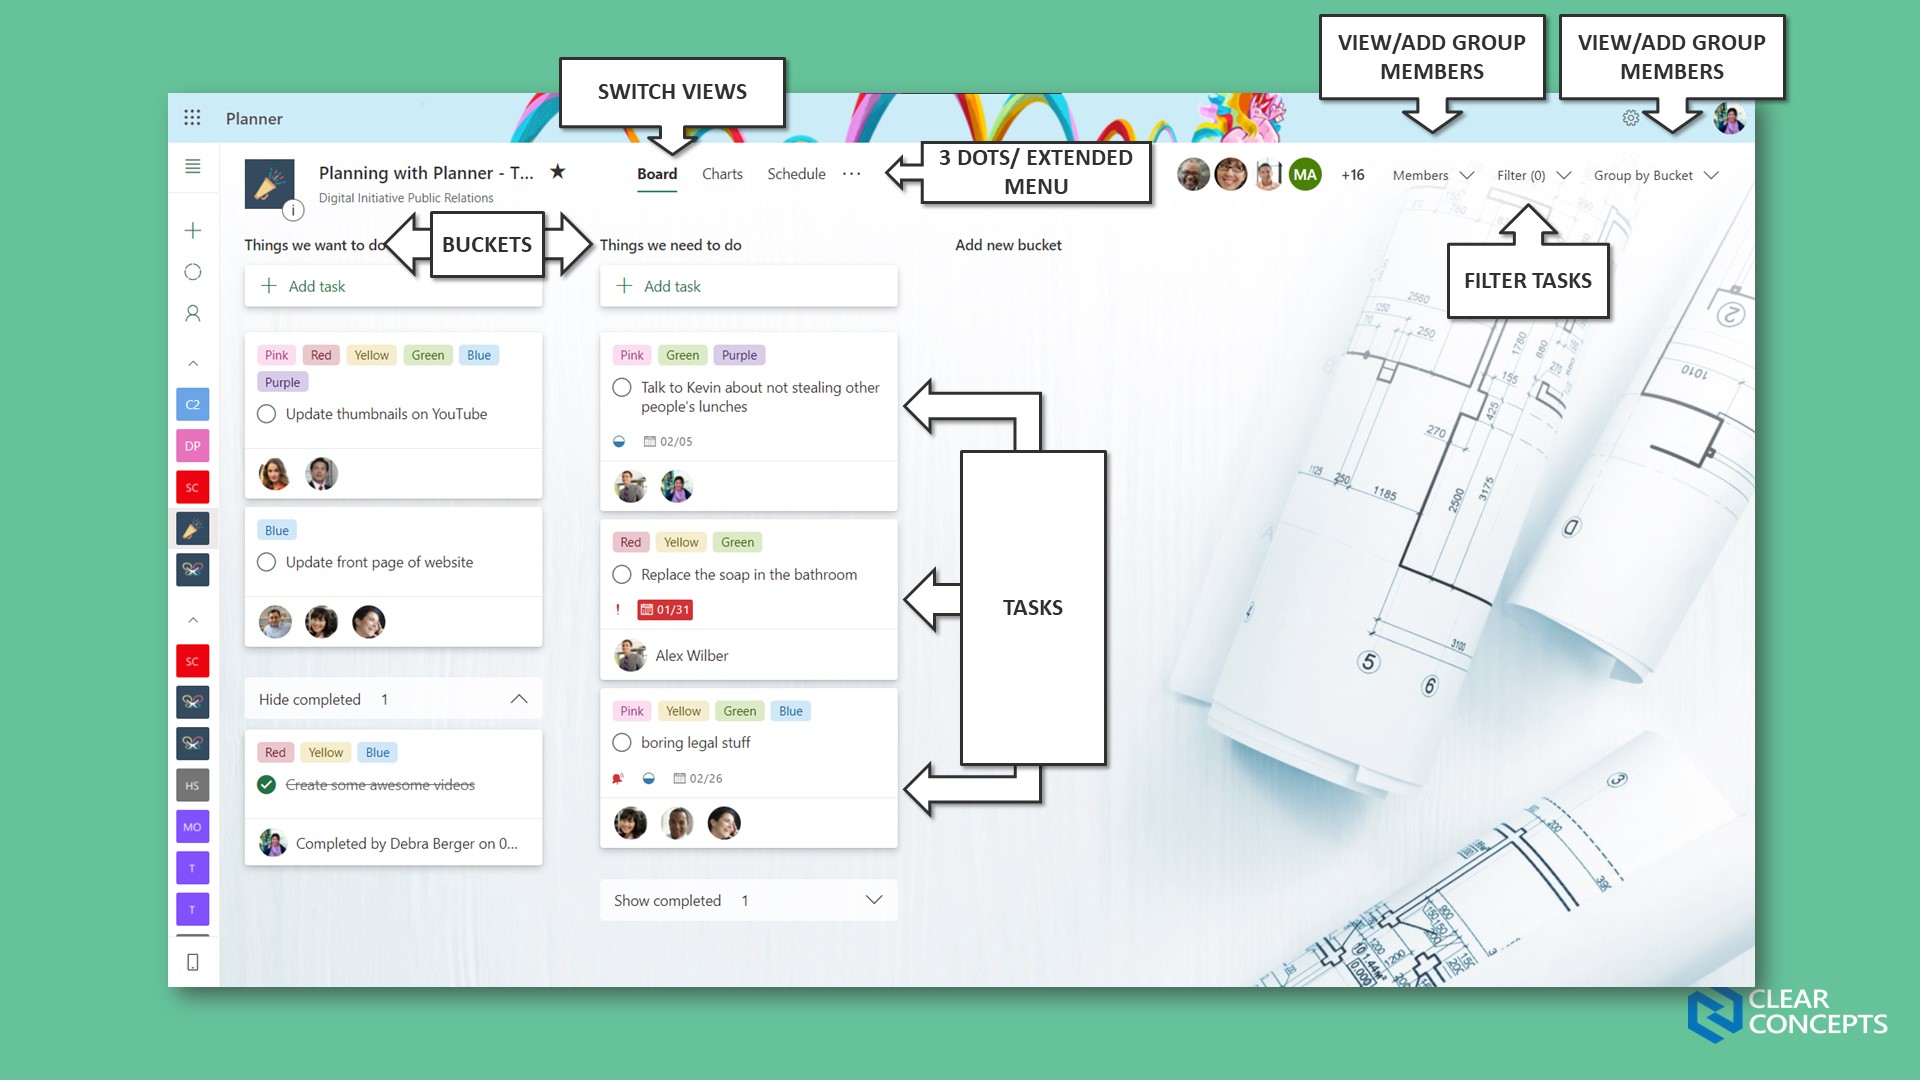
The “Board” view is your primary screen in Microsoft Planner. This is where you’ll setup your initial tasks, buckets and other stuff.
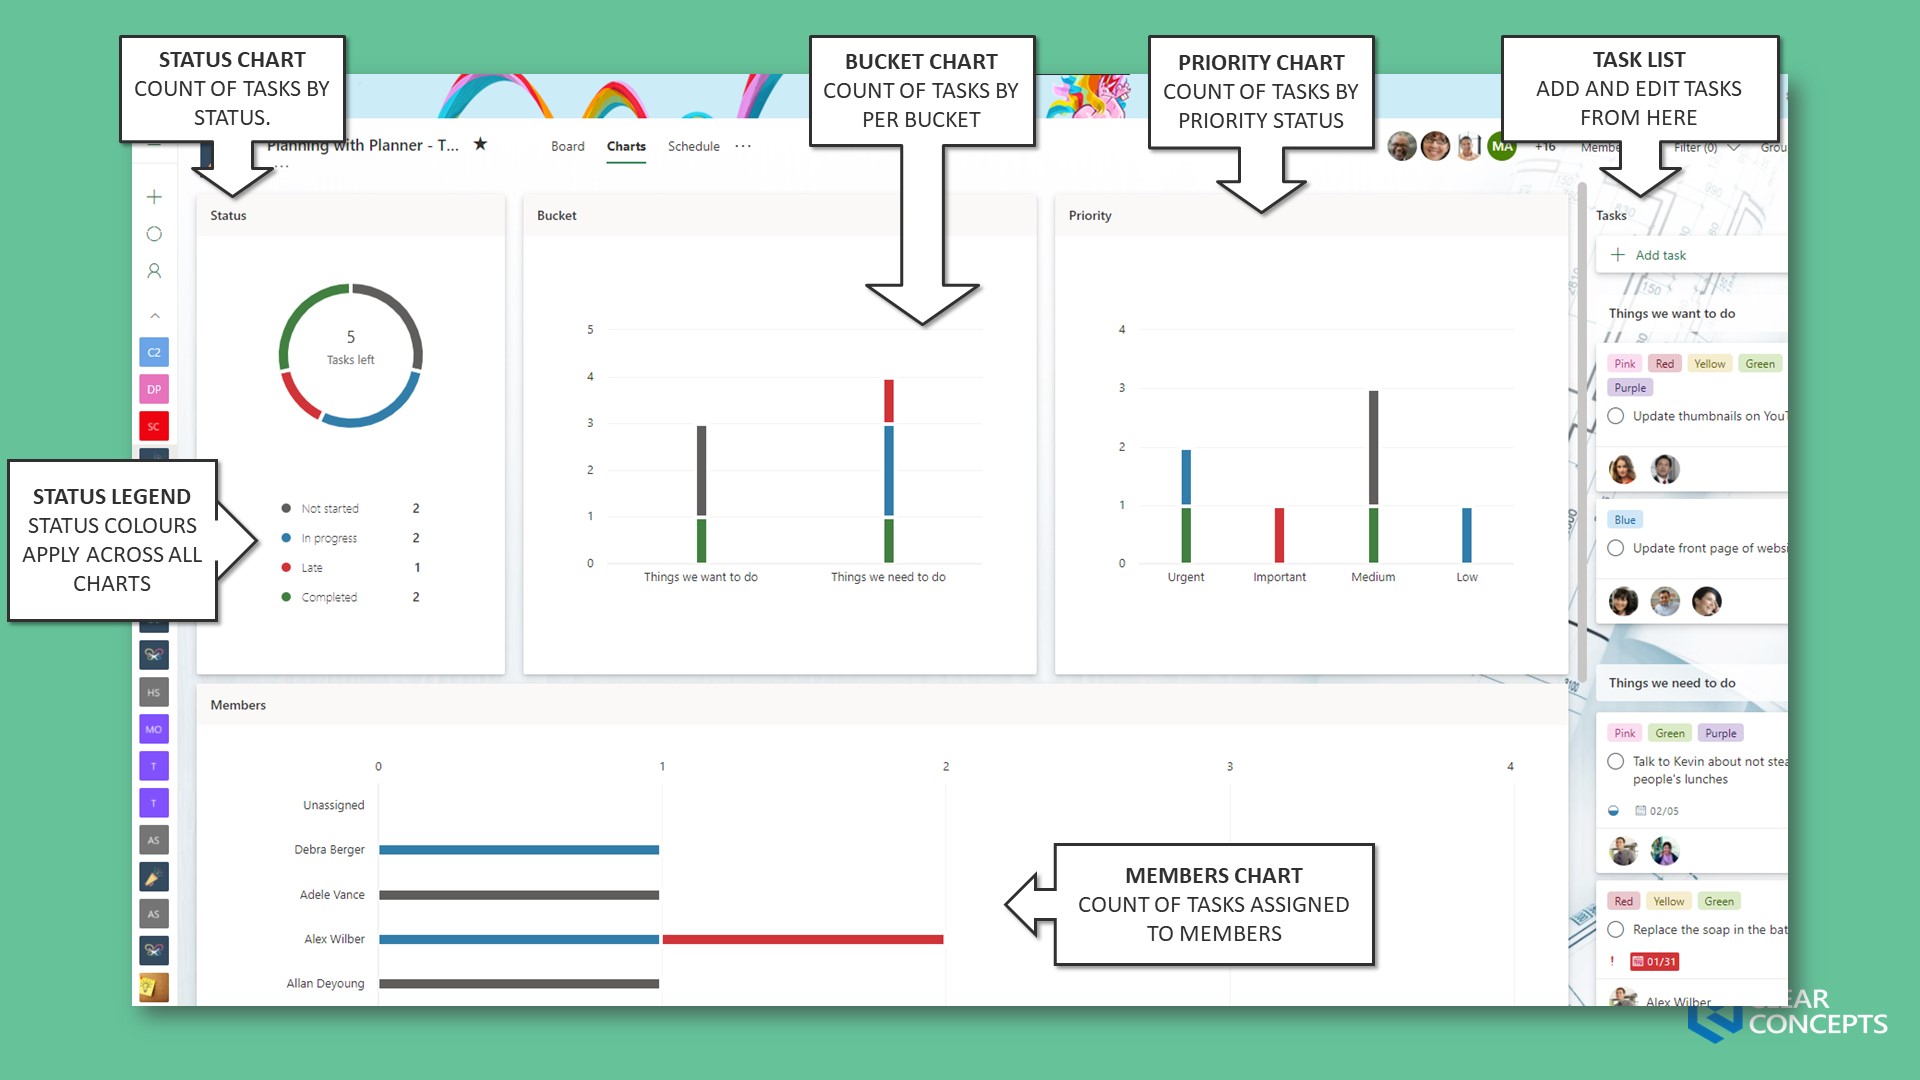
Charts is one of my favorite features in Planner. They provide quick insight into how tasks are progressing, and whether changes need to be made.
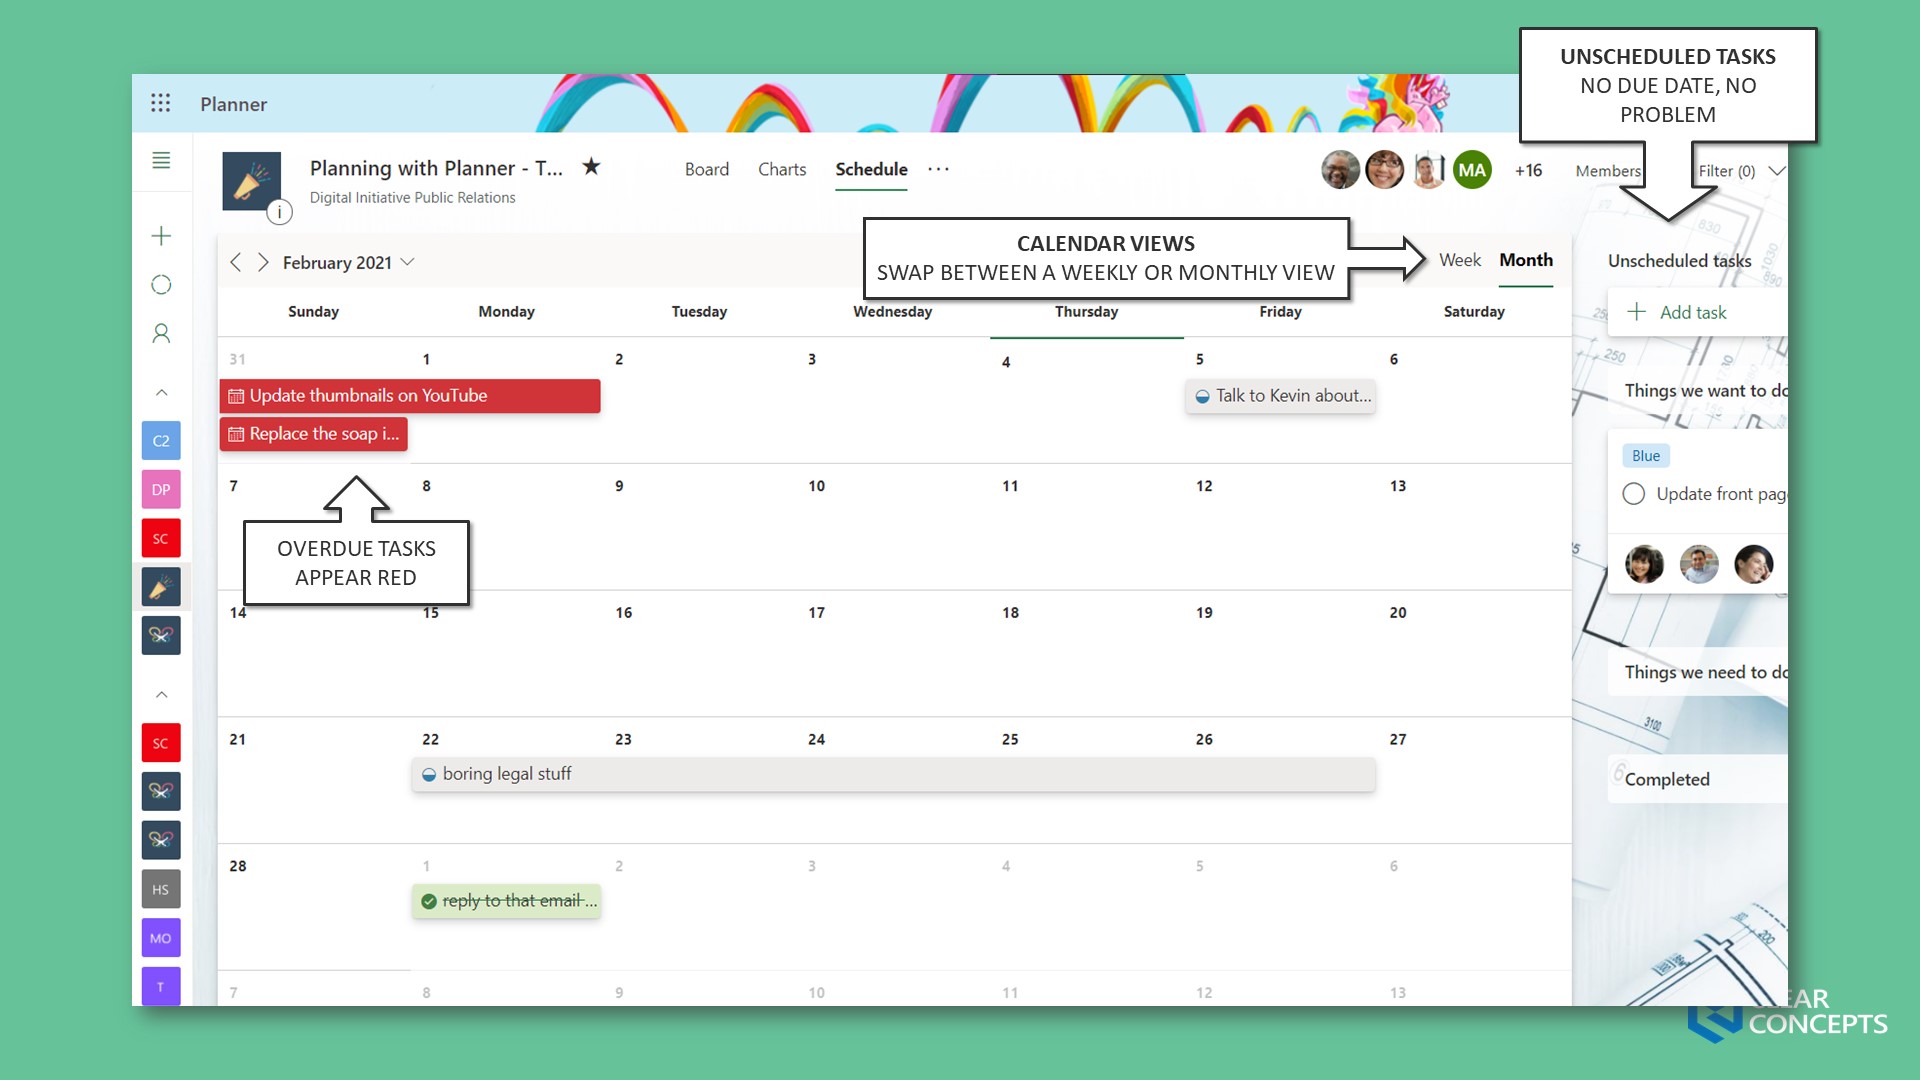
While not quite a GANTT chart (which is reserved for MS Project subscribers), Planner does provide a built-in weekly and monthly calendar view.
There is also the ability to sync your Planner board to Outlook. Keep reading to find out a bit more.
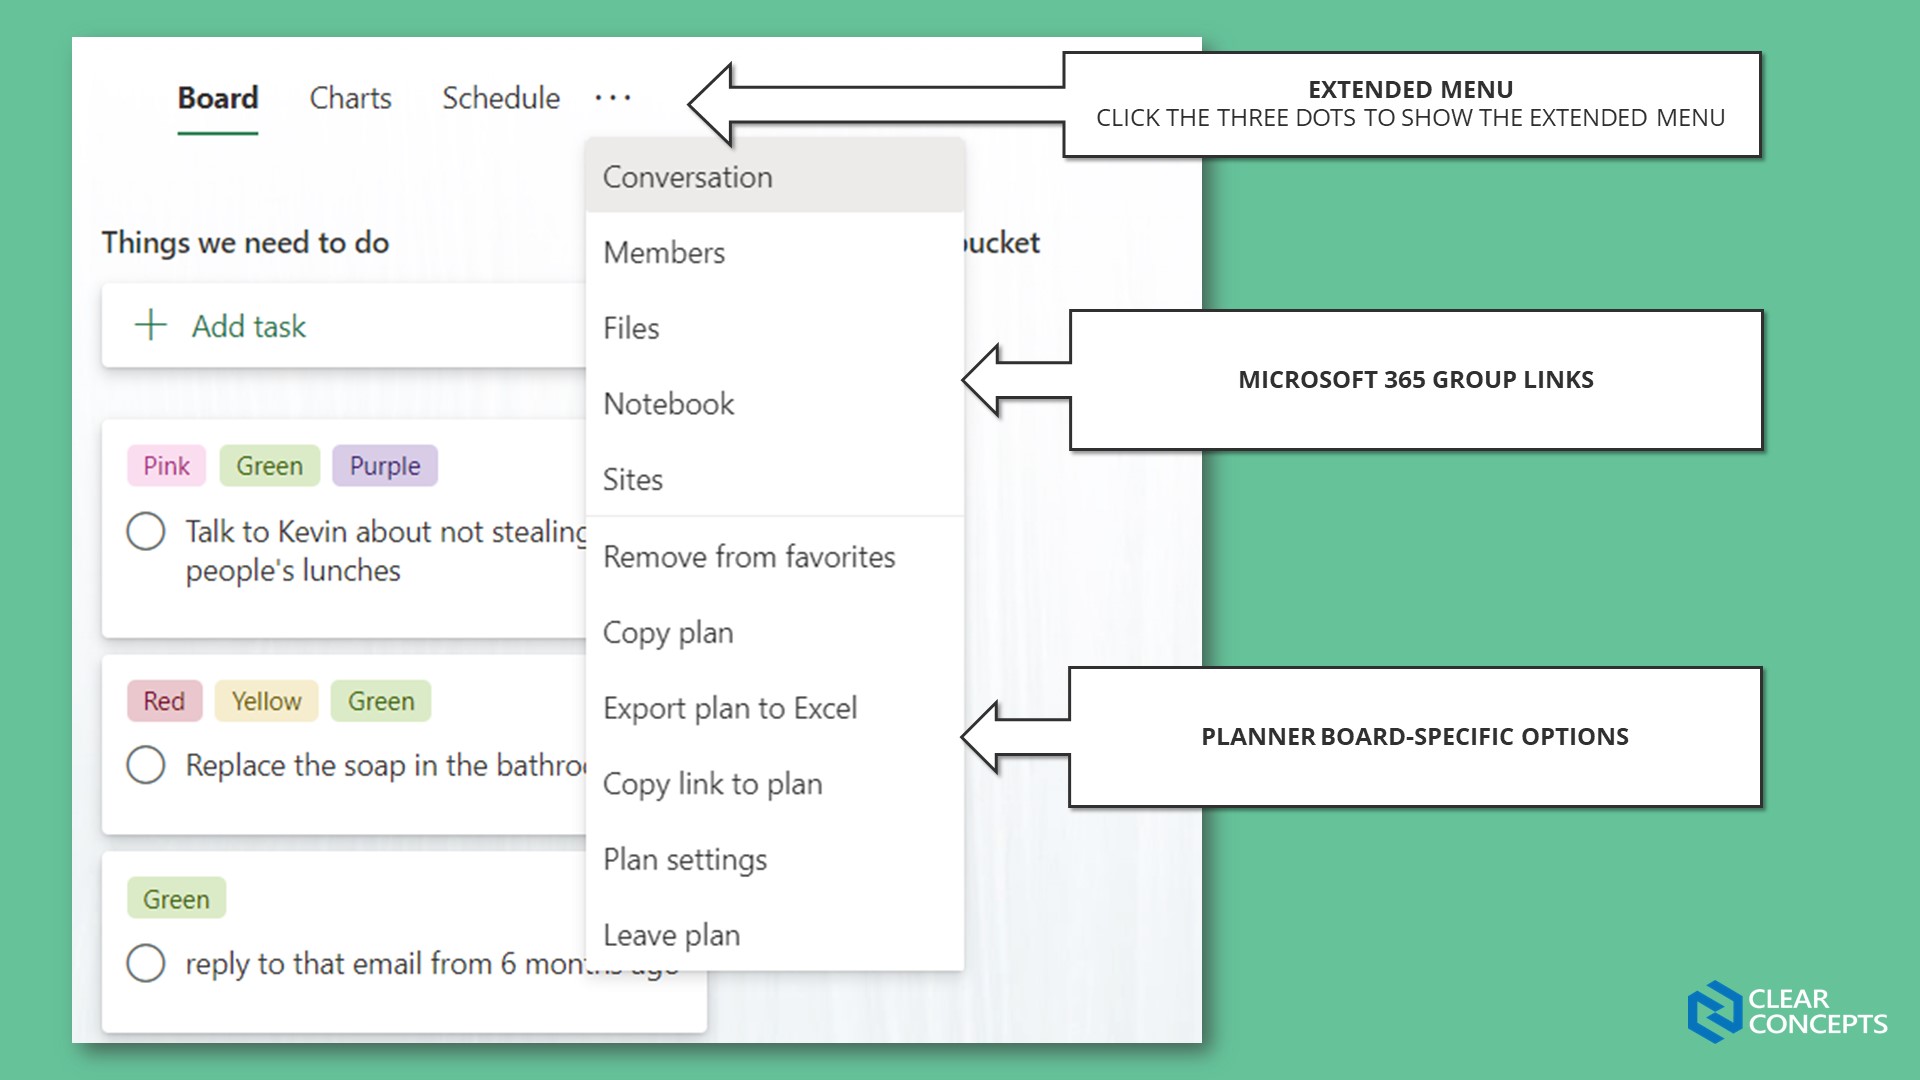
The extended menu has links to your Microsoft 365 Group workspaces (except Teams apparently), as well as plan-specific options.
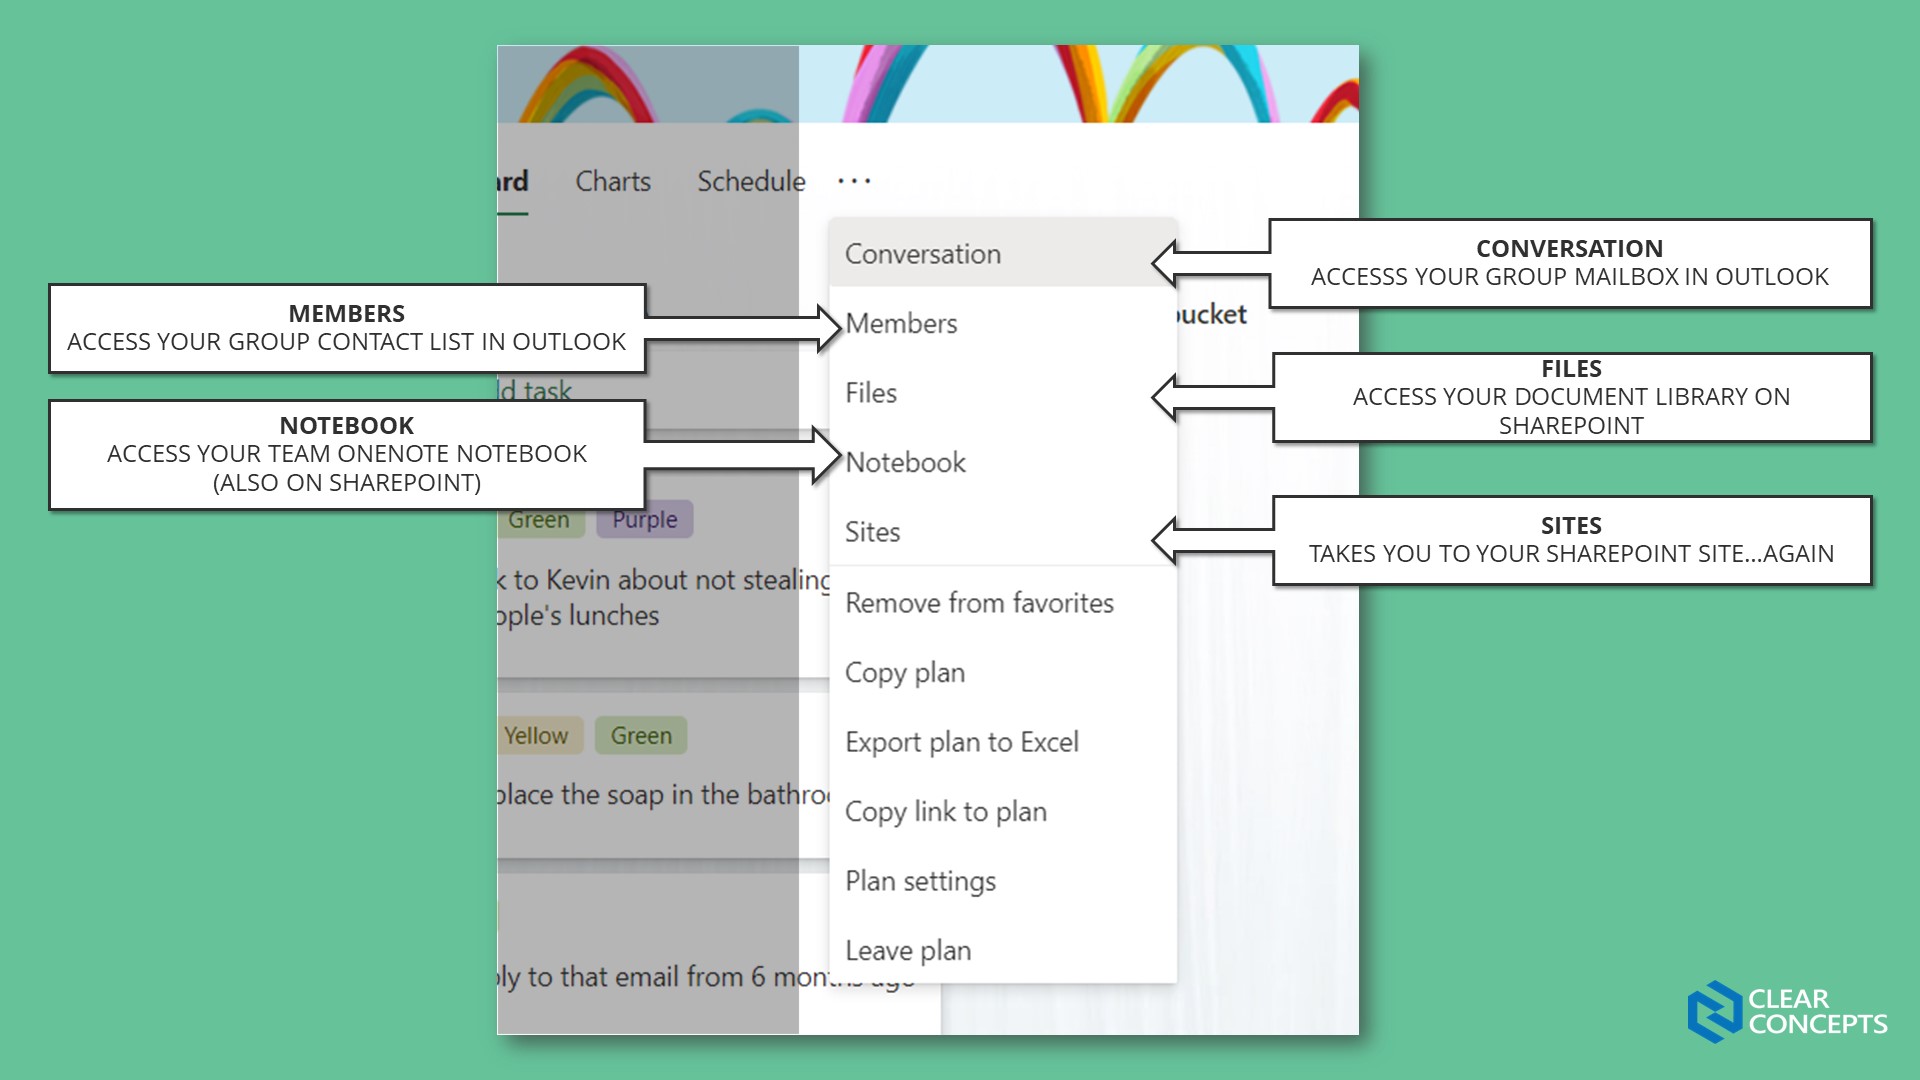
Planner is one of the first few applications that is fully built on Microsoft 365 Groups. Whether or not you agree with it, you cannot use Planner outside of a group.
The first five links in the extended menu take you to either Outlook, OneNote, SharePoint and in the rare situation – Yammer.
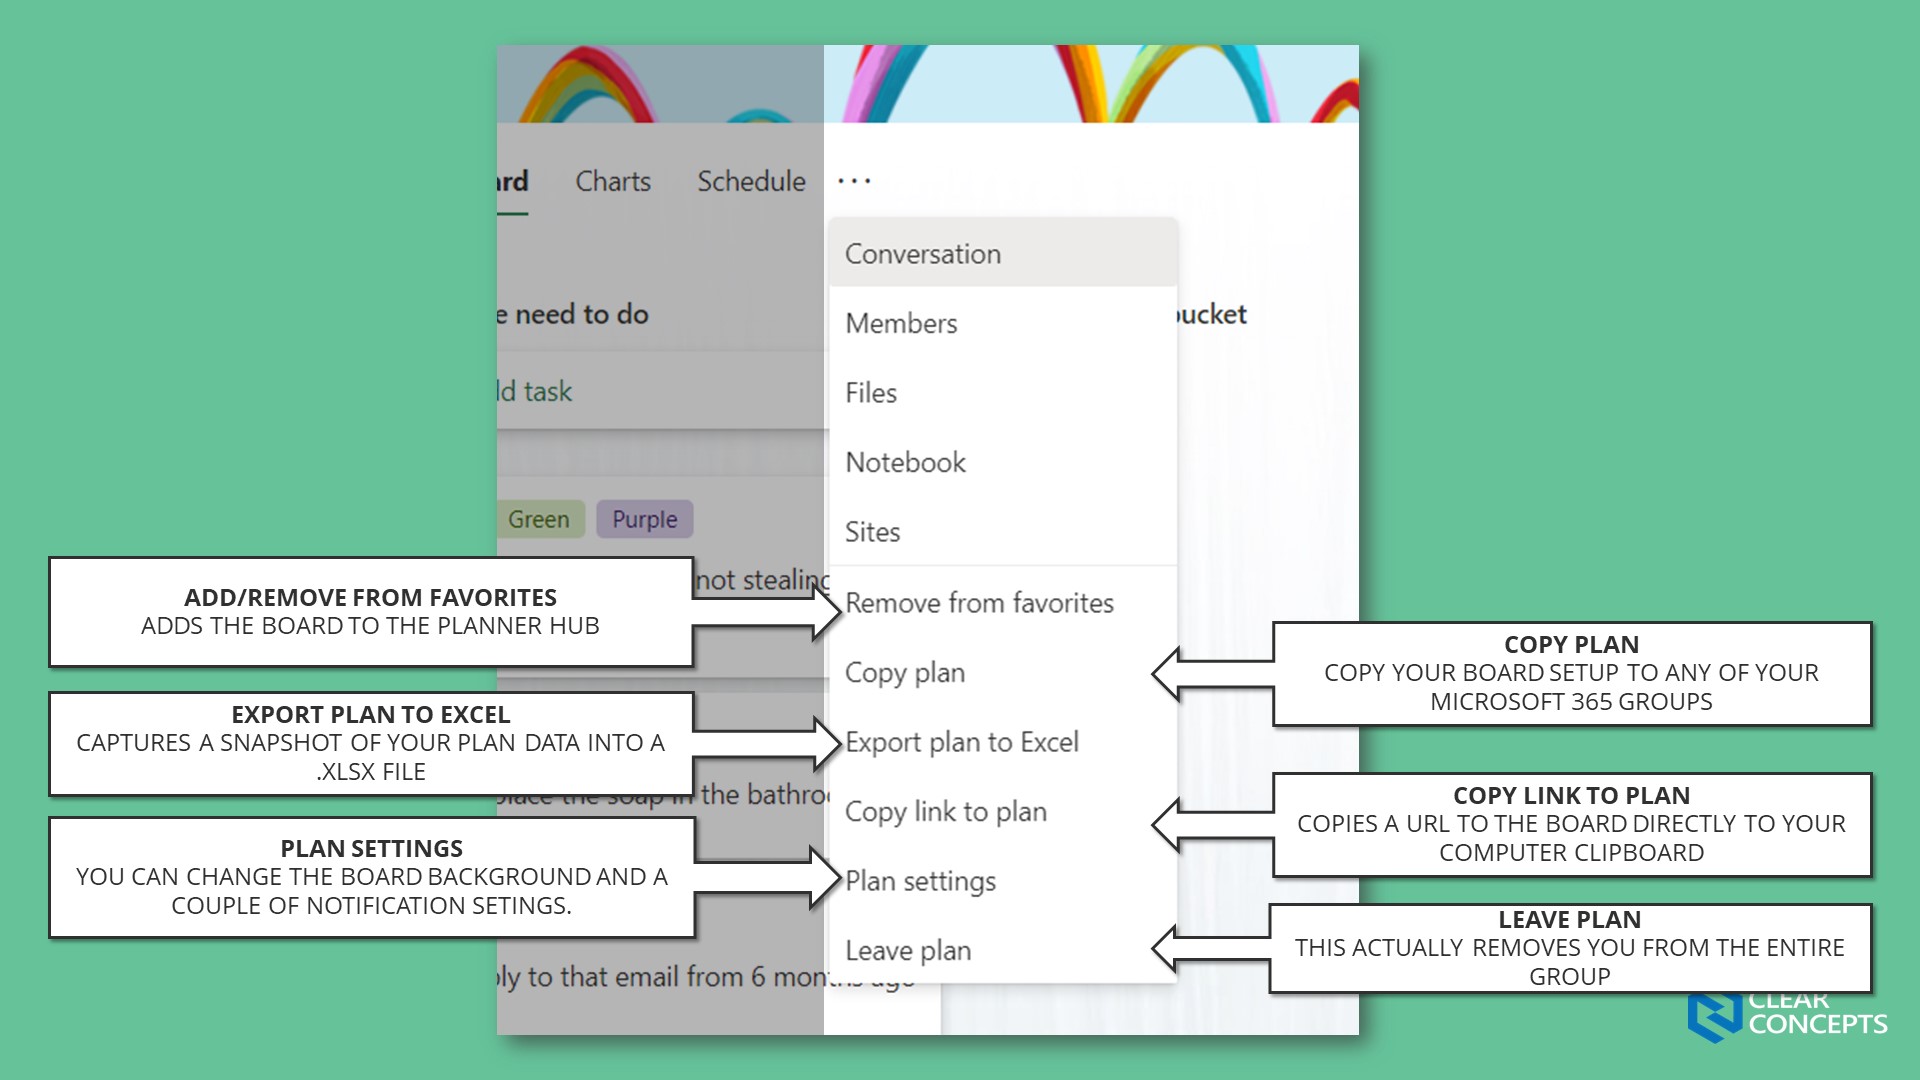
The plan-specific features can be helpful. For example, you can leverage the copy plan feature to create template planner boards for reoccurring projects and events.
Exporting a plan to Excel can be handy if you need a quick snapshot of your plan for archival purposes.
The “Leave Plan” button is a bit misleading because will remove you from the entire Microsoft 365 Group, not just the plan you're on.
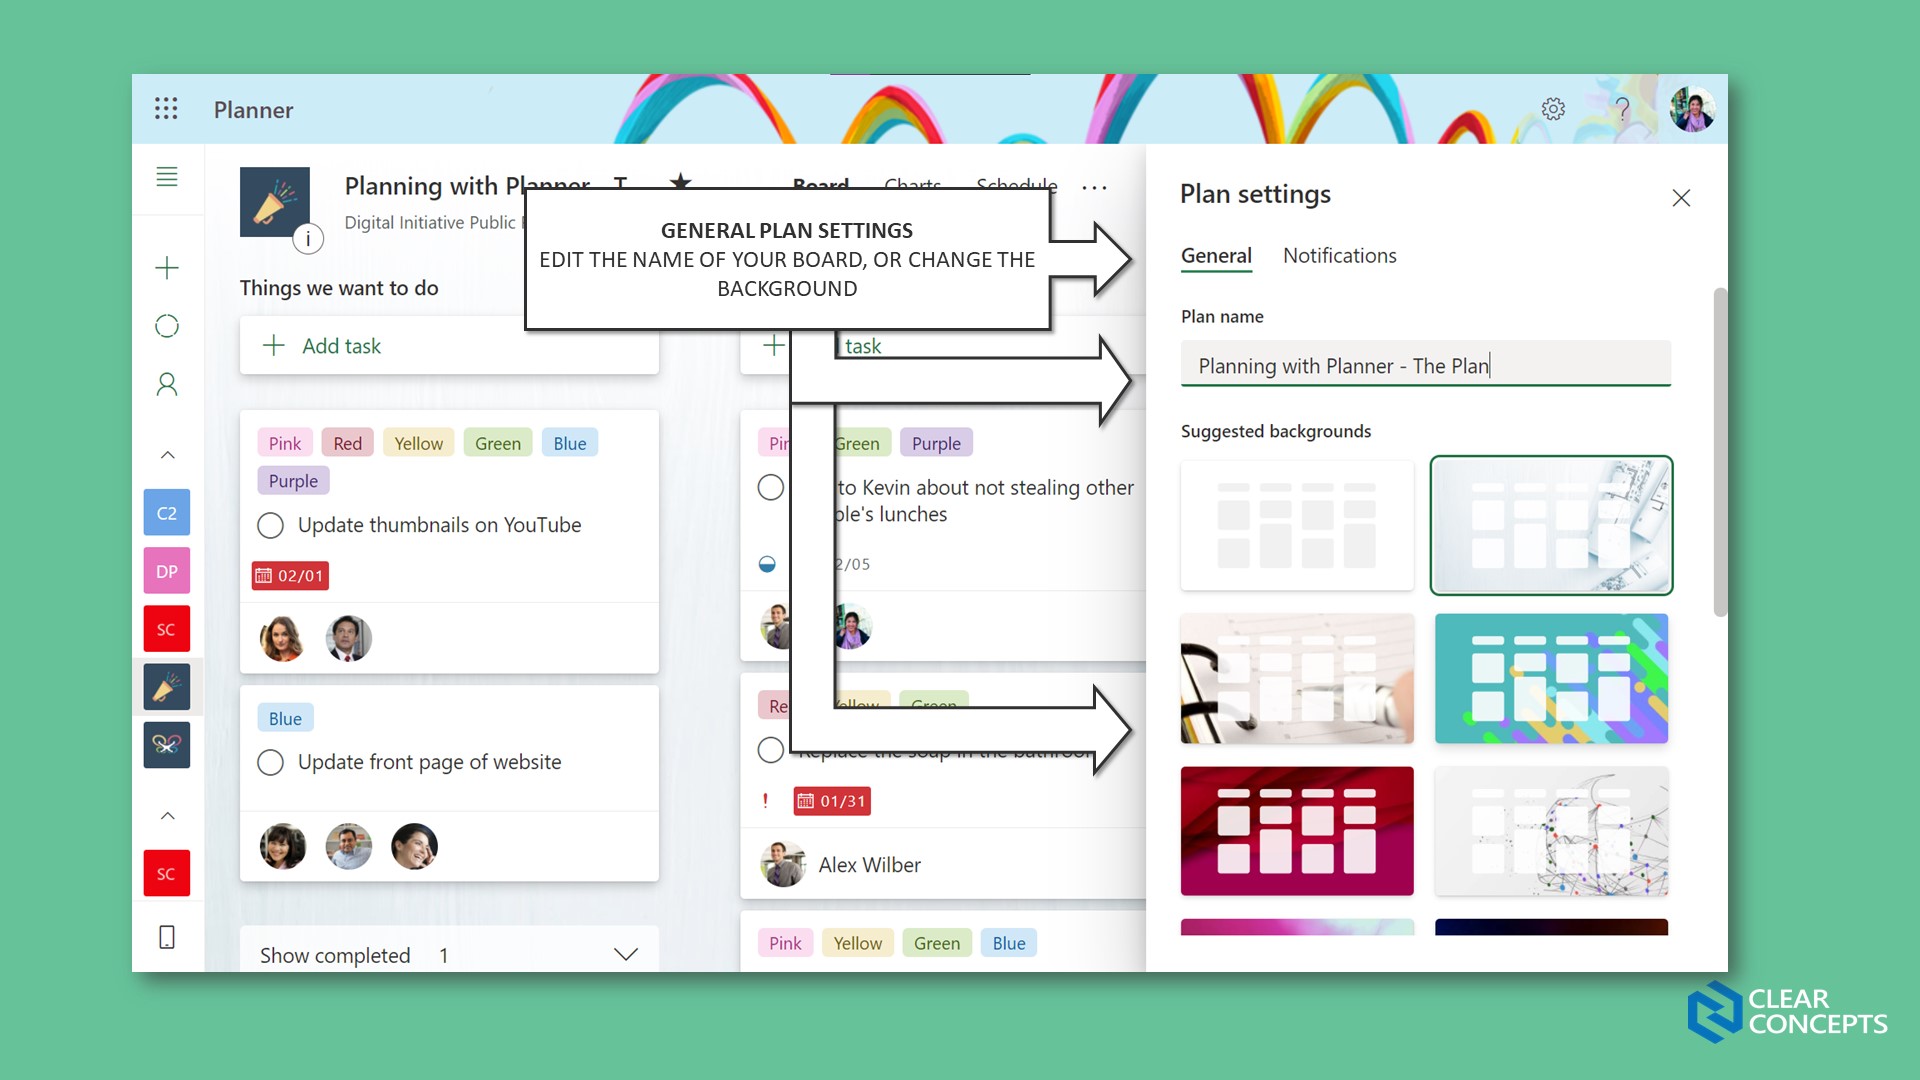
This has been updated recently to include board backgrounds. Other than backgrounds and being able to rename your board, there’s nothing else to see here.
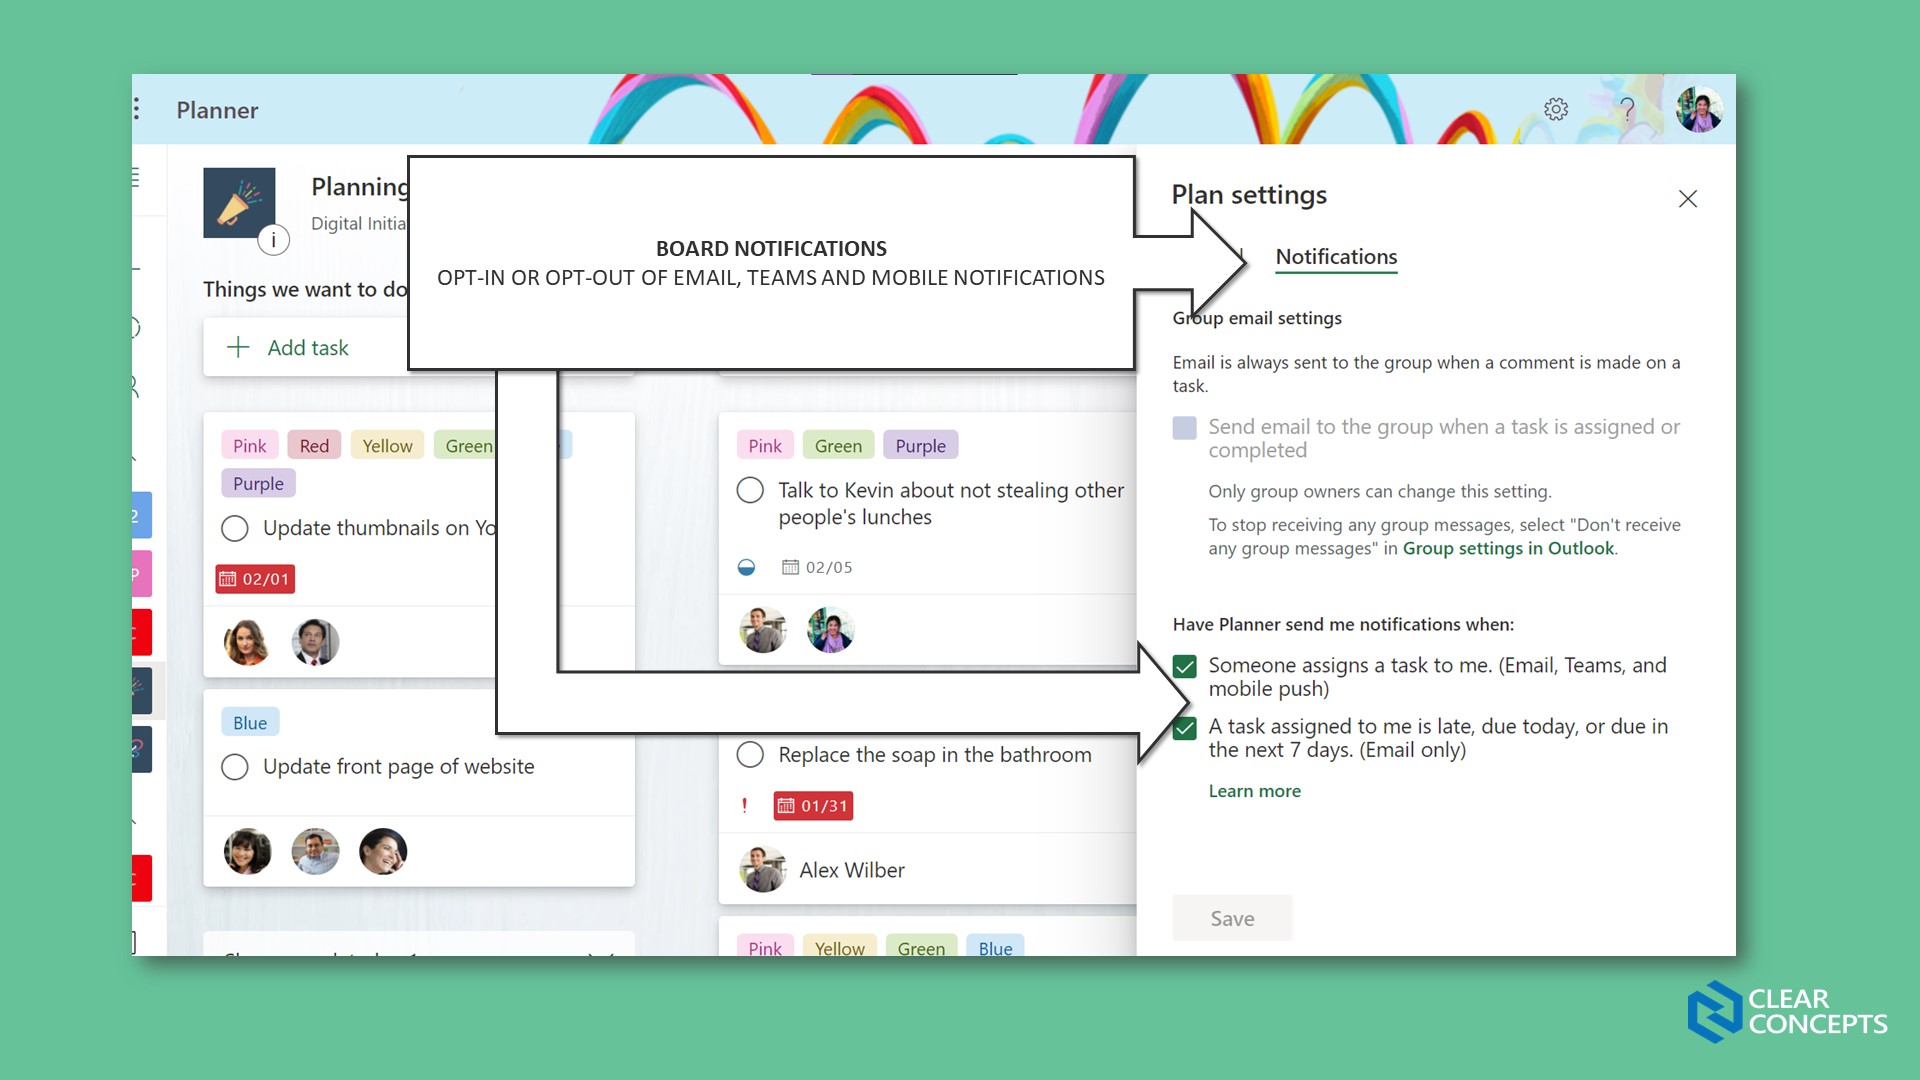
Notifications in Planner have always been lacking, in my own opinion. If you don’t count the Planner connector in Microsoft Teams or the Planner mobile app, you only get email notifications when (1) you’re assigned a task, and (2) assigned tasks are coming up due.
You can get emails sent to your Microsoft 365 Group mailbox too, but personally – I've never found them useful.
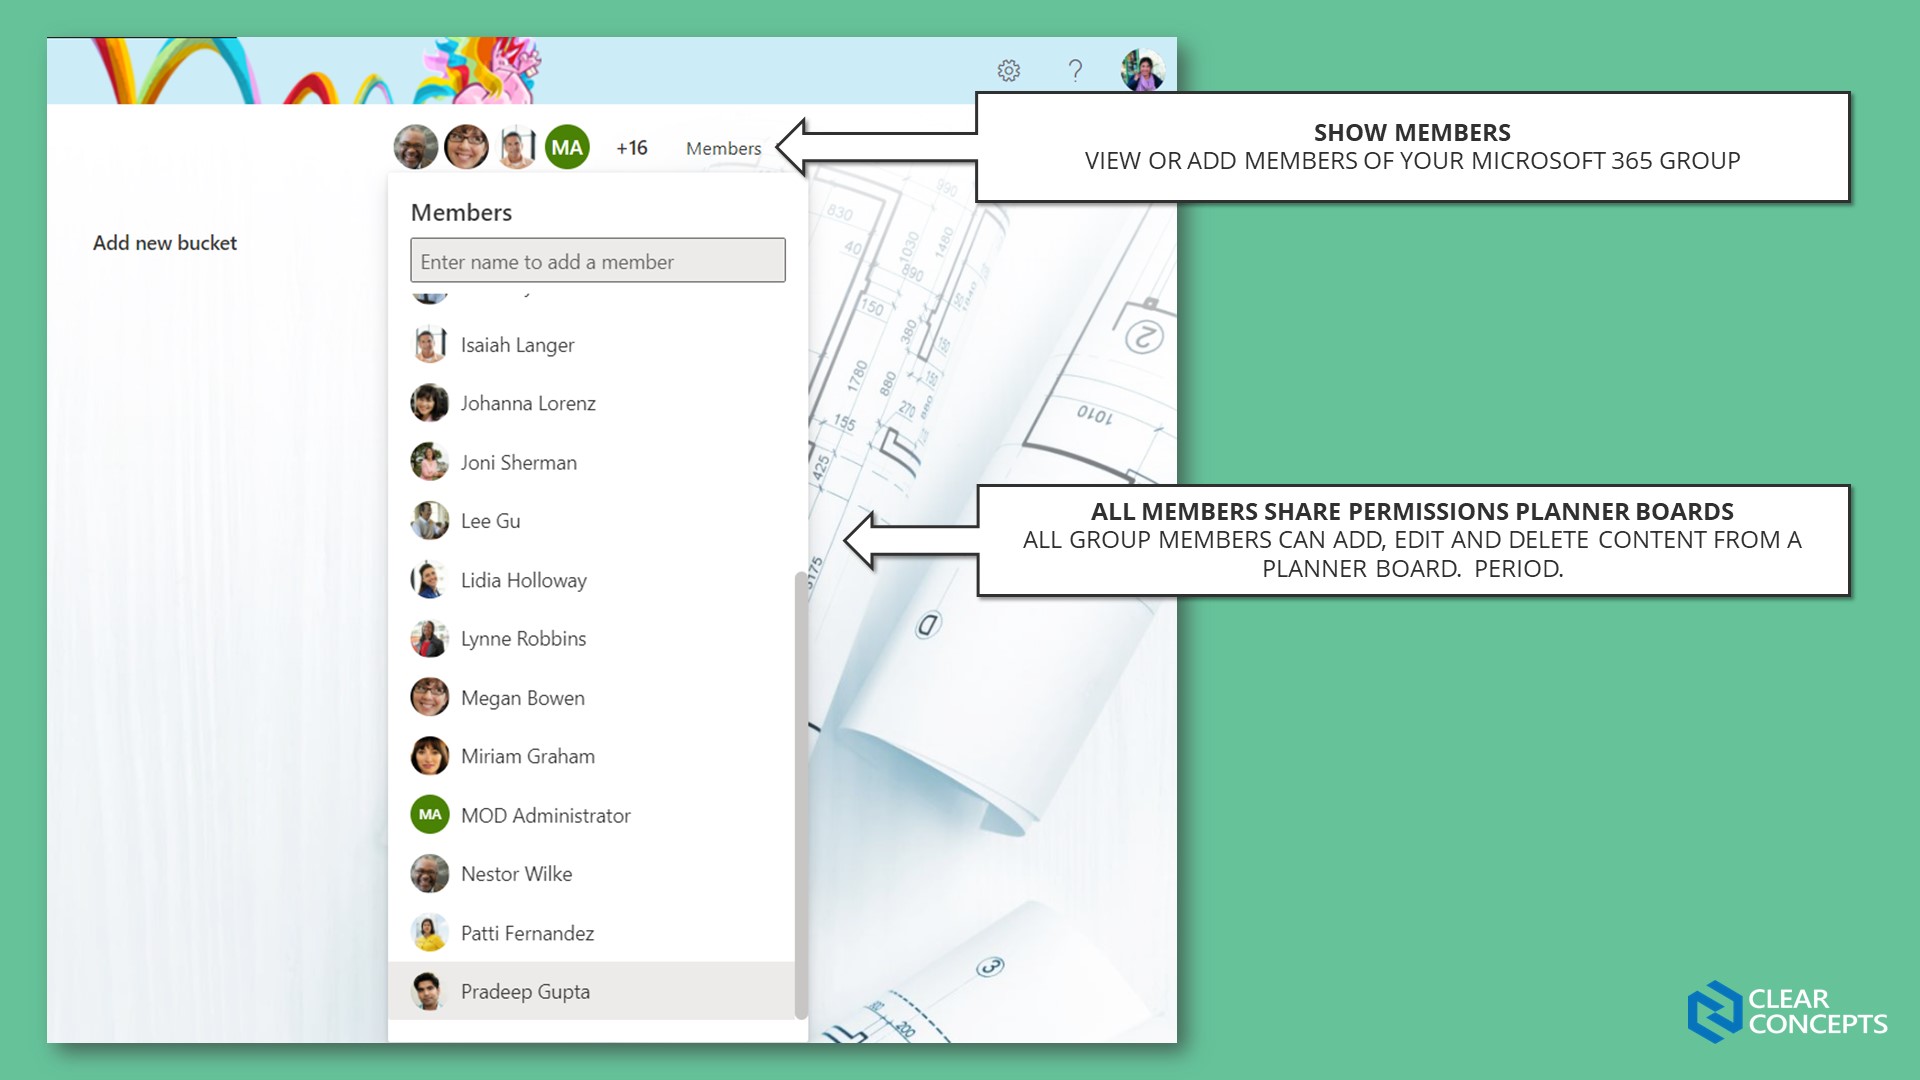
This is a view of everyone in your Microsoft 365 Group. All your group members have equal permissions for any boards created within the group.
This means that everyone can add, edit and delete board content. Unfortunately, there’s no way to restrict user permissions at the time of writing this.
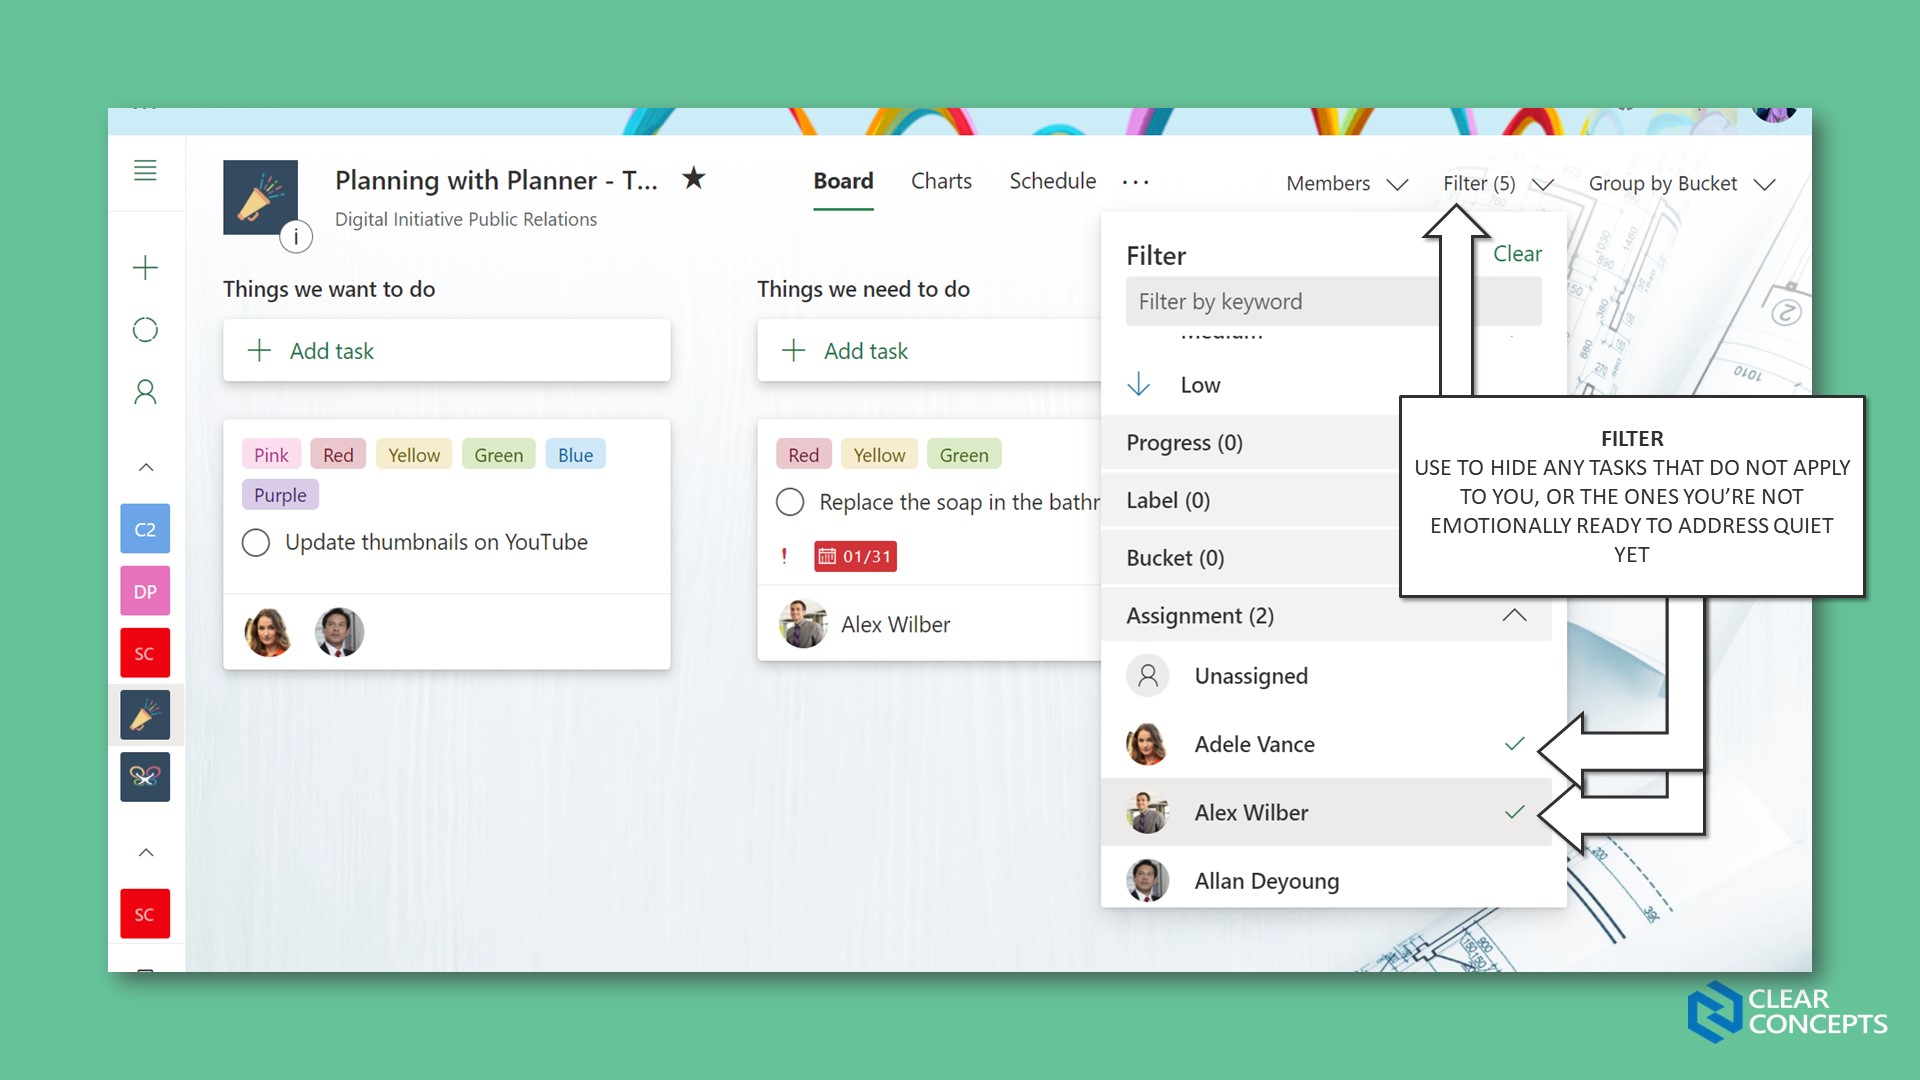
You can filter against almost everything in your Planner board. Using the filter will hide any tasks you don’t want to see.
What’s important to note here is that the filters will remain applied as you switch between your board, charts and schedule views.
Just don’t forget to hit the “clear” button when you’re done.
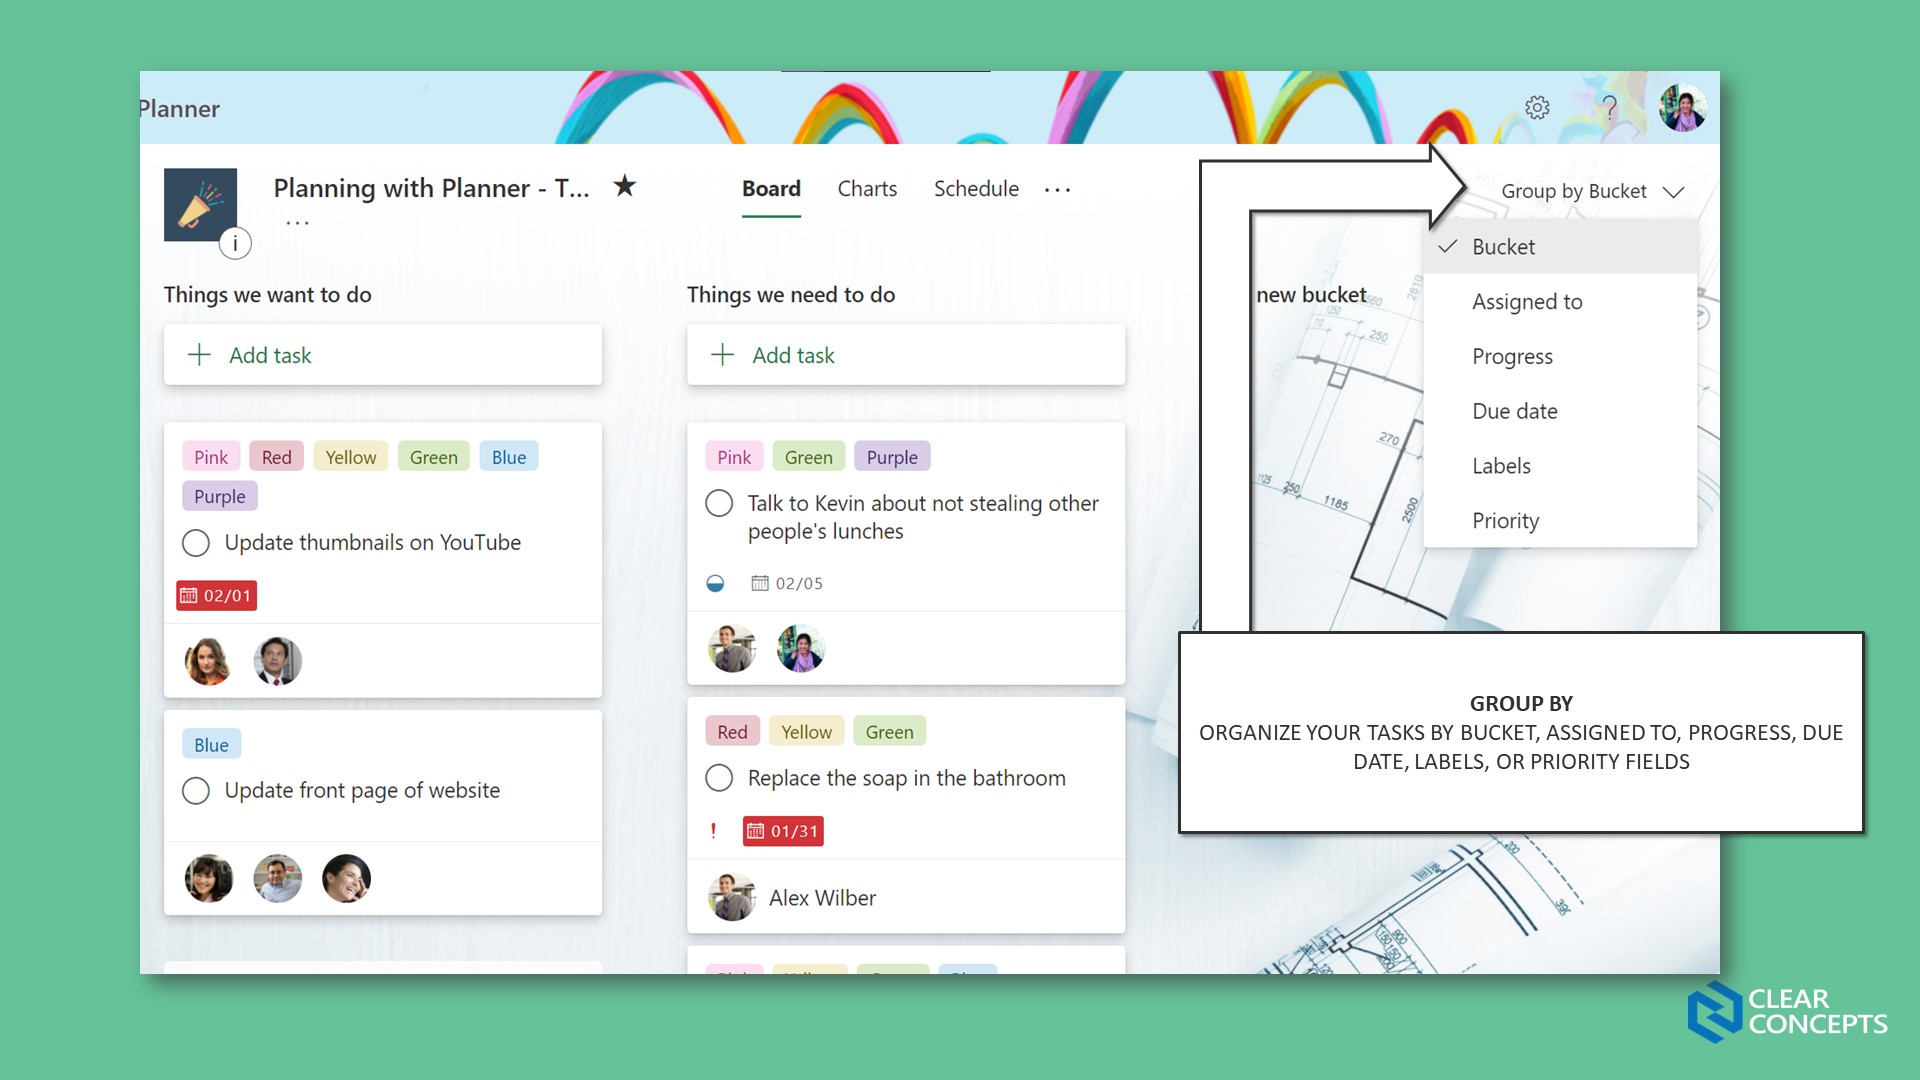
Use the Group by feature quickly reorganize your tasks by assignment, progress, due date, labels and priority. By leveraging this feature, it may change how you approach naming your buckets.
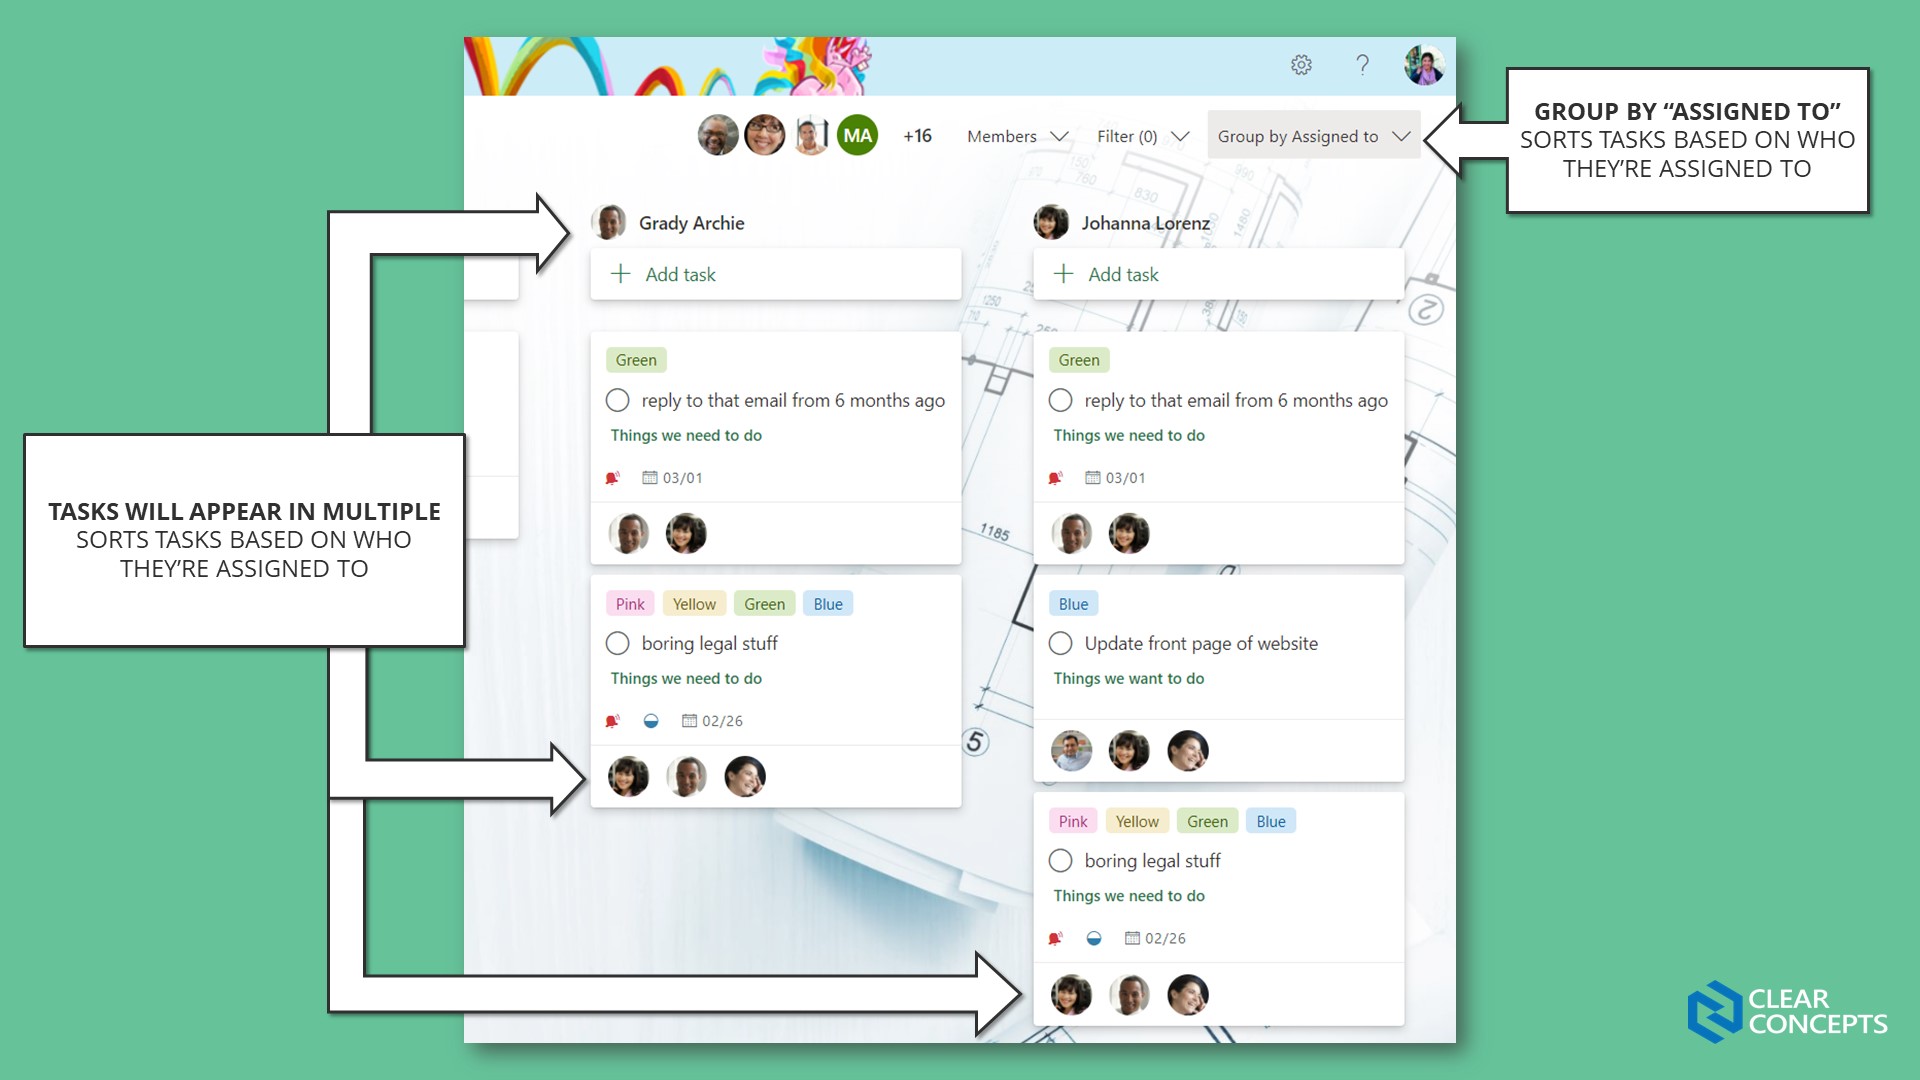
No need to create buckets for individuals board members when Planner does it for you.
Clicking and dragging tasks between "assigned to” lists will add/remove members from those tasks. Careful with this because your members will likely get emailed every time to assign something to them.
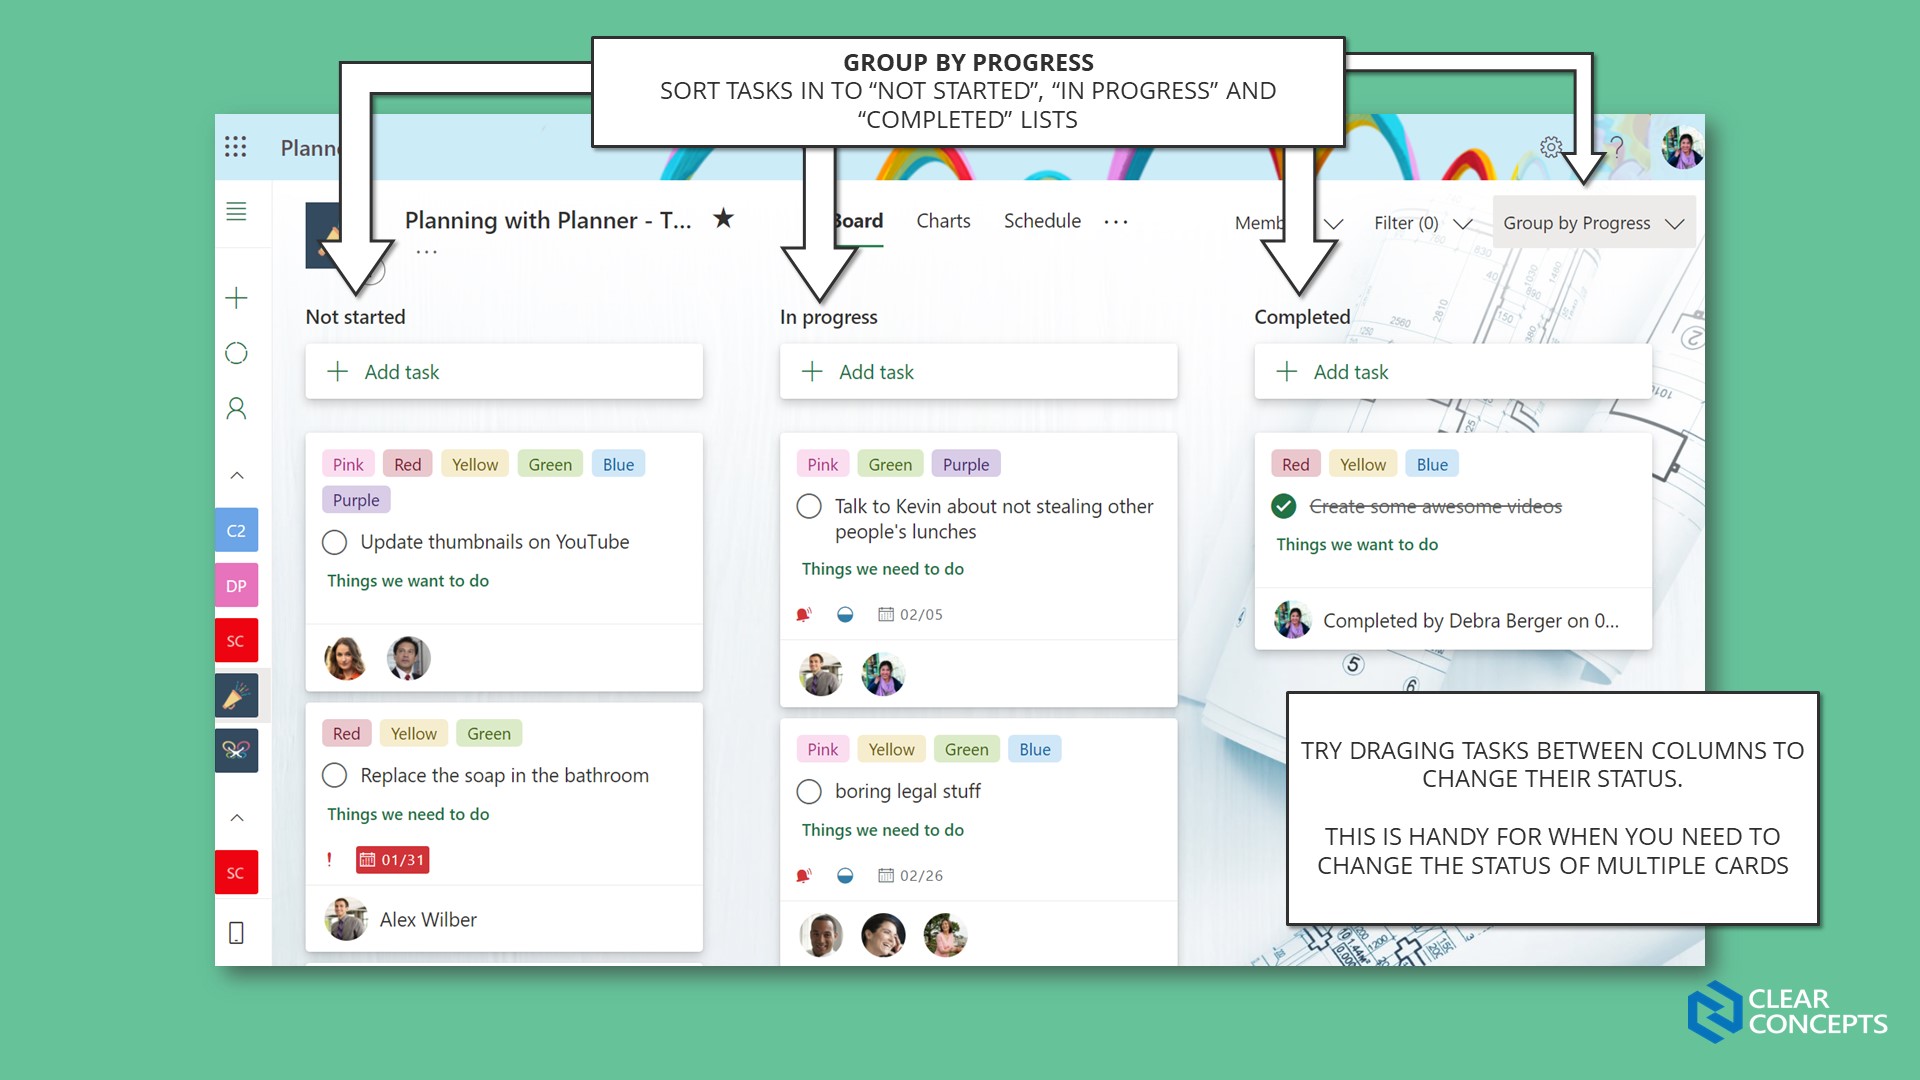
It’s hard to resist the habit of creating “To Do”, “Working On” and “Complete” buckets out of the gate but remember that Planner technically does this for you with the “Progress” field.
Dragging tasks between “progress” lists is a fast way to update multiple card status in a short period of time.
The “Late”, “Tomorrow”, “Future” and “No Date” fields cannot be modified, but are relatively easy to understand.
Dragging tasks to the “Late” field will make it one day past due. Dragging tasks to the “Future” list pushed it out ten days from the current date in my own tests.
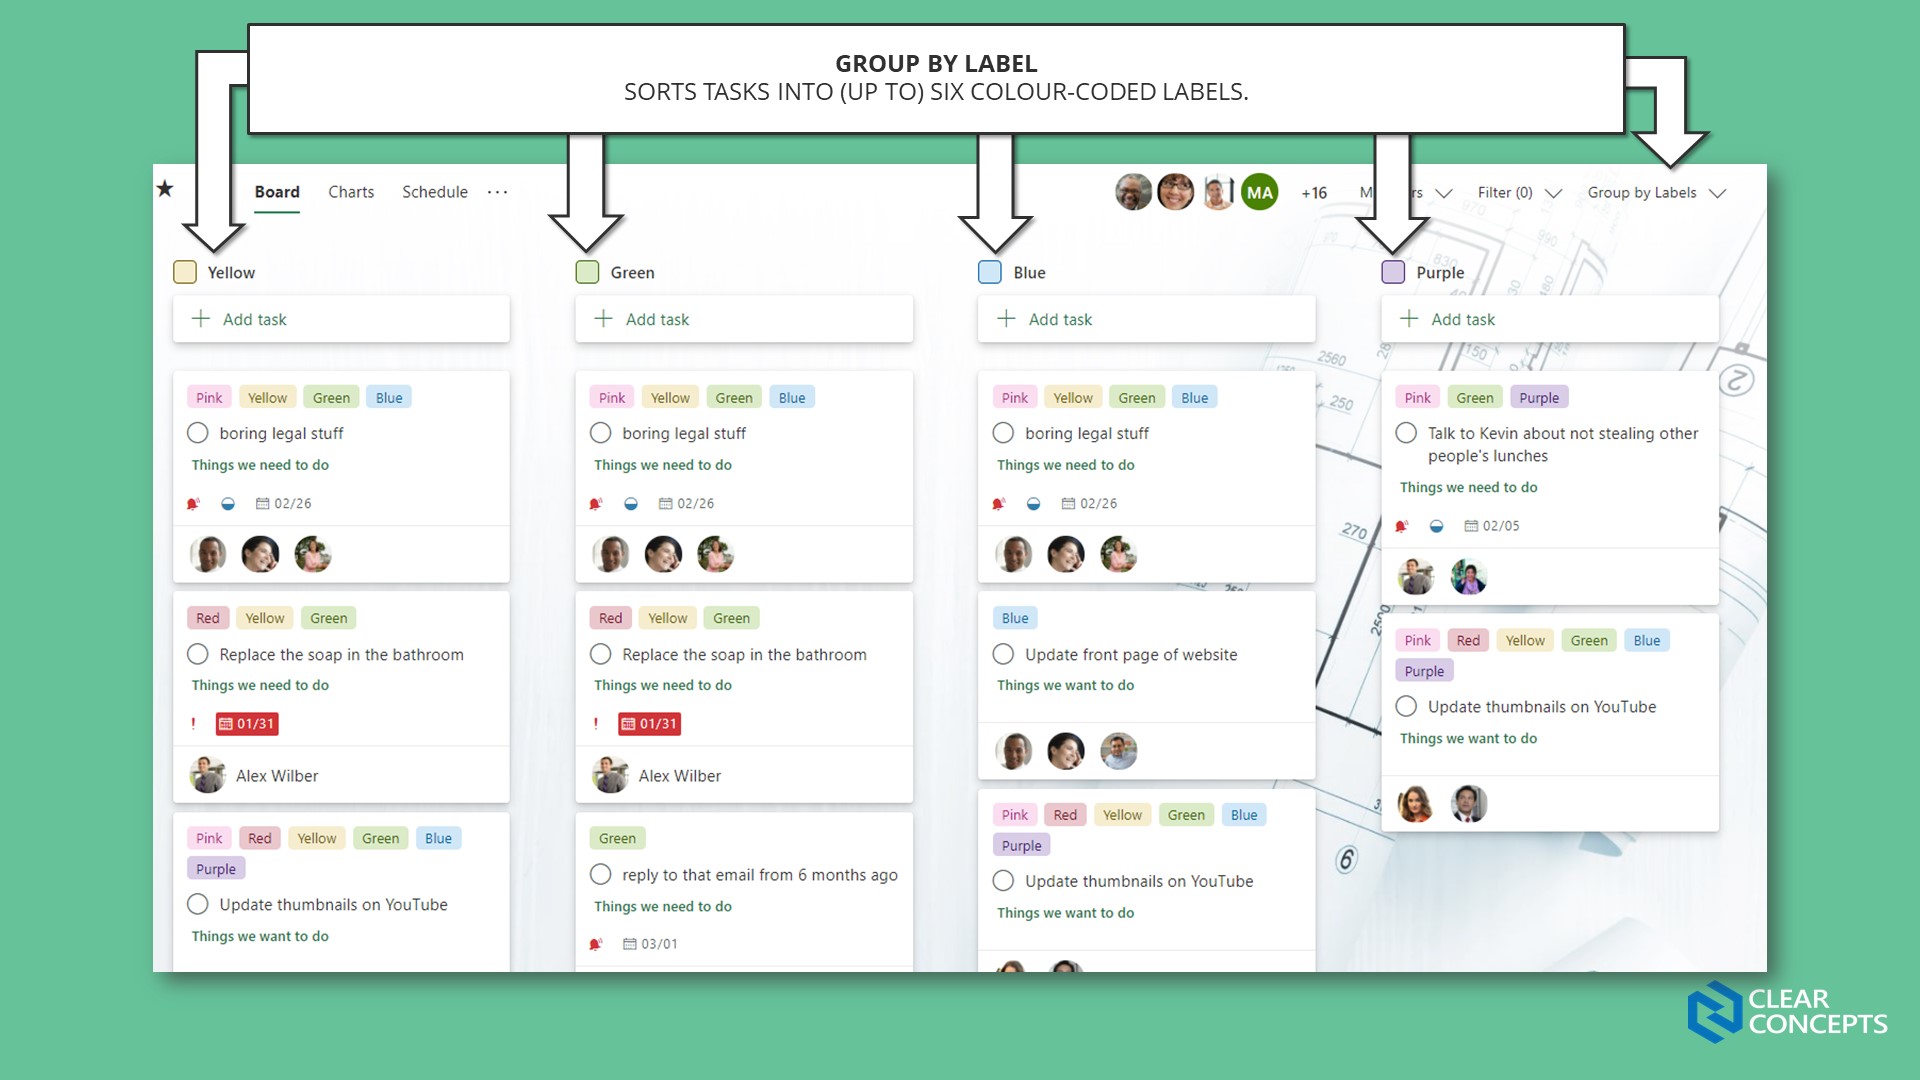
To be honest, I’ve rarely found labels to be helpful in my use-cases. However, at the end of the day they’re here to help you organize your tasks a little better so I’m happy they’re there.
Dragging a card from one list to another in this view will add and/or remove a label from your tasks, so be careful.
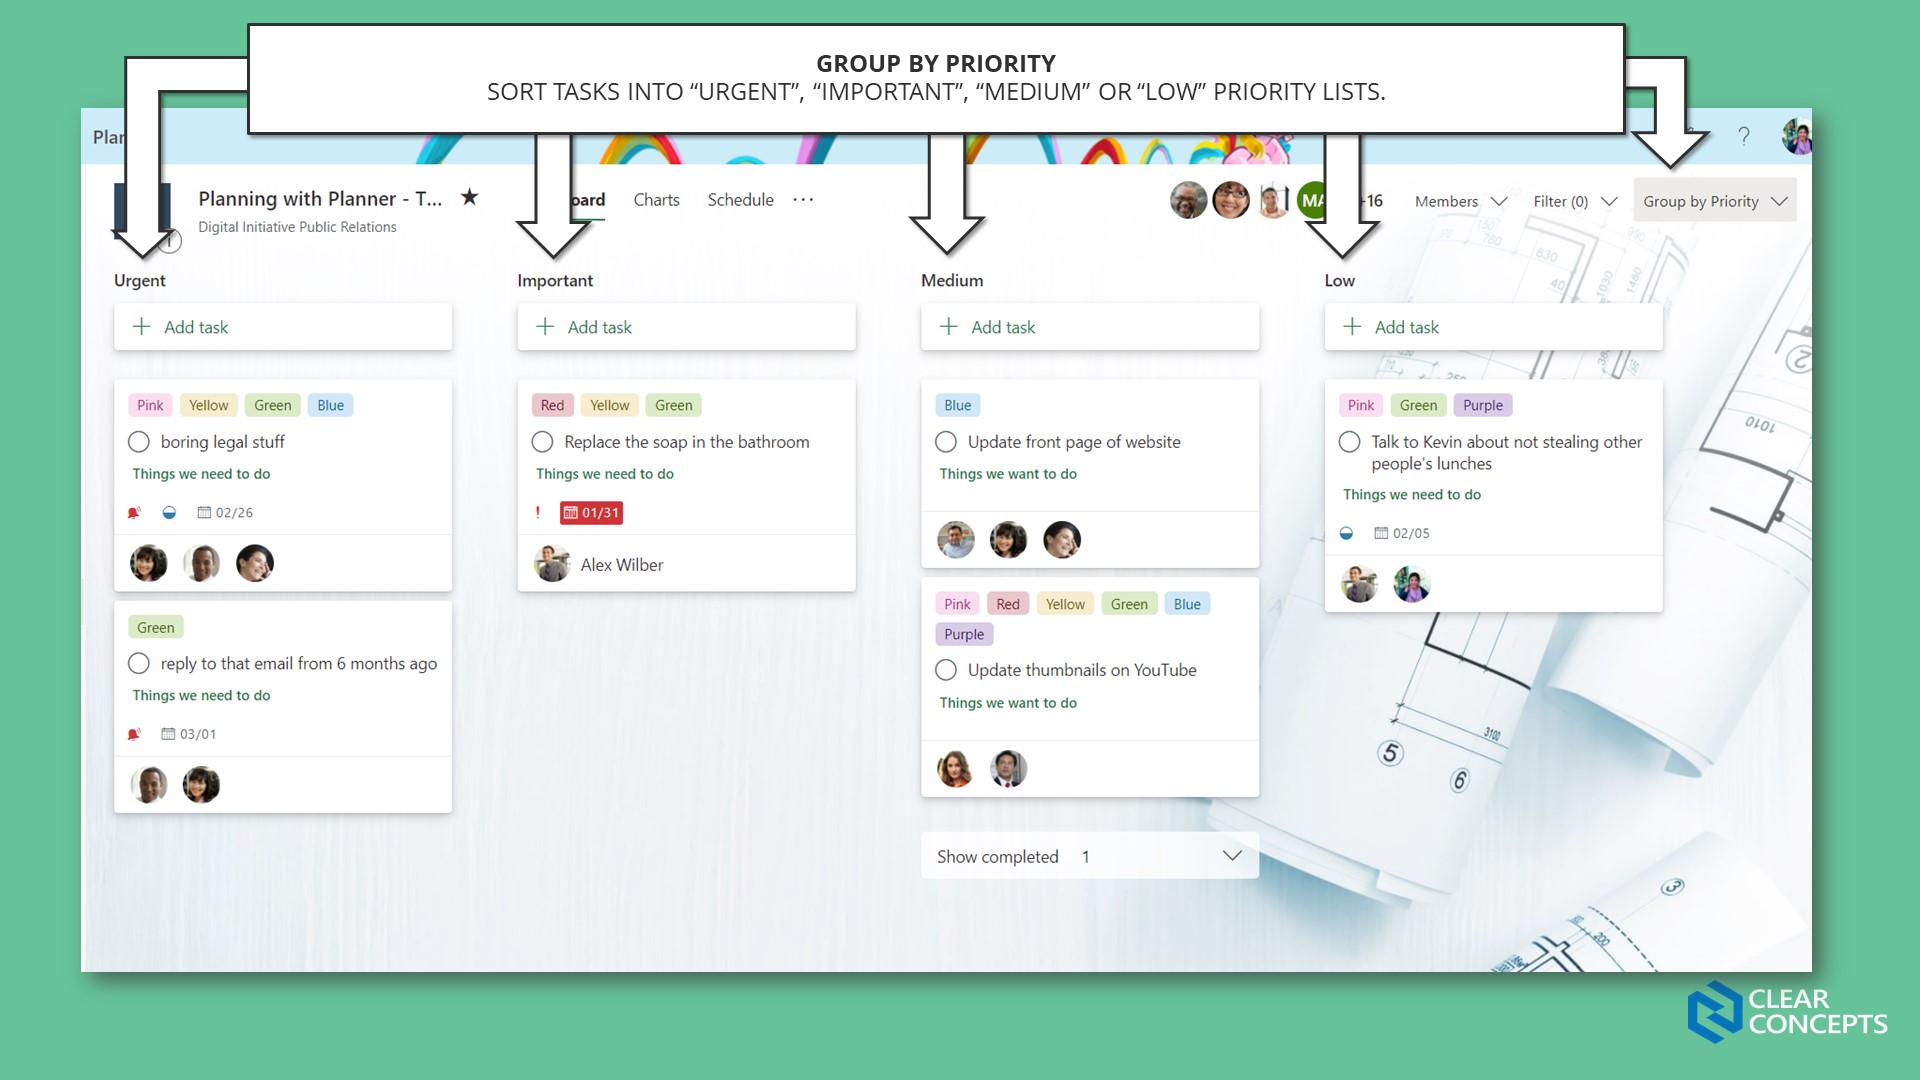
Lastly, grouping by priority should be helpful when staff need to figure out what tasks to work on immediately. As you’ve probably guessed by now, dragging tasks between these lists will change the priority level.
What about “Tasks” app in Microsoft Teams?
I’ll cover how Planner looks and works in Microsoft Teams a future post, mainly because that User interface is slightly different from the Planner web app.
Have comments or suggestions for future User Interface maps you’d like to see? Let us know!
